Introduction
Have you ever thought about how you can reduce the workload of your employees and still achieve a high level of customer satisfaction?
Self services are the answer! These can help you automate processes and enable customer service even out of normal hours.
As an example, we show you how to build a self service application for recording electricity meter readings.
Neccesary prompts
First of all, the necessary prompts are created.
The following table shows the prompts required.
| Prompt | Contents |
|---|---|
| Welcome | Welcome to your energy provider! This automatic service allows you to provide us with your current meter reading. |
| Input Meter Number | Please enter your meter number |
| Input Meter Number Error | We couldn't find your meter number. Please wait one moment, we will connect you to the next available agent. |
| Current Meter Reading | Please enter your current meter reading in single digits. |
| Repeat Current Meter Reading | The current meter reading is |
| Confirm Meter Reading Menu | If the meter reading is correct please press 1, otherwise press 9 to enter the reading again. |
| Thank You Goodbye | We have recorded your current meter reading. Thank you for using our service and goodbye. |
TTS
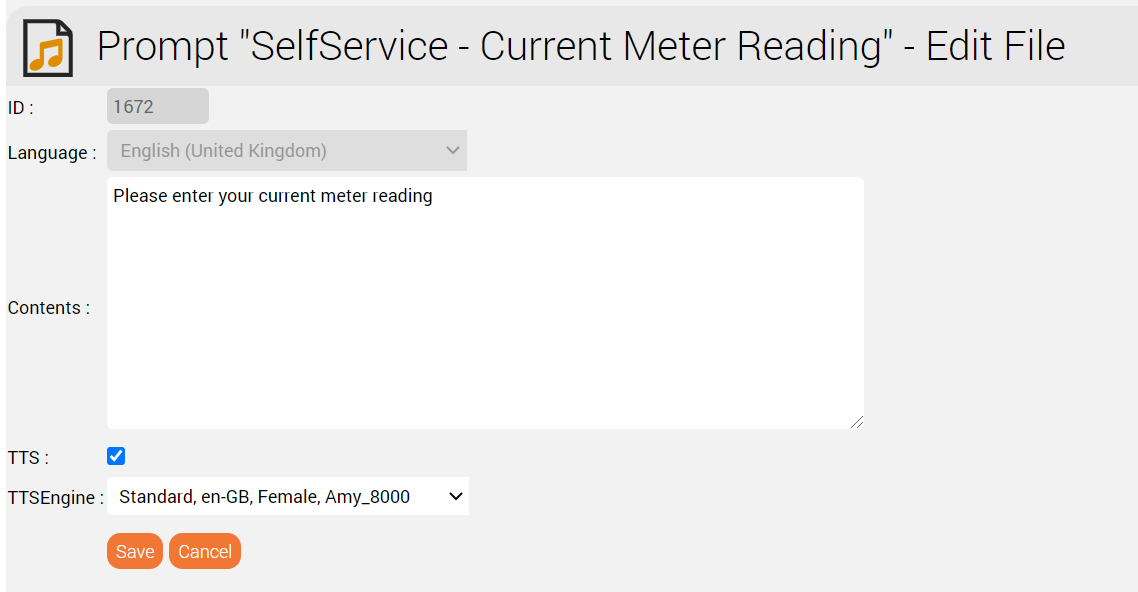
You can create the prompts quickly and easily using a TTS engine if you have subscribed to our TTS service. This is shown in the screenshot below.
List - Checking Meter Numbers and Recording Results
A list is used to check the meter numbers and store the results.
The list is pre-loaded with all existing meter numbers. This can, for example, be manually loaded into the system, or imported using an FTP job.
The results in the list list could be automatically processed by exporting the list to an FTP server.
The fields in the list are as follows:
| Field | Meaning | Comments |
|---|---|---|
| Field 1 | Meter Number | This is the only field which contains data when the meter numbers are loaded into the system. |
| Field 2 | Meter Reading | This field only contains a value, if a meter reading has been made using the automated service. |
| Field 3 | Date of Meter Reading | This field only contains a value, if a meter reading has been made using the automated service. |
| Field 4 | Time of Meter Reading | This field only contains a value, if a meter reading has been made using the automated service. |
This is shown in the screenshot below.
Possible Call-Flow for the Self Service
The call flow for the self service might look like this:
An Explanation of the Important Objects Used
In this section we explain the key objects used in the call flow above and how it works.
Note - not all objects are explained - a basic familiarity with the jtel IVR is assumed.
Enter Meter Number / Enter Meter Reading
These use Input Digits DTMF objects to ask the customer to enter the meter number and the meter reading.
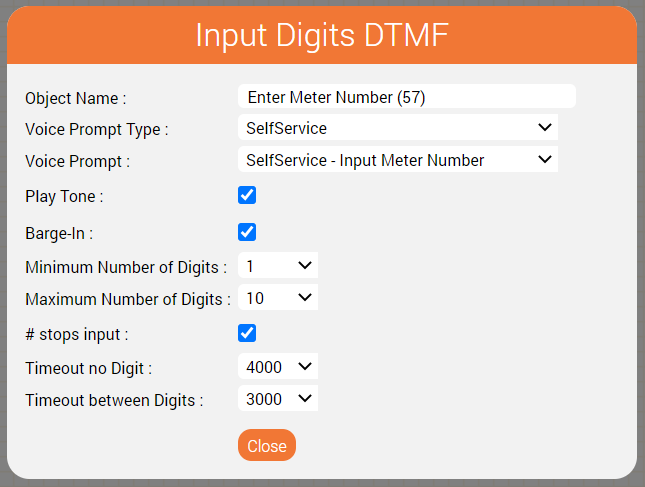
Here is the parameterisation for entering the meter number.
An audio beep is played after the prompt, to inform the caller that now is the time to start typing in the meter number (Play Tone). However, Barge-In is also selected so the announcement does not have to be listened to completely, but can be interrupted by starting to type in the meter number.
The minimum and maximum number of digits can be used for a plausibility check, for example, if the meter number may have a maximum of 10 digits then this can be specified as the upper limit.
Further details on this object can be found here: Input Digits DTMF
Check Meter Number
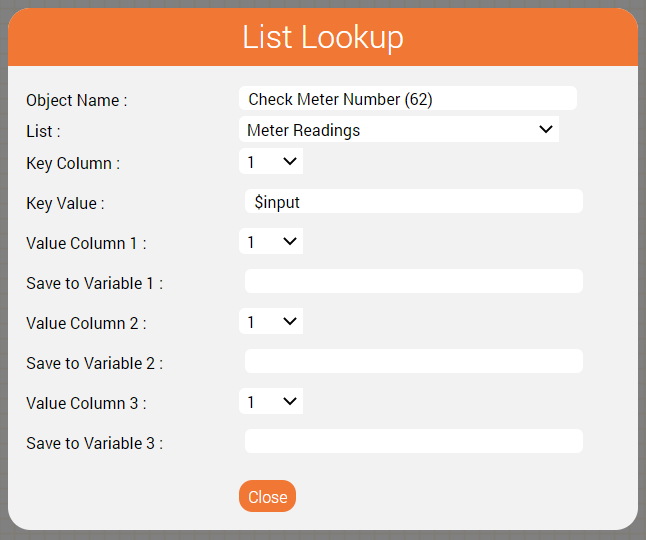
The meter number is checked for validity by looking up the value - $input - in the List "Meter Readings". All meter numbers should be loaded into this list in order that the service may work as built here.
This object has two outputs.
- Found - $input was successfully found in the list of meter numbers.
- Not found - $input was not found in the list. In this case, no self service is available and the caller could be connected to an agent.
Further details on this object can be found here: List Lookup
Remember the inputs: meternumber / meterreading
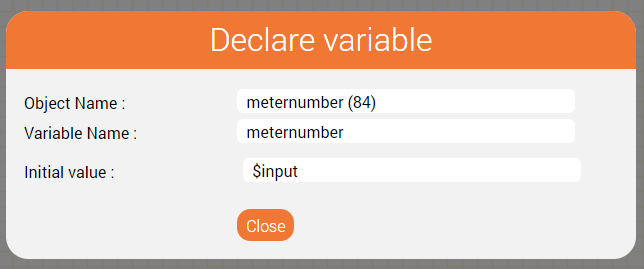
If the meter number is found, we need to remember this for later. This is achieved by saving $input to a variable $meternumber using the Declare Variable object meternumber in the call flow above.
Similarly, when the meter reading is entered, this is saved to a variable $meterreading in the Declare Variable object meterreading.
Further details on this object can be found here: Declare Variable
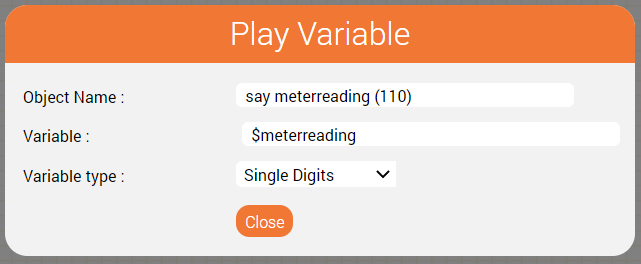
Saying the Current Meterreading: say meterreading
This object is used to output the current meter reading as a concatenation of single digits. It is used after the "Current Reading is" prompt is played.
It is parameterised like this:
Further details on this object can be found here: Play Variable.
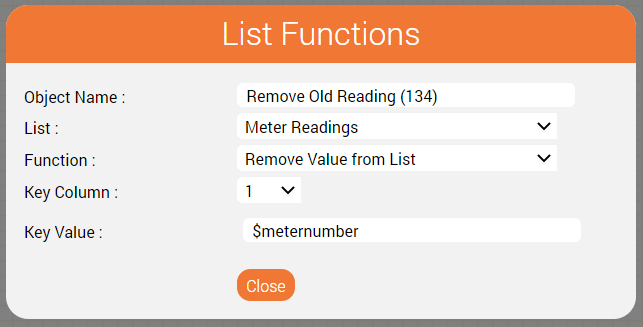
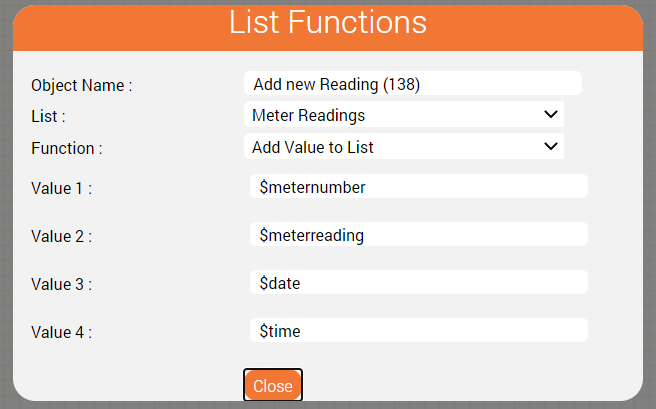
Saving the result: Remove old Reading / Add new Reading
The meter reading is saved to the same list in our example call flow.
This involves deleting the old entry and adding a new entry with the same meter number using two instances of the List Functions object.
Removing the old entry is performed like this:
And the new reading is added like this:
Keeping it Tidy: Jump Input Again / Input Again
These two objects are used to define a point in the routing, to which the call flow can jump, and to perform the actual jump from the end of the call flow to the middle.
Of course, one could just connect the two objects directly together, but the number of connectors involved will mean the end result might look somewhat untidy.
Further details on these two objects are found on the following pages: Jump to Target, Target
Conclusion
We hope this tutorial has given you some insight as to how a simple self service can be built using the jtel system.
The logic can be changed and adapted as the use case requires.
Here are some examples:
- Save the readings to a new list only containing the readings recorded
- Check the meter number using a checksum algorithm if available
- Query a backend system by REST to check the meter number and record the results directly
