| Sv translation | ||
|---|---|---|
| ||
IntroductionThe WEB role provides the following functionality to the jtel platform.
WEB requires access to STORE, and DATA. The web server is provided by the java based wildfly server, and uses port 8080. The load balancer (LB) is used to distribute sessions to the webserver(s), and to decrypt https if installed. The WEB role runs internally behind the LB role and does not use encryption. Pre-RequisitesSTORE must be |
...
mounted before installing this role. See Mounting STORE - All Linux except for STORE (CentOS8/Win2019). InstallationMySQL ClientInstall the mysql repository for enterprise Linux 8.x and the mysql community client as follows. This disables some default repos which are activated by the base CentOS 8.x installation:
Symbolic Link for StoreSince access to the store is performed using UNC paths, this path must be created and linked to the location of the STORE mount:
This will enable the webserver to access paths like: //acd-store/shared Install Java Runtime
Install WildflyThe following commands will install and configure the wildfly server as a systemd service:
|
Configure Firewall
The following commands open the necessary ports in the firewall:
Configure FirewallThe following commands open the necessary ports in the firewall:
| |||||||||
| Translations Ignore | |||||||||
|---|---|---|---|---|---|---|---|---|---|
|
Als nächstes kann nun der angepasste Application Server heruntergeladen und installiert werden:
Install AS: CentOS 7.7 and higher
...
Als nächstes müssen in der Firewall die Port-Freigaben für den jboss AS Dienst eingetragen und persistent gespeichert werden:
Configure firewall
...
|
...
|
...
|
...
SELinux ConfigurationEnforcingIn order that wildfly can run with selinux enabled (enforcing), the following command must be issued:
Changing SELinux ConfigurationIf you would prefer to set selinux off, or set it to permissive, you can edit the following file and reboot:
Configure Wildfly ServerFirst ServerNext, configure the wildfly server to attach to the database servers as appropriate. The 4th line of this series of commands must be modified to contain the password for the database.
|
Erforderliche Anpassungen der Konfiguration
Die Konfiguration des jboss AS Servers erfolgt über eine bzw. im Falle von Software Version >= 3.06 zwei Konfigurationsdateien. Wird eine Version der Software >= 3.06 verwendet, ist auch im Konfigurationsverzeichnis des jboss AS eine Kopie der Datei hazelcast.xml hinterlegt. Da diese bereits im Zuge der Installation des primären DATA-Servers erstellt wurde und in der Dateifreigabe vom STORE hinterlegt wurde, kann sie einfach zum Zielort kopiert werden:
Copy hazelcast.xml
...
|
...
|
...
Further ServersIf the configuration file has already been provided on STORE, then the following commands will copy it to the wildfly server.
|
Des weiteren sind Anpassungen an der Konfigurationsdatei standalone.xml notwendig. Bei installation mehrerer Server mit der WEB-Rolle bietet es sich an, nach initialer Konfiguration, diese Datei auch in die Dateifreigabe abzulegen, um die Installation zu beschleunigen. Ist eine angepasste Version dort bereits vorhanden, kann sie mit folgendem Befehl zum Zielort kopiert werden:
Copy the file standalone-full.xml
...
|
...
Configure Hazelcast ClusterThe hazelcast configuration file is now copied:
|
...
Passt man hingegen die Konfiguration des ersten WEB-Servers an, so müssen einige Werte in der Datei entsprechend der Datenbankserverkonfiguration angepasst werden. Dies kann mit folgenden Befehlen erfolgen - <password> mit den entsprechenden Passwort ersetzen:
Customize the standalone-full.xml
|
Die Werte der ersten 4 Zeilen müssen entsprechend der Datenbankkonfiguration entsprechend angepasst werden:
- DBPRI: Name des primären DATA-Servers
- DBSTA: Name des DATA Servers für die Echtzeitstatistik Daten
- DBREP: Name des DATA Servers für die Ausführung der Berichte
- DBPWD: Passwort der Datenbankverbindung
Nach der Anpassung der Konfigurationsdatei standalone-full.xml, kann diese in die zentrale Datenfreigabe gespeichert werden, um die Konfiguration der weiteren WEB-Server zu beschleunigen:
Provision of the file standalone-full.xml for the installation of additional WEB servers
|
Starten des WEB Applikations-Servers
An diesem Punkt kann der Web Server gestartet werden. Die Eingabe des folgenden Befehls aktualisiert die auszuführende Web-Applikation und startet den Webserver:
Start the web server - CentOS 7.6 and less
|
Ein ordnungsgemäßer Start kann in der Protokolldatei des Web-Servers geprüft werden. Dort sollten sich nach ca 45 Sekunden ab dem Start folgende Meldungen finden lassen:
Success media in /home/jtel/jboss-as-7.1.1.FINAL/standalone/log/server.log
|
Der weiteren kann im Falle von Software-Version >= 3.06 der Status des hazelcast-Clusters an Meldungen wie dieser erkennt werden:
Status of the hazelcast cluster
|
Diese Meldungen erscheinen jedes Mal, wenn ein Knoten des Clusters hinzugekommen, oder weggefallen ist. Im Portal muss der Parameter "ACD.UDP.Webserver.Use.Hazelcast" aktiviert werden, d.h. auf den Wert 1 gesetzt werden, damit die WebServer Hazelcast/UDPListener nutzen.
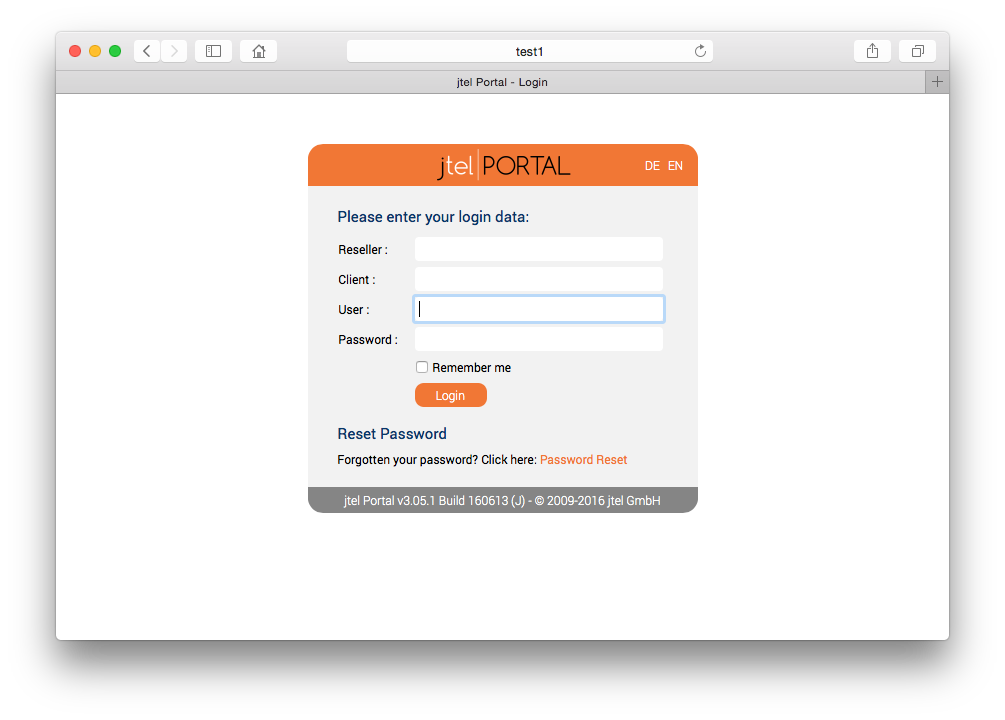
Der endgültige Test um zu zeigen, dass der Webserver ordnungsgemäß gestartet ist, ist natürlich der Aufruf direkt aus dem Browser. Unter der Annahme, dass gerade der zweite WEB-Server installiert wurde, kann man im Browser die Applikation durch Aufruf der folgenden URL erreichen: http://acd-jb2.example.com:8080/CarrierPortal/sysadmin/login
Wenn alles funktioniert, wird man von der Login-Maske begrüßt:
Installation der Software - JBOSS Installationen
Das Einbinden der offiziellen MySQL Software Repositores und die Installation des MySQL-Clients erfolgt mit folgenden Befehlen:
MySQL 8.x
...
|
MySQL 5.6
...
|
Beide Varianten
Da alle Zugriffe auf die gemeinsame Dateifreigabe über einen Windows-kompatiblen CIFS-UNC erfolgen, muss ein symbolischer Link erzeugt werden, so dass derartige Zugriffe auch unter UNIX erfolgen können. Dies erfolgt über folgenden Befehl der in der Praxis entsprechend des Namens des Rechners für die Rolle STORE anzupassen ist:
Create a symbolic link
|
Dies ermöglicht den Zugriff auf die Dateien in der Freigabe mit der UNC Angabe:
Example: Access to the share via UNC
|
Als nächstes wird die benötigte Java Laufzeitumgebung mit folgendem Befehl installiert:
Install Java runtime environment
|
Als nächstes kann nun der angepasste Application Server heruntergeladen und installiert werden:
Install AS: CentOS 7.7 and higher
|
...
|
Als nächstes müssen in der Firewall die Port-Freigaben für den jboss AS Dienst eingetragen und persistent gespeichert werden:
Configure firewall
|
Als nächstes werden nun die täglichen Wartungs-Skripte im cron-Dienst angemeldet:
Enable daily maintenance scripts
|
Um die Aktualisierung der Portal-Software im jboss AS Dienstes zu vereinfachen, wird nun noch ein entsprechendes Skript erstellt:
Create the update script
|
Erforderliche Anpassungen der Konfiguration
Die Konfiguration des jboss AS Servers erfolgt über eine bzw. im Falle von Software Version >= 3.06 zwei Konfigurationsdateien. Wird eine Version der Software >= 3.06 verwendet, ist auch im Konfigurationsverzeichnis des jboss AS eine Kopie der Datei hazelcast.xml hinterlegt. Da diese bereits im Zuge der Installation des primären DATA-Servers erstellt wurde und in der Dateifreigabe vom STORE hinterlegt wurde, kann sie einfach zum Zielort kopiert werden:
Copy hazelcast.xml
|
Des weiteren sind Anpassungen an der Konfigurationsdatei standalone-full.xml notwendig. Bei installation mehrerer Server mit der WEB-Rolle bietet es sich an, nach initialer Konfiguration, diese Datei auch in die Dateifreigabe abzulegen, um die Installation zu beschleunigen. Ist eine angepasste Version dort bereits vorhanden, kann sie mit folgendem Befehl zum Zielort kopiert werden:
Copy the file standalone-full.xml
|
Passt man hingegen die Konfiguration des ersten WEB-Servers an, so müssen einige Werte in der Datei entsprechend der Datenbankserverkonfiguration angepasst werden. Dies kann mit folgenden Befehlen erfolgen - <password> mit den entsprechenden Passwort ersetzen:
Customize the standalone-full.xml
|
Die Werte der ersten 4 Zeilen müssen entsprechend der Datenbankkonfiguration entsprechend angepasst werden:
- DBPRI: Name des primären DATA-Servers
- DBSTA: Name des DATA Servers für die Echtzeitstatistik Daten
- DBREP: Name des DATA Servers für die Ausführung der Berichte
- DBPWD: Passwort der Datenbankverbindung
Nach der Anpassung der Konfigurationsdatei standalone-full.xml, kann diese in die zentrale Datenfreigabe gespeichert werden, um die Konfiguration der weiteren WEB-Server zu beschleunigen:
Provision of the file standalone-full.xml for the installation of additional WEB servers
|
Starten des WEB Applikations-Servers
Wenn die Centos-Version 7.7 ist, müssen Sie den folgenden Patch ausführen, bevor Sie jboss starten
Start the web server - CentOS 7.7 and higher
|
An diesem Punkt kann der Web Server gestartet werden. Die Eingabe des folgenden Befehls aktualisiert die auszuführende Web-Applikation und startet den Webserver:
Start the web server - CentOS 7.6 and less
|
Ein ordnungsgemäßer Start kann in der Protokolldatei des Web-Servers geprüft werden. Dort sollten sich nach ca 45 Sekunden ab dem Start folgende Meldungen finden lassen:
Success media in /home/jtel/jboss-as-7.1.1.FINAL/standalone/log/server.log
...
08:07:38,249 INFO [org.jboss.as.server] (DeploymentScanner-threads - 2) JBAS018559: Deployed "SMSReceiver.war"08:07:38,250 INFO [org.jboss.as.server] (DeploymentScanner-threads - 2) JBAS018559: Deployed "CarrierPortal.war"08:07:38,250 INFO [org.jboss.as.server] (DeploymentScanner-threads - 2) JBAS018559: Deployed "jasper-utils-0.0.1-SNAPSHOT.jar"
Start WildflyStart the webserver as follows:
Whether it is running, can be checked in the webserver log file:
Or by logging into the portal directly on port 8080 using a browser pointing to the following URL:
The login page should appear, with the logo.
|
| Sv translation | ||||||
|---|---|---|---|---|---|---|
| ||||||
|
| Sv translation | ||||||||||||||||||||||||||||||||||||||||||||||||||||||||||
|---|---|---|---|---|---|---|---|---|---|---|---|---|---|---|---|---|---|---|---|---|---|---|---|---|---|---|---|---|---|---|---|---|---|---|---|---|---|---|---|---|---|---|---|---|---|---|---|---|---|---|---|---|---|---|---|---|---|---|
| ||||||||||||||||||||||||||||||||||||||||||||||||||||||||||
IntroductionLe rôle WEB fournit les fonctionnalités suivantes à la plate-forme jtel.
WEB nécessite l'accès à MAGASIN, et aux DONNÉES. Le serveur Web est fourni par le serveur java wildfly et utilise le port 8080. L'équilibreur de charge (LB) est utilisé pour distribuer les sessions sur le (s) serveur (s) Web et pour déchiffrer https s'il est installé. Le rôle WEB s'exécute en interne derrière le rôle LB et n'utilise pas de chiffrement. PrérequisSTORE doit être monté avant d'installer ce rôle. Voir Mounting STORE - All Linux except for STORE (CentOS8/Win2019). InstallationClient MySQLInstallez le dépôt mysql pour Linux 8.x d'entreprise et le client communautaire mysql comme suit. Cela désactive certains repos par défaut qui sont activés par l'installation de base de CentOS 8.x :
Lien symbolique pour le magasinComme l'accès au magasin se fait par des chemins UNC, ce chemin doit être créé et lié à l'emplacement de la monture du magasin :
Cela permettra au serveur web d'accéder à des chemins comme : //acd-store/partagé Installer Java Runtime
Installer WildflyLes commandes suivantes permettent d'installer et de configurer le serveur wildfly en tant que service systemd :
Configurer le pare-feuLes commandes suivantes permettent d'ouvrir les ports nécessaires dans le pare-feu :
Configuration SeLinuxImposerPour que le wildfly puisse fonctionner avec selinux activé (Imposer), la commande suivante doit être émise :
Changer la configuration de SELinuxSi vous préférez désactiver selinux, ou le régler sur permissif, vous pouvez modifier le fichier suivant et redémarrer :
Configurer le serveur WildflyPremier ServeurEnsuite, configurez le serveur de wildfly pour qu'il s'attache aux serveurs de base de données comme il convient. La 4e ligne de cette série de commandes doit être modifiée pour contenir le mot de passe de la base de données.
Autres serveursSi le fichier de configuration a déjà été fourni sur MAGASIN, les commandes suivantes le copieront sur le serveur de wildfly.
Configurer la grappe de diffusionLe fichier de configuration de hazelcast est maintenant copié :
Démarrer WildflyDémarrez le serveur web comme suit :
Il est possible de vérifier s'il fonctionne dans le fichier journal du serveur web :
Ou en se connectant au portail directement sur le port 8080 à l'aide d'un navigateur pointant sur l'URL suivante :
La page de connexion doit apparaître, avec le logo. |
Der weiteren kann im Falle von Software-Version >= 3.06 der Status des hazelcast-Clusters an Meldungen wie dieser erkennt werden:
Status of the hazelcast cluster
|
Diese Meldungen erscheinen jedes Mal, wenn ein Knoten des Clusters hinzugekommen, oder weggefallen ist. Im Portal muss der Parameter "ACD.UDP.Webserver.Use.Hazelcast" aktiviert werden, d.h. auf den Wert 1 gesetzt werden, damit die WebServer Hazelcast/UDPListener nutzen.
Der endgültige Test um zu zeigen, dass der Webserver ordnungsgemäß gestartet ist, ist natürlich der Aufruf direkt aus dem Browser. Unter der Annahme, dass gerade der zweite WEB-Server installiert wurde, kann man im Browser die Applikation durch Aufruf der folgenden URL erreichen: http://acd-jb2.example.com:8080/CarrierPortal/sysadmin/login
...
|