Pre-Requisites
- The integration to the Cisco UCM requires a JTAPI Connection to the PBX. This must be configured in the CUCM.
- In addition, the jtel-presence-aggregator module must be installed on an appropriate server. See Rolle PRES.
JTAPI Installation
Installation
Install the Cisco JTAPI Libraries on an appropriate server. This example assumes that the PRES role has been installed on a windows server.
Installing simply requires clicking through the defaults, it is not necessary to change the paths.
Configuration
From the directory in which Cisco JTAPI is installed (on a windows server, usually C:\Program Files\Cisco\JTAPI64Tools), run jtprefs.bat.
The following screens show the settings which can be made:
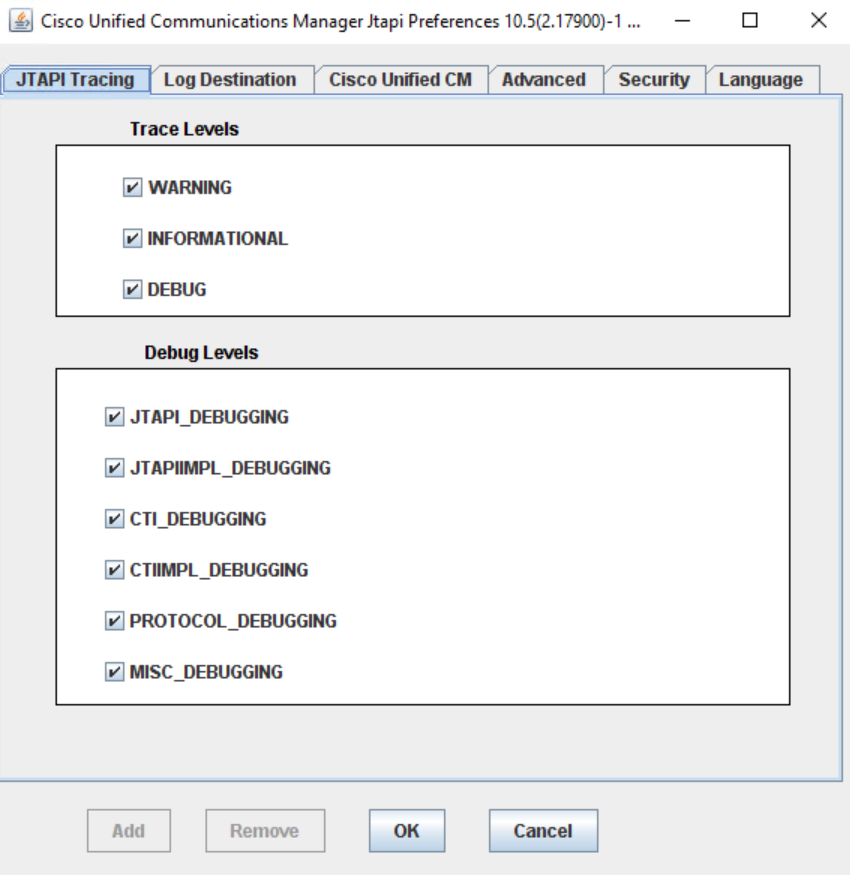
Debugging
If debugging and logging is desired, settings can be made on this page to specify the debug level:
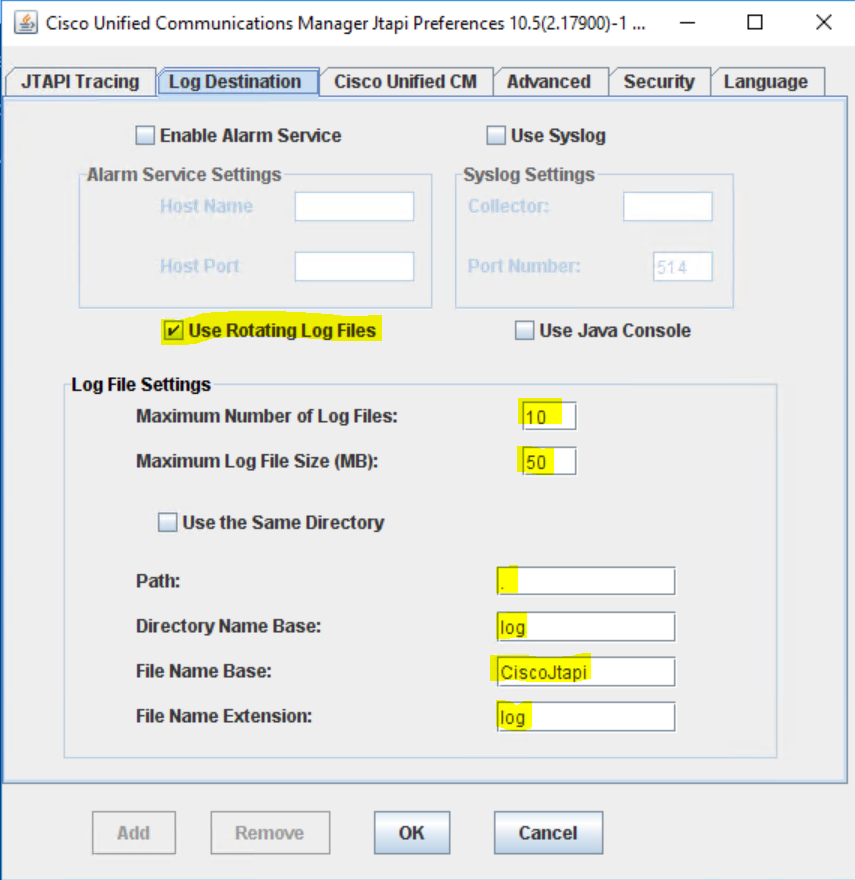
Logging
These are the recommended logging settings:
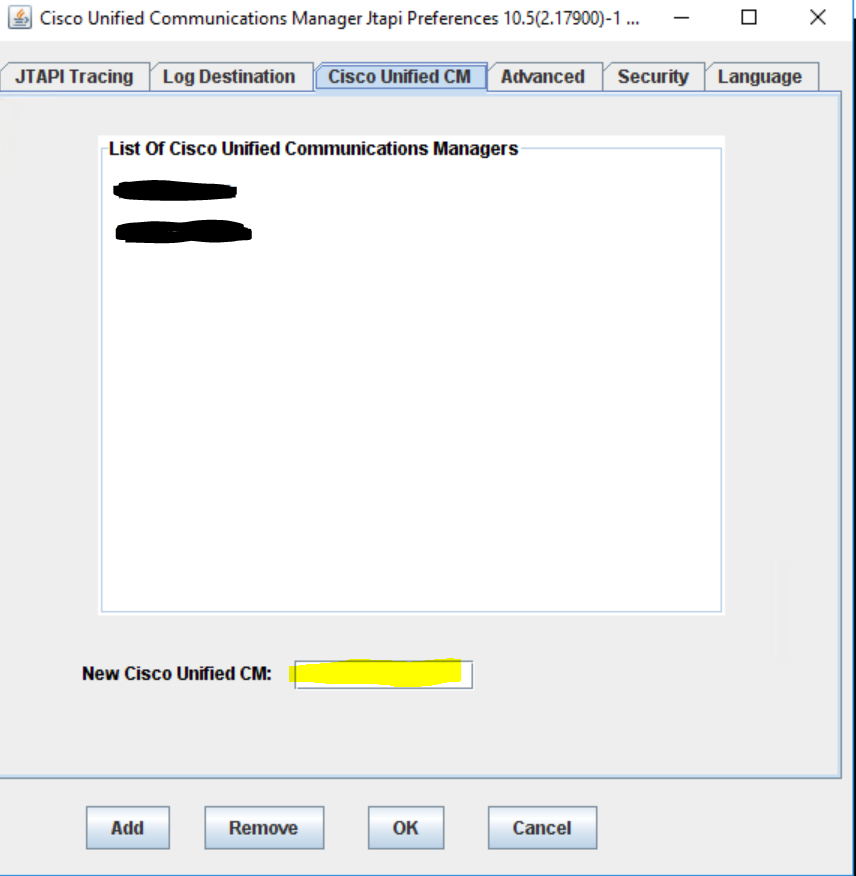
Cisco Unified CM
Add all available call manager servers on the next page:
Further Settings
The settings on the remaining pages can be left "as is", and do not need to be changed.
Copy JTAPI.INI
Click on OK, to create a JTAPI.INI file.
This file will be stored in:
C:\Program Files\Cisco\JTAPI64Tools
Copy this file to the bin directory of the presence aggregator, for example:
C:\presence-aggregator\bin
Portal Configuration
To use the connector, and new presence connector is created as sysadmin in the jtel Web Portal.
Give the connector a good name, and select CiscoCUCM Jtapi (Version) as the connector type.
The Configuration of the connector uses XML. The following example XML is used in the table below, to explain the settings.
<?xml version="1.0" encoding="UTF-8"?>
<config>
	<implementation>
		<jar>
			<base>jtel-system-presence-connectors-cisco</base>
			<version>1.0</version>
		</jar>
		<class>de.jtel.system.presence.connectors.cisco.v10.CiscoJTAPIImplementation</class>
	</implementation>
	<parameters>
		<providerName>IP_ADDRESS</providerName>
		<user>JTAPI_USER</user>
		<password><![CDATA[JTAPI_USER_PASSWORD]]></password>
	</parameters>
	<addressTranslators>
		<translator>
			<match>^1(..)$</match>
			<replace>498946149501$1</replace>
		</translator>
		<translator>
			<match>^2(..)$</match>
			<replace>498946149502$1</replace>
		</translator>
	</addressTranslators>
	<addressExcluders>
		<excluder>
			<match>^9(..)$</match>
		</excluder>
	</addressExcluders>
	<behavior>
		<syncAcdUsers>0</syncAcdUsers>
		<syncPbxUsers>1</syncPbxUsers>
	</behavior>
</config>
Settings
| Setting | Value | Comments |
|---|---|---|
implementation jar base | jtel-system-presence-connectors-cisco | Do not change this |
| implementation jar version | 1.0 | Currently version 1.0. |
| parameters providerName | IP_ADDRESS | Use the IP Address or DNS Name of the CUCM Server. |
| parameters user | JTAPI_USER | Use the name of the configured user with JTAPI access in the CUCM Server. |
| parameters password | JTAPI_USER_PASSWORD | Use the password of the configured user with JTAPI access in the CUCM Server. Note: if special characters (not allowed in XML) are included in the password, these must be escaped inside a CDATA section as shown in the example configuration above. |
| addressTranslators | XML Translator Definition | If the numbers reported by the CUCM server via JTAPI are not fully qualified E.164, they can be translated. This assumes the portal has been configured fully to E.164, and may not be necessary in all installations. The address translator mechanism provides a way to normalise the numbers before they are used to update presence information in the jtel System. A translator consists of two parts: Match A regular expression, which matches the number as reported by the CUCM. For example, the following regex: ^1(..)$ Matches all 3 digit telephone numbers beginning with a 1. A grouping is used to isolate the last two digits of the number into group 1, referred to in the replacement as $1 Replace The replacement to be made. For example: 498946149501$1 This would cause the two digit matched group from the regex to be appended to the string 498946149501. Example Input: 123 Output: 49894614950123 Recommendations Any number of translators can be used. They are all applied in sequence, so a little thought might be required to get the desired effect. It is recommended always to work with groupings and a specific length. Also, to prevent erroneous matches, the ^ (begin of string) and $ (end of string) regex operators should be used. |
| addressExcluders | XML Excluder Definition | Excluders are used to match number patterns which shall not be monitored. For example, if trunks are passed to the jtel system, it does not make sense to monitor these entities. An excluder consists of one part: Match A regular expression, which matches the number as reported by the CUCM. For example, the following regex: ^9(..)$ Matches all 3 digit telephone numbers beginning with a 9, and will not setup monitor points to these numbers. |
| behaviour syncAcdUsers | 0 | Causes all reported extensions to be created as an ACD user. Setting this to 1 is not recommended. Note: even if this is set to 0, the ACD users presence status will still be set according to the current Tel1 field in the user record, and TelActive (the active telephone number). |
| behavious syncPbxUsers | 1 | Causes all reported extensions to be created as PBX Users. Setting this to 1 is recommended. |
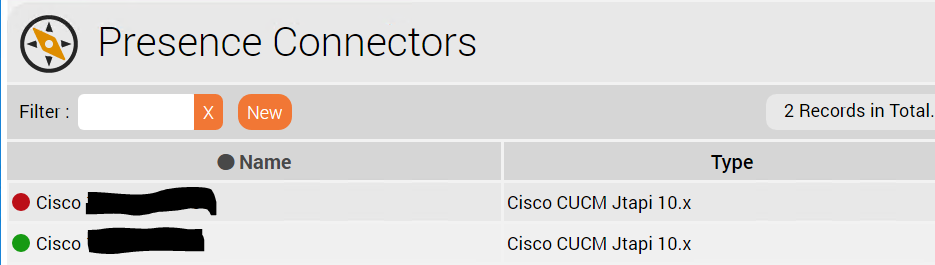
Starting / Stopping Connectors
Connectors can be started or stopped in the web interface, by clicking on the red / green dot next to the name:
Trunk Groups
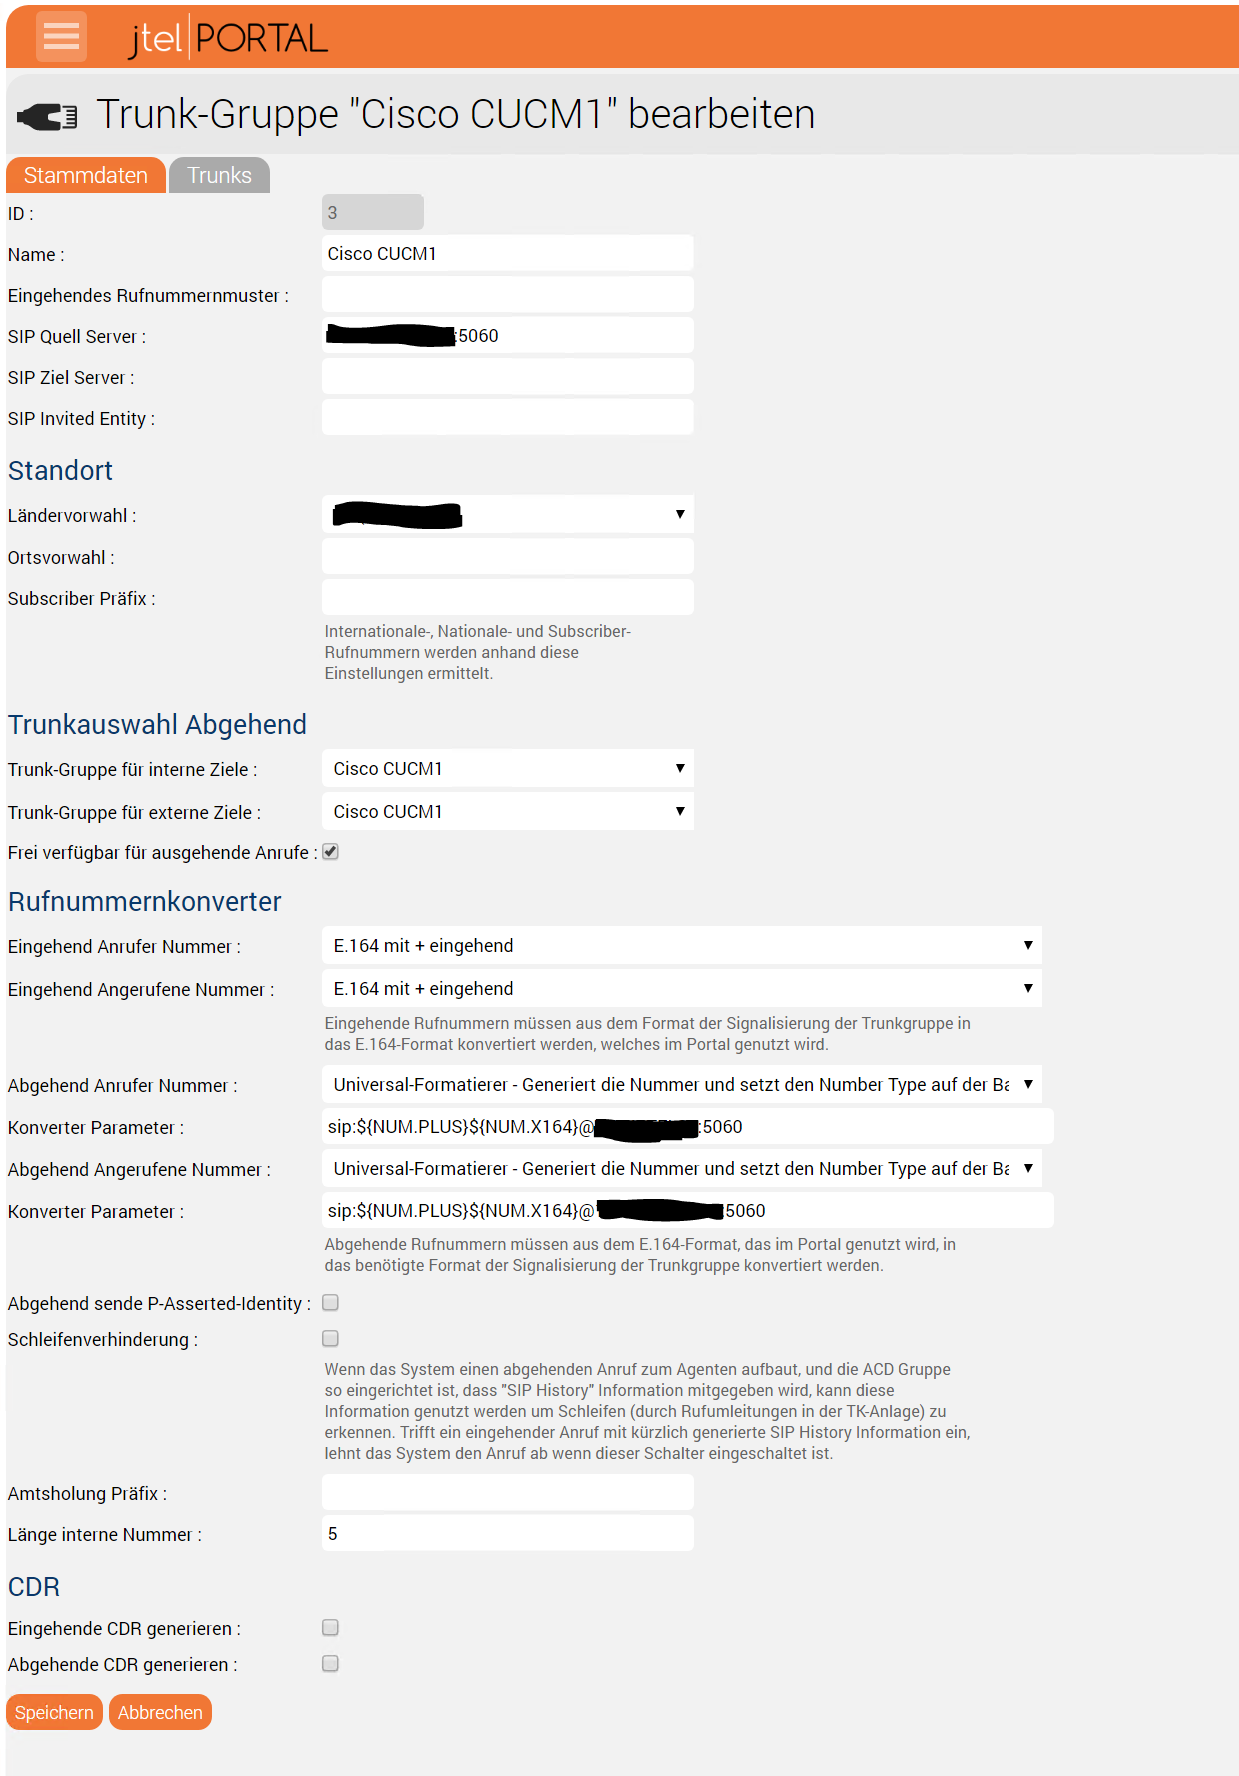
The following settings are recommended for the creation / use of Trunks and Trunk Groups in the jtel System:
| Setting | Example Value | Comments |
|---|---|---|
| SIP Source Server | 10.10.10.1:5060 | This is used to match the trunk to the relevant CUCM in incoming INVITE messages. Important for multi-CUCM installations. |
| Incoming Caller | Set to E.164 with + | |
| Incoming Called | Set to E.164 with + | |
| Outgoing Caller | sip:{NUM.PLUS}${NUM.X164}@10.10.10.10:5060 | Use the universal formatter, so that internal numbers can be presented if necessary in non E.164 format. The IP Adress of one of the the jtel servers is used here. |
| Outgoing Called | sip:{NUM.PLUS}${NUM.X164}@10.10.10.1:5060 | Use the universal formatter, so that internal numbers can be dialled if necessary in non E.164 format. The IP Adress of one of the CUCM is used here. |
| Internal Number Length | 5 | Set the maximum length of an internal number here. |
User Configuration
Users can be configured either:
- Fully E.164 qualified (recommended)
- Only the extension number
The second method may be the best method to use on multi-site CUCM installations, if the numbering plan in the CUCM was never E.164 and has become "untidy" over time.
Example