The Starface connector must be installed or at least ready to be configured on the telephony server under C:\ drive to complete the following steps
Introduction
To run the jtel starface connector and connect to starface via https, a certificate is required.
Create Root Certificate
To create the certificate, use a CMD as Administrator. Change to Starface directory and into "Install" and run the command.
Caution password
# Change directory
cd C:\jtelStarface6v2SOAPWindowsService\Install
# Install
makecert.exe -sv SignRoot.pvk -cy authority -r signroot.cer -a sha1 -n "CN=JTEL" -ss my -sr localmachine
Create self-signed Certificate
To then create the self-signed version, run the following command in the same Administrator CMD window
The password will now be required
makecert.exe -iv SignRoot.pvk -ic signroot.cer -cy end -pe -n CN="localhost" -eku 1.3.6.1.5.5.7.3.1,1.3.6.1.5.5.7.3.2 -ss my -sr localmachine -sky exchange -sp "Microsoft RSA SChannel Cryptographic Provider" -sy 12
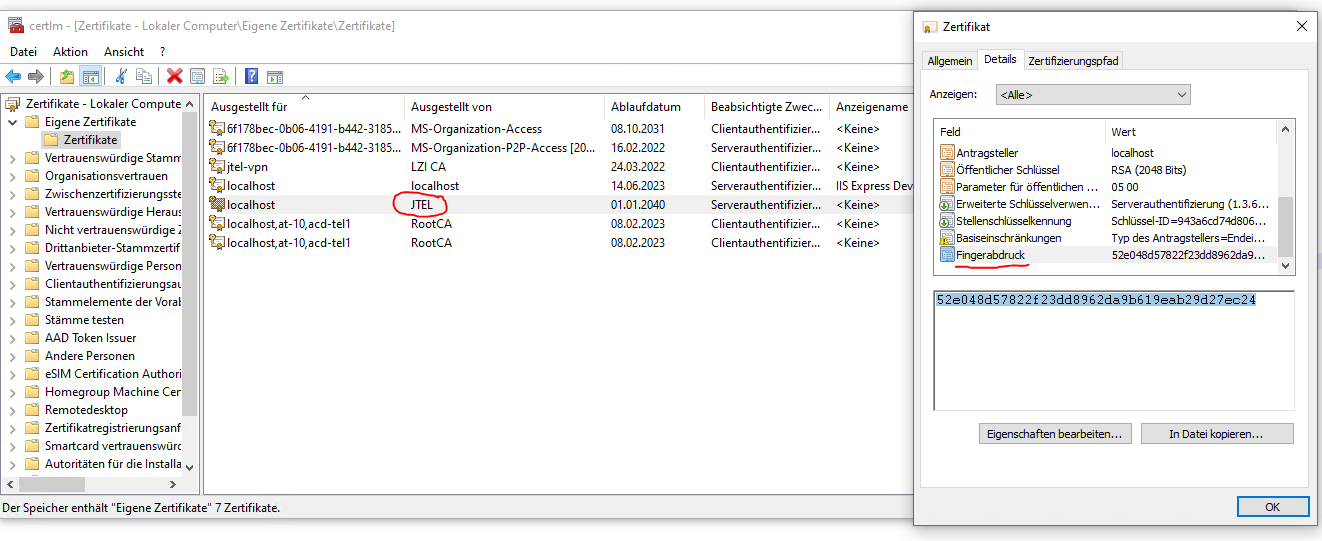
Extract the certificate-hash
Navigate through windows to locate your new self-signed certificate and extract the hash value
- Open the certificate snap-in. For more information, see How to: View Certificates with the MMC Snap-in.
- Run certlm.msc.
- Find the hash for the created service certificate and copy it
Register the service Certificate for the URL
Replace "<hash>" with the hash value in the window and execute the command in an Administrator CMD
netsh http add sslcert ipport=0.0.0.0:56745 certhash=<hash> appid={27ff64b1-2005-4a91-9c96-44d1fe51f209}
Test
use the following URL in any browser to test
https://localhost:56745/jtelStarface6v2SOAPServiceLibrary/JTELStarface6v2SOAPService