...
The mechanism to perform this involves a combination of setting the threshold values - i.e. setting up values to go into "buckets", and then configuring CSS styles to color these elements.
| Warning | ||
|---|---|---|
| ||
You should have html and CSS experience before attempting these settings. |
Example
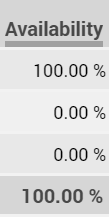
To make our example easy to understand, we will take the Availability and Service Level counters from the ACD groupscolumn as our example.
We want the service level Availability to be colored green when it is 80% or above, yellow when it is 60% or above and red otherwise.
...
The CSS definition which will be used by each bucket in our example is shown in the table below. (We will see how to apply this later).
| Bucket | Colouring | CSS Definition |
|---|---|---|
| 0 | Green | background-color: #169A13; |
| 1 | Yellow | background-color: #FCC10F; |
| 2 | Red | background-color: #BB0F18; |
Example
...

Bucket Definition
First of all, we will consider a three bucket definition using the buckets 0, 1 and 2 above (green, yellow, red - like a traffic light).
...
- If the value is >= 80 it will be placed in bucket 0. Whilst it could fit into all buckets, the bucket with the highest threshold is bucket 0, and this one will "win".
- If the value is >= 60 but < 80, it will be placed in bucket 1. If could fit into buckets 1 or 2, but bucket 1 hast has the highest threshold and will "win".
- If the value is < 60 it can only fit into the third bucket and so will be placed there.
| Info |
|---|
Note: in our example if the value was negative, it would not fit into any bucket and no CSS rules would be applied. Since a service level should never be less than 0, this will not matter. However, the principle of not having a bucket which fits a value can be used safely - if a value is not placed in a bucket, no CSS rules will be applied and the value will appear as usual (black text on the grey zebra striped background). |
Columns
The columns which are available to be highlighted are shown in the supervisor with a grey bar underneath them.
Here the Availability column is shown.
When you mouse over the grey bar in the column header, you are shown the relevant settings:

Setting
This is the name of the setting required - see the previous section on how to create the settings.
Column
This is the name of the column used in the CSS definition. You will use this further below.
ID
This is the associated ID for the CSS setting.
The purpose of the ID is to enable different coloring for different rows of data.
Each row of data is rendered with a particular ID, in our example, the AcdGroupsID.
If you want to have different coloring for different ACD Groups, you can use the ID value later in the CSS too.
Attaching Buckets to Columns
...
- If the user has defined a setting, use this setting.
- Otherwise: If the value is associated with an ACD group, check the ACD group parameters and use the setting if found.
- Otherwise: Check the Client Parameters and use this setting if found.
- Otherwise: no setting is configured, no processing will occur.
The actual settings setting required are documented in the table further belowis shown in the mouse-over help for the column - and is value to the right of Setting, as shown above.
For our example, we need to configure the settings:
...
setting Thresholds.AcdSupervisor.
...
Statistics.ServiceLevelAvailability
...
Here it is shown in Client Master Data ... Parameters:

For example, here the 4 example settings are shown configured in the User Settings for the logged in user:

Columns
The columns which are available to be highlighted are shown in the supervisor with a grey bar underneath them.
Example - here the Agent Status Duration column is available.

When you mouse over the column, you are shown the relevant settings:

Threshold
This is the name of the setting required - see the previous section on how to create the settings.
CSS
This is the name of the CSS definition required. You will use this further below.
ID
This is the associated ID for the CSS setting.
The purpose of the ID is to enable different coloring for different rows of data.
Example:
- Assume that you want to highlight the Agent Status Duration column
- You might want to color the agent status duration only for the "Pause" status if it is longer than a certain time.
- The ID of the standard Pause status in the system is 2 - so you would use the fact that AcdAgentStatusID = 2 for Pause to achieve this
Special Columns
This section documents some columns which have special behaviour.
...
CSS and Rendering
All elements displayed in the table are child div elements of the corresponding td (table data) element in the DOM. The div element may contain other elements - such as a span.
For example:
| Code Block |
|---|
<td class="iceDatTblCol1 fullWidthTableCol1" style=";text-align:right;"> <div class="icePnlGrp TableThresholdGlobal_LevelBucket_21 AcdLoginTotalCallsAllGroupsServiceLevelAvailability_LevelBucket_21 AcdLoginTotalCallsAllGroupsServiceLevelAvailability_1235_LevelBucket_21" id="M:elementAgentsAllelementTodaysGroupData_dTAgentsdataTableTodaysGroupData:20:j_idt1335idt3875"> <span class="iceOutTxt alignRight" id="M:elementAgentsAllelementTodaysGroupData_dTAgentsdataTableTodaysGroupData:20:j_idt1336idt3877">1<>100.00 %</span> </div> </td> |
The div element rendered is given with three special CSS classes to allow for coloring:
Global CSS Class - Global_Bucket_X
In the example above: TableThresholdGlobal_LevelBucket_X1
This is a global style available which can be used by any table column. X will is be replaced by the bucket number in which the value is placed. In the example above, the bucket used is bucket 21.
Column Specific CSS Class - Column_Bucket_X
In the example above: AcdLoginTotalCallsAllGroupsServiceLevelAvailability_LevelBucket_2 1
This is a column specific style applied to a particular the column. The name for this threshold the start of the CSS class name is shown in the mouse-over help as "Column". After the name comes _Bucket_ followed by the number of the bucket. In our example, the column is ServiceLevelAvailability, and the bucket is 1.
Column and ID Specific CSS Class - Column_ID_Bucket_X
In the example above: AcdLoginTotalCallsAllGroupsServiceLevelAvailability_1235_LevelBucket_21
This is a column and ID specific style applied to a particular column, when the and an associated ID has for a particular valuerow of data. In our example, the CSS style is associated with the the Column = ServiceLevelAvailability, for AcdGroupsID = 235, and the Bucket used is 1.
Defining the CSS
The last step is to define the CSS. The CSS you define here will be used for the whole supervisor page, and so it must be capable of matching all of the elements you want to match in the DOM.
The CSS is a setting which is either defined in:
- A User Setting (these can be defined by each user individually in User Master Data)
- An ACD Group Parameter (only used for values associated with ACD Groups - in the ACD Groups ... Parameters Tab for each ACD Group individually).
- A Client Parameter setting (these can be defined for the client account as a whole in Client Master Data)
The name of the setting is CSS.AcdSupervisor
| Warning | ||
|---|---|---|
| ||
This is not a tutorial on how to select items with CSS. Complete familiarity with CSS and CSS selectors is assumed! |
Now we will write the CSS for the selectors we need. In this example, we are selecting all td elements in the DOM which contain a direct child div styled with the appropriate ServiceLevelAvailability bucket.
| Code Block |
|---|
td:has(> div.ServiceLevelAvailability_Bucket_0) {
background-color: #169A13;
color: white;
}
td:has(> div.ServiceLevelAvailability_Bucket_1) {
background-color: #FCC10F;
color: white;
}
td:has(> div.ServiceLevelAvailability_Bucket_2) {
background-color: #BB0F18;
color: black;
} |