This guide assumes that the ESXi image is already installed on the server when it is delivered.
Licensing
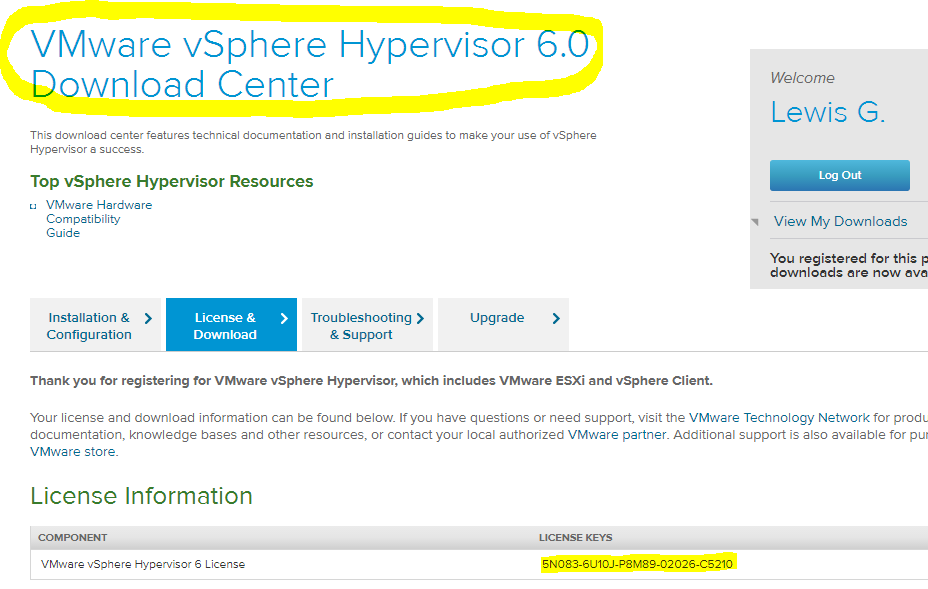
Since ESXi is a free product, you can easily register with VMWare and get the free version or an activation key.
The customer should register and you use the key from the customer on the server.
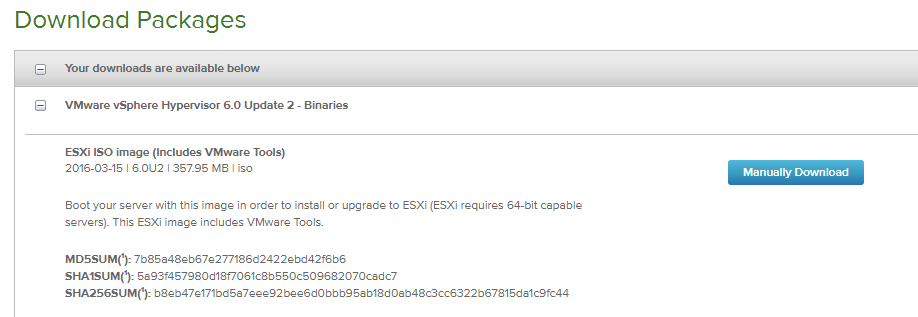
After registration at VMWare you can see the key under Downloads:
Preparation
- wire the server and provide it with a monitor and keyboard.
- Provide at least 2 network ports in the local LAN to connect the servers to the network.
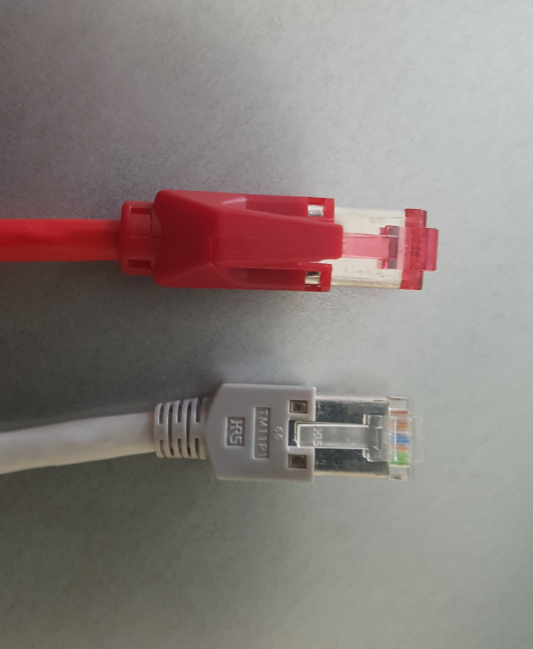
- FIf 2 ESXi Servers, connect the designated network interfaces together. Cat 6 or Cat 7 is required for 10 GB networks. This can be seen on the cable (it says Cagegory 6 or 7 on it) but especially on the shielding of the plug - this is much more pronounced and usually has a "special" somewhat cooler appearance than Cat 5. see pictures (red is Cat-7, grey is Cat-5)

Configuring RAID
First you have to check if the RAID controller on the server is configured as desired.
This can be checked during start-up using the screen messages. The procedure is different per server / manufacturer.
For performance and redundancy a RAID10 with a hot spare disk is recommended (needs 5 hard disks, the capacity is 2 x disk size, tollerates failure of two disks afterwards the data is gone). RAID6 is also a good choice because the capacity is increased (requires at least 4 disks, with 5 disks 2 can fail before data loss occurs, the capacity is 3 x disk size).
Configure the desired RAID, and then restart the server.
First Steps VMWare
- Switch on the server. These boot up after a few minutes and get an IP address from DHCP. This can be seen on the ESXi screen as soon as it is booted - it says here "Download tools to manage this host from: (URL)".
- Diese URL im Browser öffnen, Tools herunterladen (falls noch nicht vorhanden):
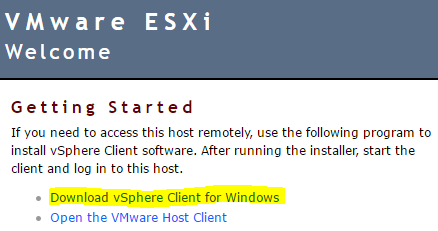
- Open vSphere Client and enter the IP address of the VMWare server and "root" (without password) for login.
Note: to start the software in English, change the link - add this in bold after the program name:
"C:\Program Files (x86)\VMware\Infrastructure\Virtual Infrastructure Client\Launcher\VpxClient.exe" -locale en_US
Ignore the license notice for now. The license will be installed later, after all other steps are completed.
Basic configuration
The basic configuration includes:
- Setting up storage.
- Updating the ESXi software to the latest kernel.
- Assigning the IP addresses for the internal LAN.
- If necessary, change the IP addresses for the external LAN (Attention: this requires a route in the router at jtel so that this network is accessible).
Setting up storage
- On Home, click "Inventory" (icon), select ESXi Server, and then click Configuration, "Storage".
- Add Storage wählen:

- Select the RAID disk as Disk/ LUN (It is probably the only one).
- As storage name we recommend a reasonable name, for example Internal RAID10, select Maximum Space and create.
Updating VMWare to the latest version
On the console of the VMWare server, F2 (root + password - empty), then Troubleshooting Options, then enable ESXi Shell and SSH.
Log on to the VMWare server with Putty as root.
Enter command:
vmware -vl
If an update is required, proceed as described here:
Download the current ISO from VMWare:
The instructions for updating the ESXi can be found here:
https://www.youtube.com/watch?v=JPE8lP6Peeo
Network Configuration
If the ESXi Server is to be set up on the customer settings, the gate-muc1.jtel.local machine can be reconfigured so that the OPT1 interface matches the customer network settings.
From the ESXi Console or the vSphere Client, change the IP settings of the ESXi Server management interface to match the customer network.
This is done via: F2, enter password, Configure management network.
For Custom DNS suffixes the domain name should be entered, for example jtelacd.local.
Then reconnect to the vSphere Client.
Setting Up an Internal Switch for Communication Between ESXi Servers
Under Configuration, Networking, Add Networking, set up a network for the internal communication between the two VMWare servers, if necessary.
- Add Networking, Virtual Machine, Create a VSphere standard switch, select the network card(s) that should be connected to it:
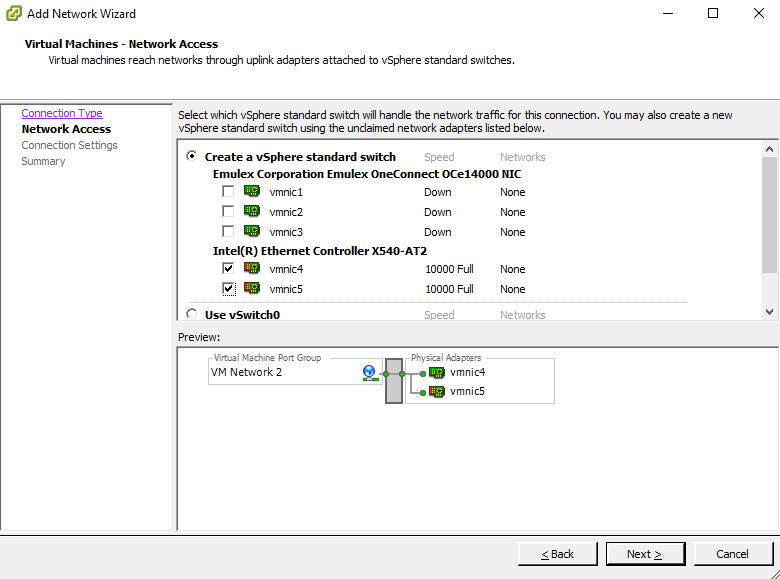
- Click through and click OK.
If the ESXi servers are connected via switches, you do not need to set anything else (Attention: this is an assumption according to ESXi documentation but not tested because we did not have a 10GB switch to test). The ports must be connected to LACP (Link Aggregation Control Protocol) at the switch.
If the ESXi servers are connected directly to each other, an adapter should be switched to standby:

NTP
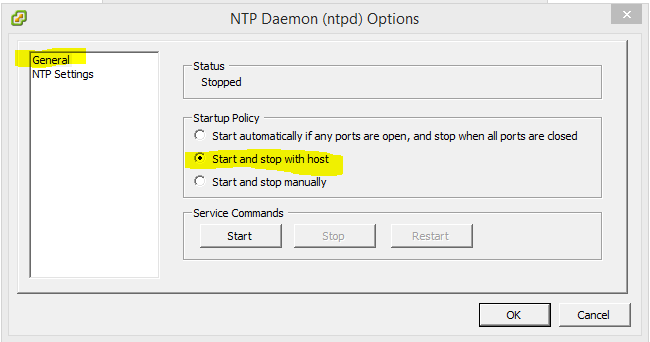
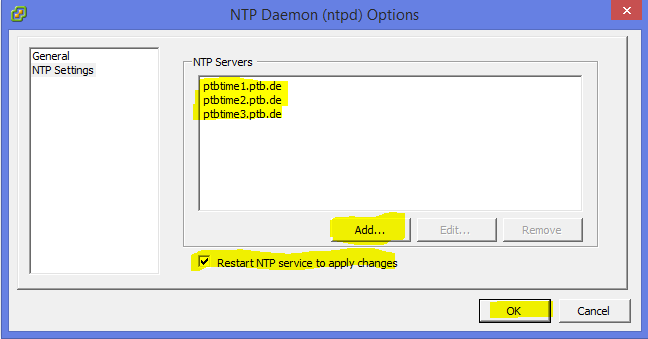
In vSphere Client click on the ESXi Server. In the tab "Configuration", left click on "Time Configuration". In the upper right corner set to "Properties", "NTP Client Enabled" and press "Option".

The following settings must be made:
It is recommended to configure all WIndows hosts with the VMWare tools so that they synchronize the time with the host.
This is done with the following commands:
Status Anzeigen:

"c:\Program Files\VMware\VMware Tools\VMwareToolboxCmd.exe" timesync status

Einschalten:

"c:\Program Files\VMware\VMware Tools\VMwareToolboxCmd.exe" timesync enable
Then switch off the Windows time sync:
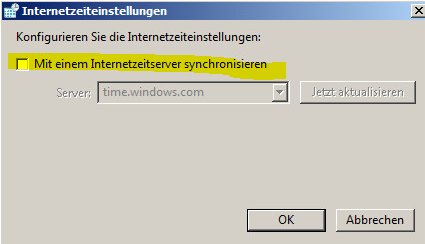
Final Tasks
Set root password
Use the VMWare Console or GUI to change the password for root on the ESXi servers
License key VMWare
Enter your VMWare activation key together with the customer.
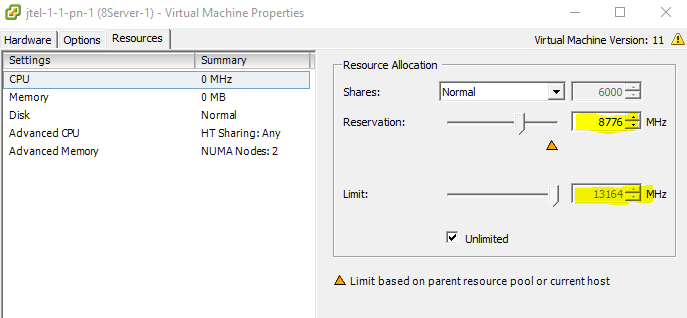
CPU / RAM and MAC adress
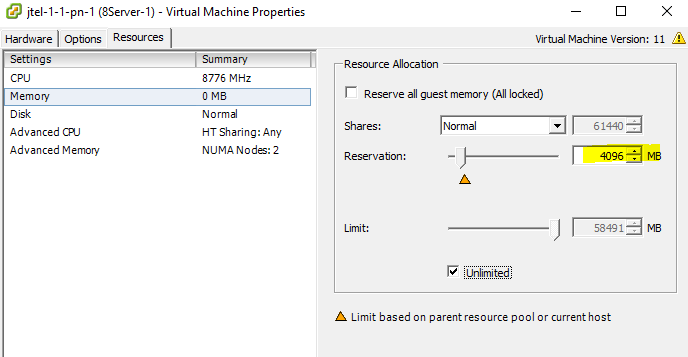
Reserve or set CPU and Mac addresses (the address cannot be copied - it must be set), and establish them, if present for several network cards). It is not well documented what to do here. The first digit must always be < 3F, i.e. copying the last 3 digits of the automatically generated MAC address does not always work. Of course you should test (before installing any licenses) if the MAC address is OK and if the network works correctly.
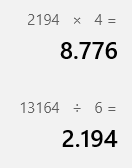
CPU reservation: divide the total CPU MHz by the number of cores, and then calculate and set the corresponding value (here for example 4 cores reserved from 6 the correct value):
Here the RAM reservation for 4GB from 6GB: