In a nutshell:
- Type „group policy“ or „Gruppenrichtlinie“ in the Windows search field
- Click on „Edit Group Policy“ to open the „Editor for local group policy“
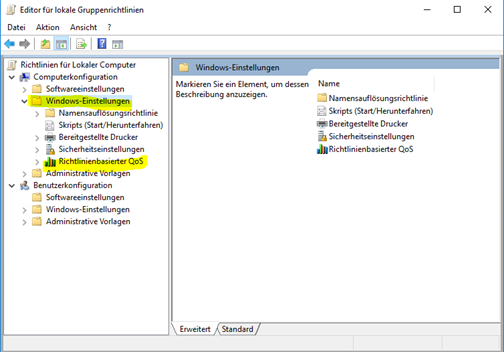
- Under „Computer Configuration“ expand the item „Windows settings“
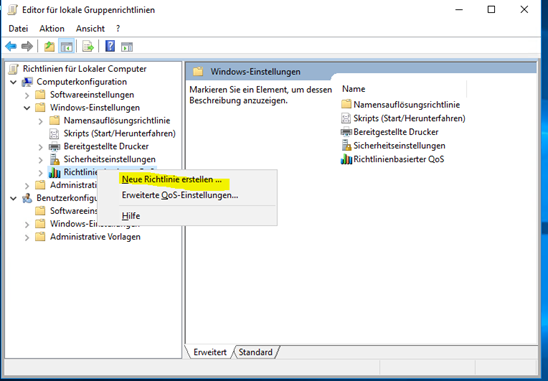
- Right click on „Policy-based QoS“ and select „create new policy“
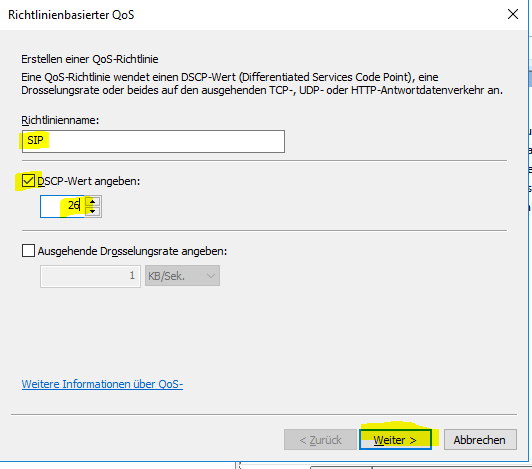
- Set the policy name to „SIP“, set the DSCP value to 26 (26 is recommended for SIP packets) and click „next“
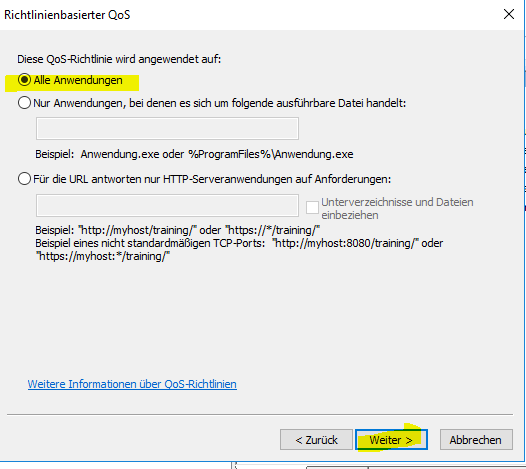
- Make sure the option „all application“ is selected and click „next“
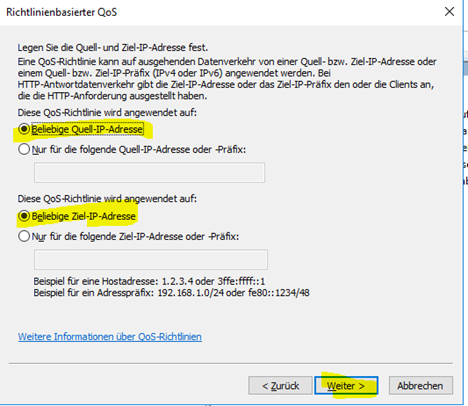
- Make sure the options „any source IP addresses“, „any destination IP addresses“ are selected and click „next“
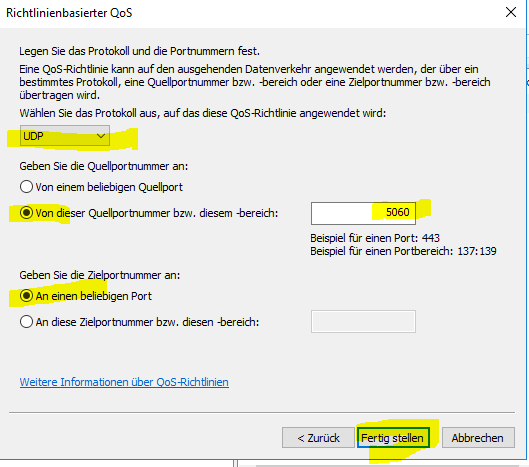
- Choose the protocol „UDP“ from the drop-down list. Select the option „from this source port number or range“, set the port number to 5060. Make sure the option „from any destination port“ are selected and click „Finish“
- Your SIP policy settings should be displayed in the list of Policy-based QoS
- In case you made a mistake in your settings NO WORRIES. Right click on the entry and select „edit existing policy“
In Details:
Type „group policy“ or „Gruppenrichtlinie“ in the Windows search field
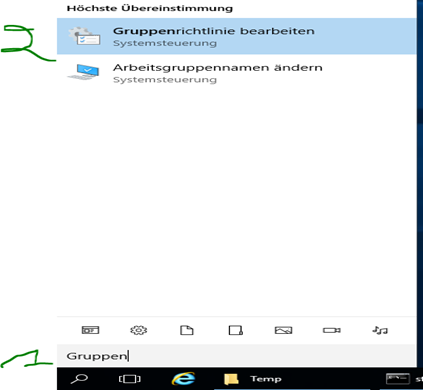
Click on „Edit Group Policy“ to open the „Editor for local group policy“

Under „Computer Configuration“ expand the item „Windows settings“
Right click on „Policy-based QoS“ and select „create new policy“
Set policy name to „SIP“, set the DSCP value to 26 (26 is recommended for SIP packets) and click „next“
Make sure the option „all application“ is selected and click „next“
Make sure the options „any source IP addresses“, „any destination IP addresses“ are selected and click „next“
Choose the protocol „UDP“ from the drop-down list. Select the option „from this source port number or range“, set the port number to 5060. Make sure the option „from any destination port“ are selected and click „Finish“
Your SIP policy settings should be displayed in the list of Policy-based QoS

In case you made a mistake in your settings NO WORRIES. Right click on the entry and select „edit existing policy“
