Introduction
The reports in the jtel system are provided as standard and can change over time, for example when new fields are added. This page provides access to an explanation on how to take a preexisting report on the jtel system and copy it. This is primarily useful when reports are customized and should not change, because mechanisms like automatic processing are in place that might be broken when reports are changed by jtel.
Prerequisites
- Standard Reporting API License
- Access to the Filesystem on your jtel systems STORE machine
- Decide which report you want to use as your base
Example
In this example, we will choose the report with the Technical-ID 'ACD-A-001' which has the name 'ACD Agent Calls Report 1 - itemised agent calls by date / time' and copy it.
1. Test the report you want to copy, to see if it works
It is best to open two web-sessions for this. You can either use two browsers, or a normal and incognito window.
2. On both browser windows, go to sysadmin 'Menu -> System settings -> Reports'
3. Edit the report in one window, and press 'New' in the other
4. The following fields are presented:
| ID | The ReportsID in the database. This field can not be changed. |
|---|---|
| Technical-ID | The Technical-ID to classify the report within your structure. Example: ACD-A-001 (Customized<CustomerName>) |
| Report | The reports name. Example: ACD Agent Calls Report 1 - itemised agent calls by date / time (Customized<CustomerName>) Additional: After saving the configuration, a Short Text is automatically created within the portal which contains the ID of the new report in its name. The syntax is 'Reports.<ReportsID>.Name'. This Short Text can now be edited as sysadmin under 'Menu → Texts → Short Texts' to provide a translation to the other languages you use in the portal. |
| File Name Prefix | This prefix is used by the system to refer to the report. This is the critical field which is used during updates, for example. To ensure that your customized report will remain unchanged after the update, this field must be changed. Example: Statistics_AcdAgentCallsReport_Customized<CustomerName> |
| Wiki Link | This field could be filled with an internal wiki link that gives further information to your customized report. Any URL can be used within this field. Note: The entries in this row should contain no spaces |
5. After adding the information into the fields, press save
6. Edit your new report, and switch to the column 'Report Parameters'
7. Copy the XML-Definition from the preexisting standard report into a notepad, and change the setting at 'param name= "jasper"' to your newly created File Name prefix. Be careful not to remove the .jasper at the end, as this field is required.
8. Paste your new XML-Definition into your new report
9. In the next column 'Role Assignment' add the report to your desired system roles
10. The report must now also be handed down the hierarchy to the client level. Following is a step-by-step instruction to make the report accessible to a client administrator in the system
As sysadmin
Menu -> User Data -> Security Groups -> Edit the security group 'Resellers (Default)' and under column 'Reports' → add your new reports by pressing 'add' → save
As Reseller Administrator
Menu -> User Data -> Security Groups -> Edit the security group 'Clients (Default)' and under column 'Reports' → add your new reports by pressing 'add' → save
As Client Administrator
Menu -> User Data -> Security Groups -> Edit the security group 'Client Administrators (Default)' and under column 'Reports' → add your new reports by pressing 'add' → save
11. Locate the .jrxml file in the filesystem on ACD-STORE by navigating to \\acd-store\shared\Data\system\jasper and searching for the File Name Prefix in the folder
12. Copy the .jrxml file to a place of your choice, maybe a folder called 'Customized<CustomerName>' under \\acd-store\shared\Customized<CustomerName>
13. Rename the file, in this case Statistics_AcdAgentCallsReport_Customized<CustomerName>.jrxml and move it back into the folder \\acd-store\shared\Data\system\jasper
14. An additional optional step is to also copy the stored procedure associated with the report, to ensure that the calculation behind the report remains the same and no updates from jtel will have any effect on your report
15. Go to your .jrxml file and find the CALL command which calls the stored procedure.
It should look something like this:
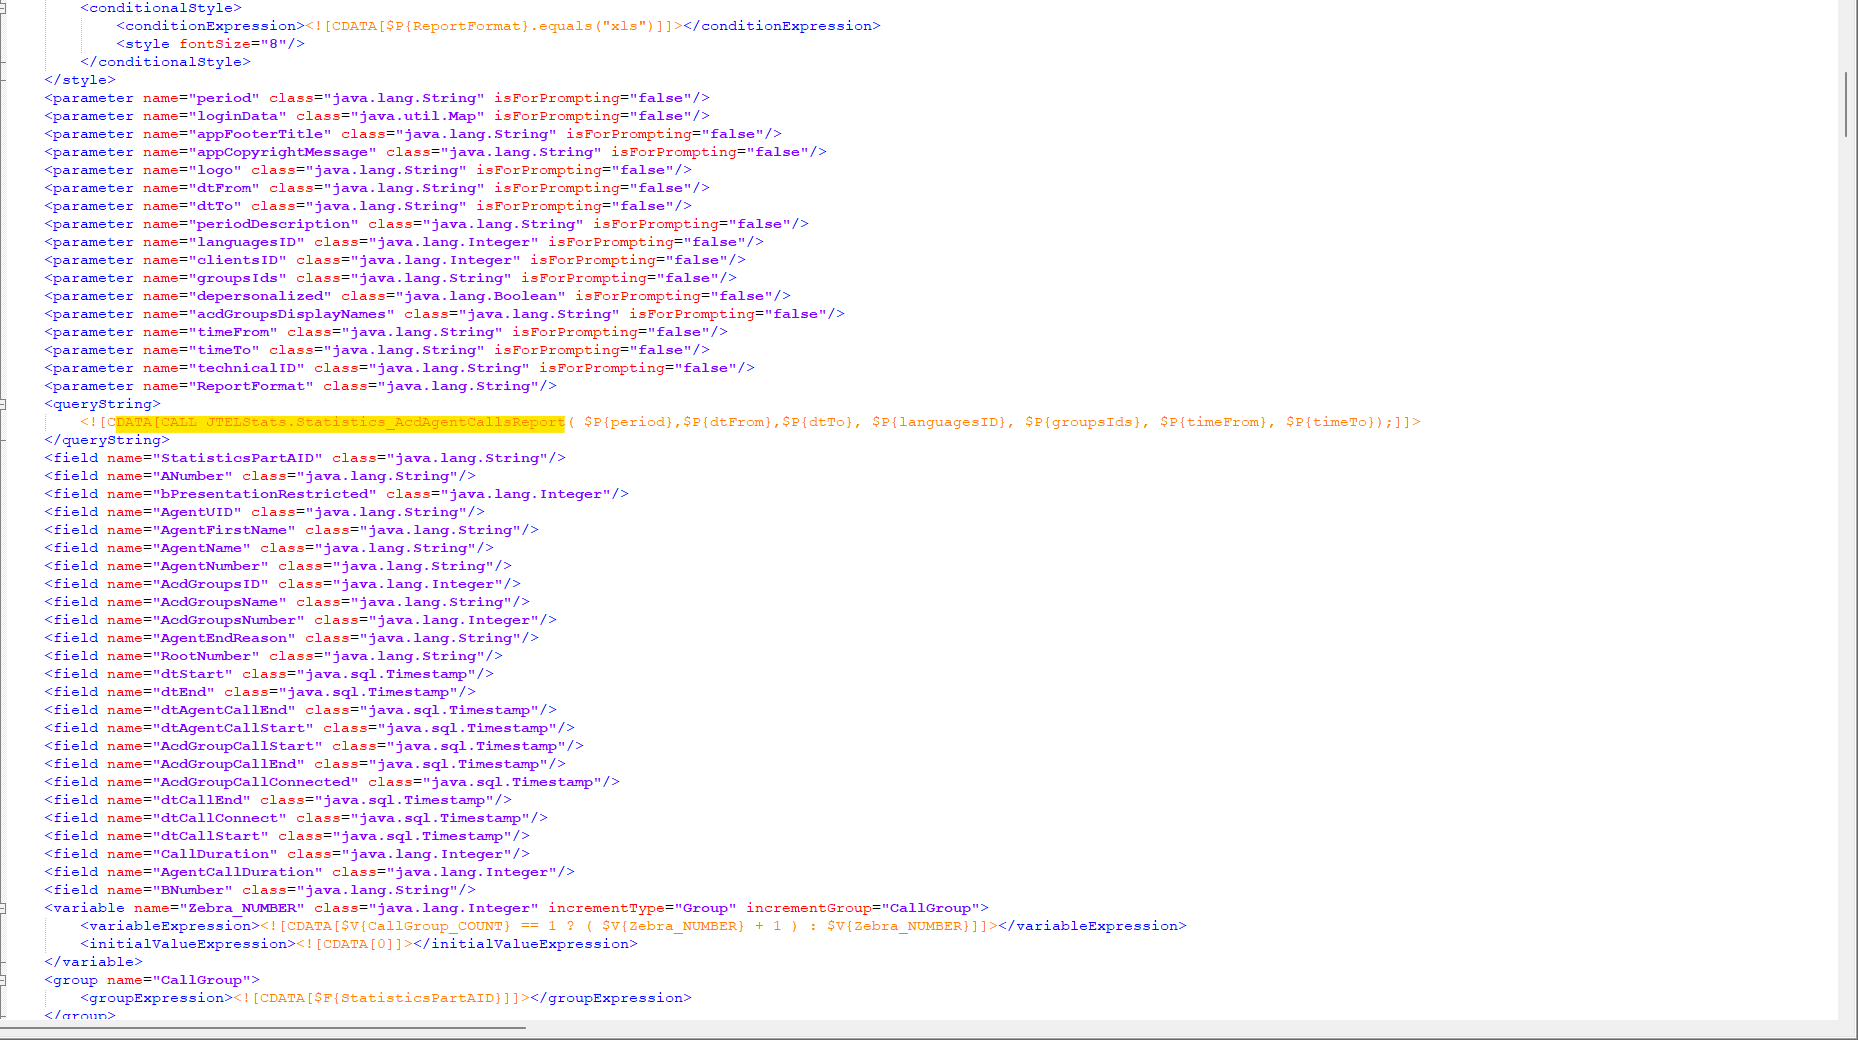
16. Change the stored procedures name to for example JTELStats.Statistics_AcdAgentCallsReport_Customized
17. Go to the folder \\acd-store\shared\JTELCarrierPortal\DB\ and search for, in this case, JTELStats.Statistics_AcdAgentCallsReport
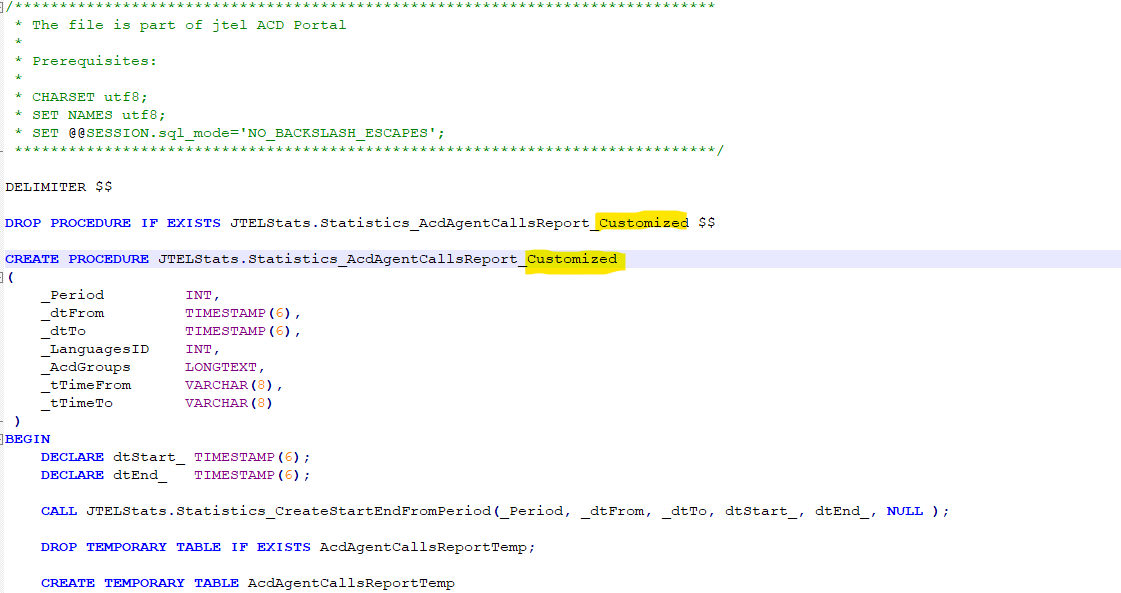
18. Copy the .sql file to your directory and change it. Two changes are required
In this example, it would look like this:
 #
#
19. Rename the file
In this example, it would look like this:
![]()
20. Copy this file back to the original files location, in this case
\\acd-store\shared\JTELCarrierPortal\DB\mySQL\acd\Procedures