Supported Windows versions
| Version | Unterstützt | Empfehlung |
|---|---|---|
| Windows Server 2008 | No | |
| Windows Server 2008 R2 | Yes | Do not use for new installations. |
| Windows Server 2012 | No | |
| Windows Server 2012 R2 | Yes | Do not use for new installations. |
| Windows Server 2016 | No | |
| Windows Server 2016 R2 | Yes | |
| Windows Server 2019 | Yes |
Note
To install the SIP drivers under Windows Server 2016 R2 and Windows Server 2019, the so-called Secure Boot must be deactivated. See the documentation of your virtual environment for instructions on how to do this.
Removing the BIOS lock on OEM versions of Windows Server
Sometimes when installing in VMWare using an image from an OEM version of Windows Server, an error may occur, like this:
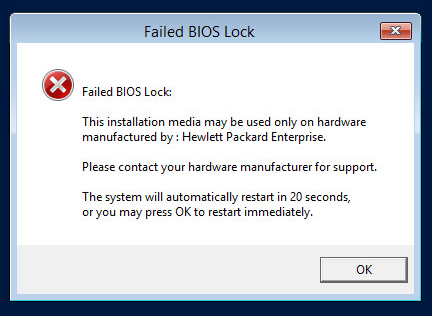
To fix this, do the following:
With VSphere Client installed navigate to the VM and edit settings.
From the "Options" tab navigate to Advanced and click General.
Configure Parameters on the right and add a new row to the parameters called "smbios.ReflectHost" with a value of "true."
Do this with the VM off, if it's on then restart the VM.
Lock is lifted.
Proxy Server
Some applications (such as GIT) require the explicit specification of a proxy.
This can be determined with the following command if the settings are automatic
netsh winhttp show proxy
Basic installation of the operating system
Windows Server is installed from an installation DVD or ISO file without any special precautions or adjustments.
Attention: the version WITH graphical user interface must be installed.
During the installation the system is rebooted several times. After the installation is complete, the system usually asks for a password for the local administrator user. If this is set, you are in the normal desktop. Since the installation routine does not allow large settings, several common features have already been set automatically:
- Host name: A host name was generated automatically.
- Network configuration: The Windows installer automatically configures the found network cards with DHCP. If a DHCP server is available, the installed Windows can be reached under a dynamically assigned address. If no such address is available, the network adapter must be configured so that it can function under a known address on the network.
Windows Updates
- Please keep updating Windows until no more updates are found.
- Should this have to be carried out by the project technician, this represents additional work.
- Afterwards, automatic Windows updates should be switched off.
- On Windows Server 2012 R2, the setting is available via "Windows Updates" and can be easily clicked.
- Under Windows Server 2016 this option is more hidden.
Press Windows + R and enter gpedit.msc.
Then navigate to the following branch:
Computer configuration ... Administrative Templates ... Windows-Components ... Windows Update. Here, deactivate the option accordingly.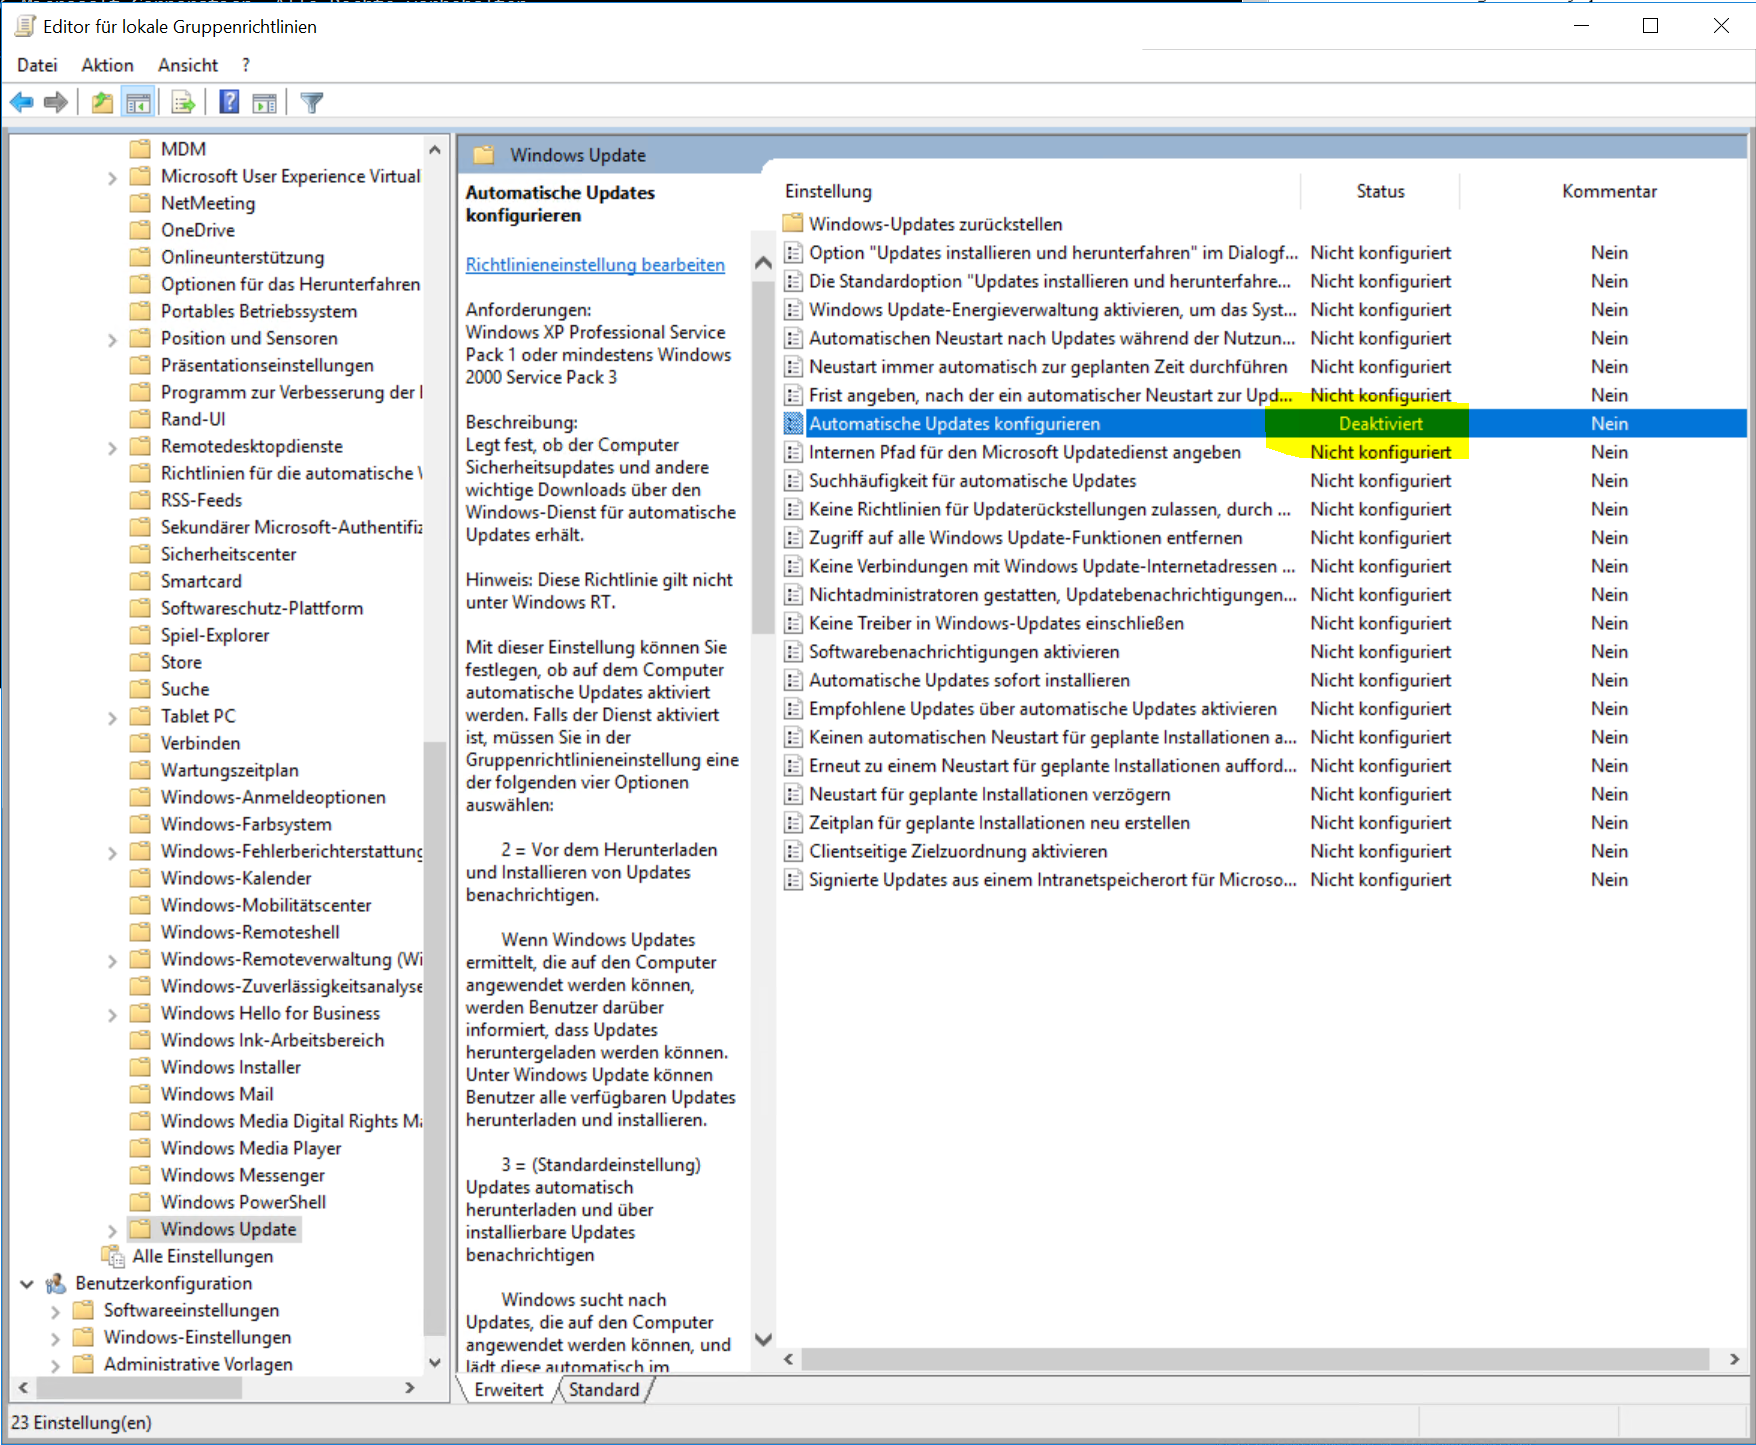
Requirements for the handover to the project technician
The following settings must now be made on the Windows machine:
- Set the host name of the system.
- Set IP address, netmask, default gateway and DNS server. Address must be static or a reservation in DHCP must be available.
- If desired by the customer, add computers to the domain (requires an appropriately authorized domain account and a restart) Must be done in cooperation with the client administrator if necessary.
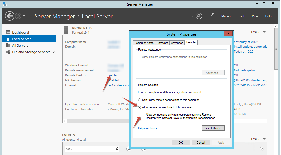
- Activate Remote Desktop. This can be done via the Server Manager:
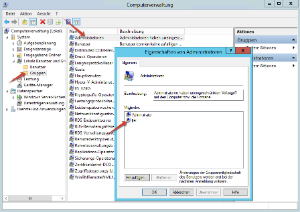
- Create local JTEL user and add it to the local administrator group. This can be done via the computer administration:
ATTENTION: If the customer insists that the jtel programs are run under a domain account because e.g. company or domain policies do not allow local Windows users, this account must be given administrator rights on this specific server. It must therefore be included in the local administrator group. Within the domain, this account needs no further rights. - For virtual machines: Installing the Guest Tools (i.e.: VMware Tools, Hyper-V Integration Services, etc.)
- Install all Windows updates
Tests
After a restart the following should now be checked:
- The system is accessible via RDP.
- It is possible for the project technician to log on to the system as a jtel user via a remote desktop client.
- The project technician can start a process as administrator in such a session.
If the customer installs the operating systems, this is usually the handover point to the project technician.
Adaptation of the operating system
The following further adjustments are now carried out on the Windows machine by the project technician:
- Java
- Compiler Libraries
- https://cdn.jtel.de/downloads/redist/vcredist_9.0_x86_9.0.30729.4148.exe
- https://cdn.jtel.de/downloads/redist/vcredist_2010_x86_10.0.30319.exe
- https://cdn.jtel.de/downloads/redist/vcredist_2012_x64_11.0.61030.exe
- https://cdn.jtel.de/downloads/redist/vcredist_2012_x86_11.0.61030.exe
- https://cdn.jtel.de/downloads/redist/vcredist_2015_x64_14.0.24123.exe
- https://cdn.jtel.de/downloads/redist/vcredist_2015_x86_14.0.24123.exe
- https://cdn.jtel.de/downloads/redist/vcredist_2017_x64_14.16.27027.exe
- https://cdn.jtel.de/downloads/redist/vcredist_2017_x86_14.16.27027.exe
- https://cdn.jtel.de/downloads/redist/ww_icl_redist_ia32_2017.1.143.msi
- https://cdn.jtel.de/downloads/redist/ww_icl_redist_intel64_2017.1.143.msi
- Cygwin environment. The installation is done in several steps:
- https://www.cygwin.com/setup-x86_64.exe
- "Install from Internet"
- Target directory: C:\Cygwin
- Package directory:
C:\Cygwin\packages - Select Packages:
openssh (Area "Net")
ncftp (Area "Net")
curl (Area "Net")
wget (Area "Web")
- https://www.cygwin.com/setup-x86_64.exe
- Git Pre-Requisites:
- https://cdn.jtel.de/downloads/tools/Git-2.16.2-64-bit.exe
IMPORTANT: DO NOT install Git Credential Manager
- https://cdn.jtel.de/downloads/tools/Git-2.16.2-64-bit.exe
- GIT Client:
- https://cdn.jtel.de/downloads/tools/TortoiseGit-2.6.0.0-64bit.msi
Name: jtel Support
email: support@jtel.de
- https://cdn.jtel.de/downloads/tools/TortoiseGit-2.6.0.0-64bit.msi
- Text editor Notepad++
- MySQL ODBC Connector:
NOTE: Due to memory problems in the newer MySQL drivers, it is recommended to work with version 5.2.7 Even in the latest 8.x ODBC drivers, memory problems occur when connections to the database fail. - Google Chrome:
- Windows Explorer settings:
- start explorer(Win+E)
- "View" ... "Options"
- activate "Show all folders"
- activate "File name extensions"
- start explorer(Win+E)
- CMD settings:
- chose "Defaults"
- deactivate "Quick edit mode" This must be done so that services running as cmd are not interrupted by a mouse click.
- "Layout" set the two "width" values to 125
- "Layout" set the "Height" value in the "Window size" area to 50
All downloads
https://cdn.jtel.de/downloads/java/jdk-8u202-windows-x64.exe
https://cdn.jtel.de/downloads/redist/vcredist_9.0_x86_9.0.30729.4148.exe
https://cdn.jtel.de/downloads/redist/vcredist_2010_x86_10.0.30319.exe
https://cdn.jtel.de/downloads/redist/vcredist_2012_x64_11.0.61030.exe
https://cdn.jtel.de/downloads/redist/vcredist_2012_x86_11.0.61030.exe
https://cdn.jtel.de/downloads/redist/vcredist_2015_x64_14.0.24123.exe
https://cdn.jtel.de/downloads/redist/vcredist_2015_x86_14.0.24123.exe
https://cdn.jtel.de/downloads/redist/vcredist_2017_x64_14.16.27027.exe
https://cdn.jtel.de/downloads/redist/vcredist_2017_x86_14.16.27027.exe
https://cdn.jtel.de/downloads/redist/ww_icl_redist_ia32_2017.1.143.msi
https://cdn.jtel.de/downloads/redist/ww_icl_redist_intel64_2017.1.143.msi
https://www.cygwin.com/setup-x86_64.exe
https://cdn.jtel.de/downloads/tools/Git-2.16.2-64-bit.exe
https://cdn.jtel.de/downloads/tools/TortoiseGit-2.6.0.0-64bit.msi
https://cdn.jtel.de/downloads/tools/npp.7.5.6.Installer.exe
https://cdn.jtel.de/downloads/tools/mysql-connector-odbc-5.2.7-win32.msi

(Englisch)
https://www.google.com/chrome/browser/desktop/index.html?system=true&standalone=1&platform=win64&hl=en

(Deutsch)
https://www.google.com/chrome/browser/desktop/index.html?system=true&standalone=1&platform=win64&hl=de
If Chrome is installed and set as your default browser, you can use the following commands to automatically start all downloads (except Chrome)
start https://cdn.jtel.de/downloads/java/jdk-8u202-windows-x64.exe
start https://cdn.jtel.de/downloads/redist/vcredist_9.0_x86_9.0.30729.4148.exe
start https://cdn.jtel.de/downloads/redist/vcredist_2010_x86_10.0.30319.exe
start https://cdn.jtel.de/downloads/redist/vcredist_2012_x64_11.0.61030.exe
start https://cdn.jtel.de/downloads/redist/vcredist_2012_x86_11.0.61030.exe
start https://cdn.jtel.de/downloads/redist/vcredist_2015_x64_14.0.24123.exe
start https://cdn.jtel.de/downloads/redist/vcredist_2015_x86_14.0.24123.exe
start https://cdn.jtel.de/downloads/redist/vcredist_2017_x64_14.16.27027.exe
start https://cdn.jtel.de/downloads/redist/vcredist_2017_x86_14.16.27027.exe
start https://cdn.jtel.de/downloads/redist/ww_icl_redist_ia32_2017.1.143.msi
start https://cdn.jtel.de/downloads/redist/ww_icl_redist_intel64_2017.1.143.msi
start https://www.cygwin.com/setup-x86_64.exe
start https://cdn.jtel.de/downloads/tools/Git-2.16.2-64-bit.exe
start https://cdn.jtel.de/downloads/tools/TortoiseGit-2.6.0.0-64bit.msi
start https://cdn.jtel.de/downloads/tools/npp.7.5.6.Installer.exe
start https://cdn.jtel.de/downloads/tools/mysql-connector-odbc-5.2.7-win32.msi
Ensuring name resolution
Since it is not necessarily to be expected that all computer names and IP addresses can always be reliably resolved in both directions by the customer's DNS servers (often the customer has no idea how to manage this), the host file on each of the machines of the jtel system should also be adapted accordingly so that all machines of the system are known. To do this, the file C:\Windows\System32\drivers\etc\hosts must be edited as administrator. It could look like this:
# Copyright (c) 1993-2009 Microsoft Corp.
#
# This is a sample HOSTS file used by Microsoft TCP/IP for Windows.
#
# This file contains the mappings of IP addresses to host names. Each
# entry should be kept on an individual line. The IP address should
# be placed in the first column followed by the corresponding host name.
# The IP address and the host name should be separated by at least one
# space.
#
# Additionally, comments (such as these) may be inserted on individual
# lines or following the machine name denoted by a '#' symbol.
#
# For example:
#
#      102.54.94.97     rhino.acme.com          # source server
#       38.25.63.10     x.acme.com              # x client host

# localhost name resolution is handled within DNS itself.
#	127.0.0.1       localhost
#	::1             localhost

192.168.1.10	acd-lb		acd-lb.example.com
192.168.1.10	acd-store	acd-store.example.com
192.168.1.21	acd-dbm		acd-dbm.example.com
192.168.1.22	acd-dbs		acd-dbs.example.com
192.168.1.22	acd-dbr		acd-dbr.example.com
192.168.1.31	acd-jb1		acd-jb1.example.com
192.168.1.32	acd-jb2		acd-jb2.example.com
192.168.1.40	acd-tel1	acd-tel1.example.com