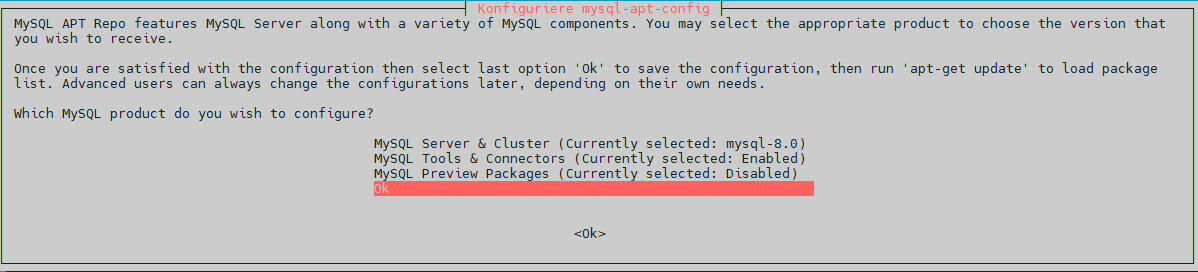
Tâches d'installation communesCes tâches sont effectuées sur tous les serveurs de la base de données, quel que soit le rôle (maître ou esclave) qu'ils doivent jouer. Joindre MAGASINSTORE doit être monté avant d'installer ce rôle. Voir Mounting STORE - All Linux except for STORE (Debian/Win2019). Installer MySQLActivez le référentiel Debian MySQL 8.x et installez-le. Notez que certaines questions vous seront posées. Obtenez simplement MySQL 8.x et dites OK. | Code Block |
|---|
| apt-get install gnupg wget https://dev.mysql.com/get/mysql-apt-config_0.8.19-1_all.deb dpkg -i mysql-apt-config_0.8.19-1_all.deb |
| Warning |
|---|
| title | Debian Buster vs Debian Bullseye |
|---|
| Debian 11 (Bullseye), qui a remplacé Debian 10 (Buster), n'est pas encore prise en charge par l'équipe MySQL. Cependant, les binaires pour buster fonctionnent bien aussi. Cette situation va probablement changer bientôt. Pour cette raison, l'étape supplémentaire suivante est nécessaire, comme indiqué dans le guide d'installation ci-dessous. |
Sélectionnez debian buster comme dépôt souhaité.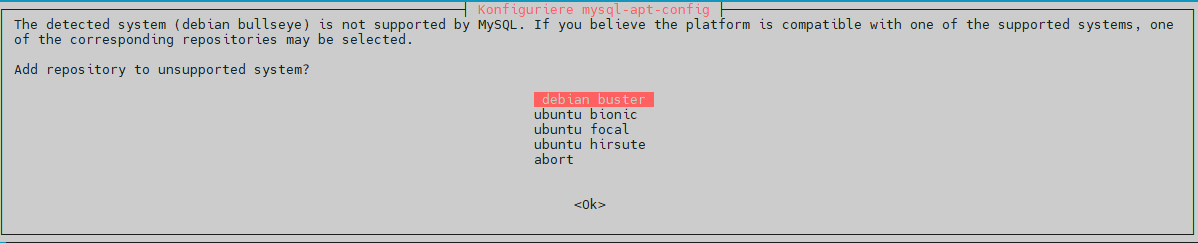 Image Modified Image Modified
Supprimer le fichier temporaire .deb| Code Block |
|---|
| rm -f mysql-apt-config_0.8.19-1_all.deb |
Mettre à jour la liste des paquets et installer le serveur MySQL| Code Block |
|---|
| apt-get update apt-get -y install mysql-server |
L'installation debian vous posera quelques questions lors de l'installation : - Mot de passe de la racine MySQL
- Plugin d'authentification par défaut - passage à "Use Legacy Authentication Method
L'installateur va également démarrer et activer le serveur mysql. L'accès au serveur MySQL est configuré dans le pare-feu : | Translations Ignore |
|---|
| Code Block |
|---|
| ufw allow 3306/tcp |
|
Ou pour une interface ethernet spécifique : | Translations Ignore |
|---|
| Code Block |
|---|
| ufw allow in on eth1 to any port 3306 proto tcp |
|
Fichiers de configurationDebian MySQL 8.x crée un répertoire de configuration /etc/mysql/mysql.conf.d/ lors de son installation. Le fichier de configuration jtel est téléchargé et stocké ici. Ce fichier contient de nombreux paramètres bien commentés qui peuvent être modifiés si nécessaire. Le principal paramètre à modifier est l'utilisation de la RAM du serveur. Voir ci-dessous. | Translations Ignore |
|---|
| Code Block |
|---|
| wget -P /etc/mysql/mysql.conf.d http://cdn.jtel.de/downloads/configs/jtel-enhanced-8-deb.cnf |
|
Pour que le serveur utilise au mieux la RAM disponible, le fichier de configuration /etc/mysql/mysql.conf.d/jtel-enhanced-8-deb.cnf doit être adapté. Le paramètre innodb_buffer_pool_size doit être adapté à environ 3/4 de la RAM disponible, mais un minimum de 3-4 Go doit rester pour l'utilisation d'autres processus. Pour les serveurs dotés de 4 Go de RAM, cette quantité ne doit pas dépasser 2 Go. | Translations Ignore |
|---|
| Code Block |
|---|
| # For 4 GB RAM innodb_buffer_pool_size = 2048M # For 8 GB RAM innodb_buffer_pool_size = 4192M # For 12 GB RAM innodb_buffer_pool_size = 8192M # For 16 GB RAM innodb_buffer_pool_size = 12288M ... # From 16 GB simply take 3/4 of the RAM |
|
Démarrer MySQLLe serveur MySQL est redémarré pour charger tous les paramètres de configuration. | Translations Ignore |
|---|
| Code Block |
|---|
| language | bash |
|---|
| title | Redémarrer le serveur MySQL |
|---|
| systemctl restart mysql |
|
Après le premier redémarrage, l'accès de l'utilisateur doit être configuré. Les commandes suivantes permettent de configurer les utilisateurs requis : | Status |
|---|
| colour | Red |
|---|
| title | Mot de passe de précaution |
|---|
|
| Translations Ignore |
|---|
| Code Block |
|---|
| mysql -u root -p<password> -v -e"CREATE USER 'root'@'%' IDENTIFIED WITH mysql_native_password BY '<password>'" mysql -u root -p<password> -v -e"GRANT ALL ON *.* TO 'root'@'%' WITH GRANT OPTION" mysql -u root -p<password> -v -e"FLUSH PRIVILEGES" |
|
Installer le plug-in UDPEnsuite, le plugin UDP est installé. Ceci est nécessaire pour la communication avec les autres modules logiciels du système, lorsque certaines modifications du DB sont effectuées. L'installation est légèrement différente pour les serveurs maître et esclave. InstallationServeur maître| Translations Ignore |
|---|
| Code Block |
|---|
| cp /home/jtel/shared/JTELCarrierPortal/Libraries/jtel_udf_udpsend/jtel_udf_udpsend.so /usr/lib/mysql/plugin/ chown root:root /usr/lib/mysql/plugin/jtel_udf_udpsend.so chmod 644 /usr/lib/mysql/plugin/jtel_udf_udpsend.so |
|
Serveur esclave
| Translations Ignore |
|---|
| Code Block |
|---|
| cp /home/jtel/shared/JTELCarrierPortal/Libraries/jtel_udf_udpsend/dummy/jtel_udf_udpsend.so /usr/lib/mysql/plugin/ chown root:root /usr/lib/mysql/plugin/jtel_udf_udpsend.so chmod 644 /usr/lib/mysql/plugin/jtel_udf_udpsend.so |
|
ConfigurationPour configurer le plugin, les commandes suivantes sont exécutées : | Status |
|---|
| colour | Red |
|---|
| title | Mot de passe de précaution |
|---|
|
| Translations Ignore |
|---|
| Code Block |
|---|
| mysql -u root -p<password> -v -e"DROP FUNCTION IF EXISTS udpsend" mysql -u root -p<password> -v -e"CREATE FUNCTION udpsend RETURNS STRING SONAME 'jtel_udf_udpsend.so'" |
|
| Note |
|---|
| La configuration du plugin UDP doit être effectuée avant que le serveur ne soit inclus dans une réplication entre serveurs, sinon la réplication échouera. Le plugin UDP doit être installé sur tous les serveurs. |
|