Versions Compared

Key

  • This line was added.
  • This line was removed.
  • Formatting was changed.
Change
Sv translation
languageen

Introduction

This guide walks you through configuring the jtel ACD Client Tab as a custom application within Microsoft Teams, providing seamless integration with the jtel Carrier Portal. By adding this app to your Teams environment, users can access the jtel ACD Client directly within Teams.

The setup process involves creating a Teams app package, uploading it to your Teams admin portal, and configuring it for global use within your organization. This document provides step-by-step instructions on the prerequisites, installation, and setup, along with guidance for updating the app as needed.

Guide Overview

  1. Prerequisites: Setting up the required files for the Teams app.
  2. App Creation: Configuring and zipping the necessary files for upload.
  3. Installation and Setup: Uploading the app to Teams and configuring it within your organization's policies.
  4. Updating the App: Procedures to update the app version and troubleshoot if necessary.

Prerequisites

To begin, create a Teams application by preparing three files

Prerequisites

First, we have to create a Teams Application.
The application should contain three files as follows

:

  1. Icon-color.png
  1. and Icon-outline.png - the application's icons.
  2. manifest.json - the application's configuration file.

Configuring manifest.json

The manifest.json

:

file defines key application properties and configurations, such as app identifiers, permissions, and URLs.

Code Block
titlemanifest.json
{
  "$schema": "https://developer.microsoft.com/en-us/json-schemas/teams/v1.516/MicrosoftTeams.schema.json",
  "manifestVersion": "1.516",
  "id": "$application_id",
  "version": "1.0.0",
  "packageName": "de.jtel.acd.teams",
  "developer": {
    "name": "jtel GmbH",
    "websiteUrl": "https://www.jtel.de/",
    "privacyUrl": "https://www.jtel.de/enprivacy-statement-eu/privacy",
    "termsOfUseUrl": "https://www.jtel.de/en/legal",
    "mpnId": ""
  },
  "name": {
    "short": "jtel ACD",
    "full": "jtel ACD Client Tab"
  },
  "description": {
    "short": "jtel ACD Teams Client",
    "full": "The jtel ACD Client for Microsoft Teams Client provides seamless integration with jtel's Carrier Portal, enabling users to manage carrier operations directly within Teams. Access dashboards, monitor performance metrics, and collaborate with your team efficiently."
  },
  "icons": {
    "outline": "Icon-outline.png",
    "color": "Icon-color.png"
  },
  "accentColor": "#333333",
  "configurableTabs": [],
  "staticTabs": [
    {
      "entityId": "jtelACD",
      "name": "jtel ACD",
      "contentUrl": "$acd_portal_url",
      "websiteUrl": "$acd_portal_url",
      "scopes": [ "team", "personal" ]
    }
  ],
  "bots": [],
  "connectors": [],
  "composeExtensions": [],
  "permissions": [
    "identity",
    "messageTeamMembers"
  ],
  "validDomains": [
    "acd.jtel.de$acd_domain",
	    "jtel.de"
  ],
  "webApplicationInfo": {
    "id": "$app_registration_id",
    "resource": "https://$acd_domain"
  }

Icon-color and Icon-outline are the App icons/logo.

Info

}
  

Replace the following placeholders:

$application_id and
  • $acd_portal_url
in the manifest.json.
  • : The URL for the jtel Carrier Portal (e.g., https://myacdsystem.mydomain.de/CarrierPortal/login/myResellersUID/myClientsUID).
  • $acd_domain: Your portal's domain, such as myacdsystem.mydomain.de.
  • $app_registration_id: The "Application (client) ID" from Microsoft Azure’s App registrations.
Info

Note: Teams only accepts URLs with https.

Note: Include webApplicationInfo only if using Microsoft Entra ID Login.

Once configured, compress the three files into a .zip file for upload

P.S. Here is a tip to generate $application_id:

The following website Free Online GUID Generator allows you to genereate our application ID.

The $acd_portal_url is the acd web URL. The Teams only accepts URL with https.

Finally, zip the three files together.

Example in the attachment:
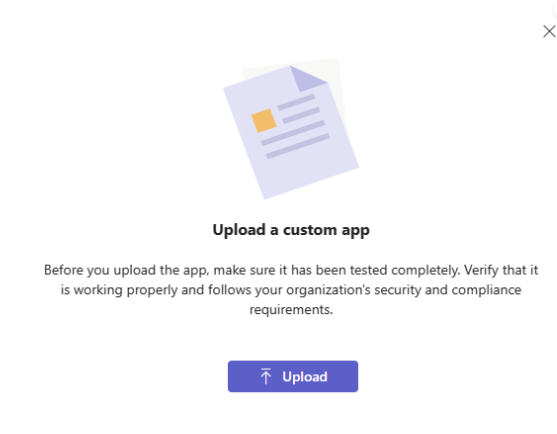
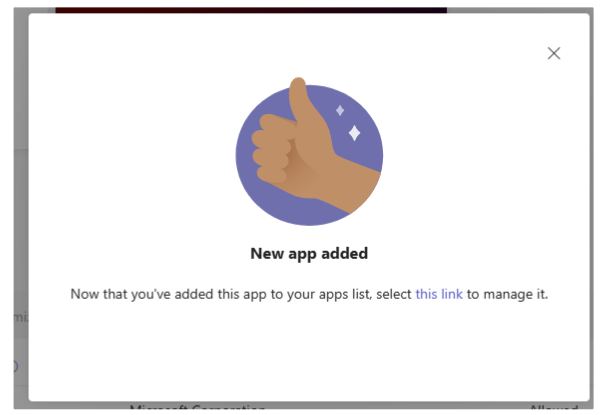
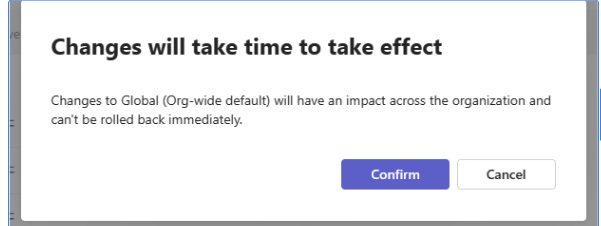
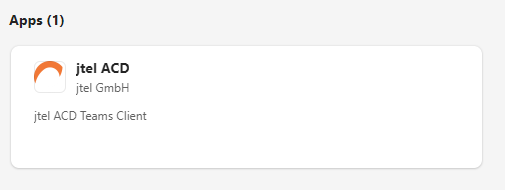
View file
namejtelACDTeamsTab.zip
height150250

Teams App Upload and Configuration

2. To create Teams Apps for your organization, you must be a Global Admin: Login to Microsoft 365 admin center with your admin credential and make sure of the role.

Install jtel app in Teams

  1. Login to Dashboard - Microsoft 365 Teams admin center

  2. Go to Teams apps → Manage apps and click on Upload new app.

  3. Follow the steps to upload the zip file created in the previous steps.


  4. By successful upload, you should see the folloing following popup:


  5. You should be able to see the new app in All apps table by typing the filter jtel ACD


  6. Go to Teams apps → Setup policies and click on Global (Org-wide default)

  7. Under Installed apps click on Add apps and search for the added application by the name “jtel ACD“. Next click on Add.

  8. Under Pinned apps, click on Add apps and add the new application.

  9. Finally click on save button and you should see the following popup:


  10. Restart the Teams application and go to Apps and search for jtel ACD.


  11. Select the new application and click on Add button. The portal will be opened then.

Info
P.S

Tip: The teams application doesn't get the changes

immediatly

immediately. If you don't see the new application in teams application, then verify with the teams web application.

Updating an Existing App

  1. Update the app folder (manifest.json and icons if necessary).
  2. In manifest.json, the id should be the same and the version should be incremented (e.g., from 1.0.0 to 1.0.1 for example).
  3. Zip the folder.
  4. Login to Dashboard - Microsoft Teams admin center.
  5. Go to Teams apps → Manage apps and search for the jtel app.
  6. Open the app and click on New version Upload file on the top of the screen.
  7. Upload the new zip.
Info

If after uploading the zip an error message appears on top of the screen. you can delete the app and reinstall it from scratch.


With these steps, your organization can seamlessly integrate and manage the jtel ACD Client within Microsoft Teams.

Sv translation
languagede

Vorstellung

Dieser Leitfaden führt Sie durch die Konfiguration des jtel ACD Client Tabs als benutzerdefinierte Anwendung in Microsoft Teams, die eine nahtlose Integration mit dem jtel Carrier Portal ermöglicht. Durch Hinzufügen dieser App zu Ihrer Teams-Umgebung können Benutzer direkt in Teams auf den jtel ACD Client zugreifen.

Der Einrichtungsprozess umfasst die Erstellung eines Teams-App-Pakets, das Hochladen in Ihr Teams-Administrationsportal und die Konfiguration für die globale Verwendung in Ihrem Unternehmen. Dieses Dokument enthält Schritt-für-Schritt-Anweisungen zu den Voraussetzungen, der Installation und der Einrichtung sowie eine Anleitung zur Aktualisierung der App bei Bedarf.

Leitfaden Übersicht

  1. Voraussetzungen
Zunächst müssen wir eine Teams-Anwendung erstellen.
Die Anwendung sollte drei Dateien wie folgt enthalten
  1. : Einrichten der erforderlichen Dateien für die Teams-App.
  2. App-Erstellung: Konfigurieren und Komprimieren der erforderlichen Dateien für den Upload.
  3. Installation und Einrichtung: Hochladen der App auf Teams und Konfigurieren der App innerhalb der Richtlinien Ihres Unternehmens.
  4. Aktualisieren der App: Verfahren zur Aktualisierung der App-Version und zur Fehlerbehebung, falls erforderlich.

Voraussetzungen

Erstellen Sie zunächst eine Teams-Anwendung, indem Sie drei Dateien vorbereiten:

  1. Icon-color.png
  1. und Icon-outline.png - die Icons der Anwendung.
  2. manifest.json
:
  1. - die Konfigurationsdatei der Anwendung.
Code Block
titlemanifest.json
{
  "$schema": "https://developer.microsoft.com/en-us/json-schemas/teams/v1.516/MicrosoftTeams.schema.json",
  "manifestVersion": "1.516",
  "id": "$application_id",
  "version": "1.0.0",
  "packageName": "de.jtel.acd.teams",
  "developer": {
    "name": "jtel GmbH",
    "websiteUrl": "https://www.jtel.de/",
    "privacyUrl": "https://www.jtel.de/enprivacy-statement-eu/privacy",
    "termsOfUseUrl": "https://www.jtel.de/en/legal",
    "mpnId": ""
  },
  "name": {
    "short": "jtel ACD",
    "full": "jtel ACD Client Tab"
  },
  "description": {
    "short": "jtel ACD Teams Client",
    "full": "The jtel ACD Client for Microsoft Teams provides seamless integration with jtel's Carrier Portal, enabling users to manage carrier operations directly within Teams Client. Access dashboards, monitor performance metrics, and collaborate with your team efficiently."
  },
  "icons": {
    "outline": "Icon-outline.png",
    "color": "Icon-color.png"
  },
  "accentColor": "#333333",
  "configurableTabs": [],
  "staticTabs": [
    {
      "entityId": "jtelACD",
      "name": "jtel ACD",
      "contentUrl": "$acd_portal_url",
      "websiteUrl": "$acd_portal_url",
      "scopes": [ "team", "personal" ]
    }
  ],
  "bots": [],
  "connectors": [],
  "composeExtensions": [],
  "permissions": [
    "identity",
    "messageTeamMembers"
  ],
  "validDomains": [
    "acd.jtel.de$acd_domain",
	    "jtel.de"
  ],
  "webApplicationInfo": {
    "id": "$app_registration_id",
}

Icon-color und Icon-outline sind die App-Symbole/Logos.

Info

Ändern Sie $application_id und $acd_portal_url in der manifest.json.

P.S. Hier ist ein Tipp zur Erstellung $application_id:

Die folgende Website: Free Online GUID Generator ermöglicht es Ihnen, unsere Application ID zu vererben..

Die $acd_portal_url ist die acd-Web-URL. Die Teams akzeptieren nur URL mit https.

Zum Schluss zippen Sie die drei Dateien zusammen.

    "resource": "https://$acd_domain"
  }
}

Ersetzen Sie die folgenden Platzhalter:

  • $application_id: Die eindeutige ID für Ihre Anwendung. Generieren Sie eine mit einem kostenlosen Online-GUID-Generator.
  • $acd_portal_url: Die URL für das jtel Carrier Portal (z.B. https://myacdsystem.mydomain.de/CarrierPortal/login/myResellersUID/myClientsUID).
  • $acd_domain: Die Domain Ihres Portals, z. B. myacdsystem.mydomain.de.
  • $app_registration_id: Die „Application (client) ID“ aus den App-Registrierungen von Microsoft Azure.
Info

Hinweis: Teams akzeptiert nur URLs mit https.

Hinweis: Fügen Sie webApplicationInfo nur ein, wenn Sie Microsoft Entra ID Login verwenden.

Nach der Konfiguration komprimieren Sie die drei Dateien zum Hochladen in eine .zip-Datei.

Beispiel Ein Beispiel finden Sie im Anhang:

View file
namejtelACDTeamsTab.zip
height150250

Teams App Upload und Konfiguration

2. Um Teams Apps für Ihr Unternehmen Ihre Organisation zu erstellen, müssen Sie ein Global Admin sein.Anmeldung bei   : Melden Sie sich im Microsoft 365 admin center mit Ihren Admin-Zugangsdaten an und vergewissern Sie sich über die der Rolle.

jtel-App in Teams installieren

  1. Anmeldung bei Microsoft 365 Anmeldung bei Dashboard - Microsoft Teams admin center

  2. Gehen Sie zum Teams apps → Manage apps und klicken Sie auf Upload new app.

  3. Befolgen Sie die Schritte zum Hochladen der in den vorherigen Schritten erstellten Zip-Datei.


  4. Nach erfolgreichem Upload sollten Sie folgendes Popup sehen:


  5. Sie sollten die neue Anwendung in der Tabelle All apps sehen können, indem Sie den Filter jtel ACD eingeben


  6. Gehen Sie zum  Teams apps → Setup policies und klicken Sie auf Global (Org-wide default)

  7. Unter Installed apps klicken Sie auf Add apps und suchen Sie die hinzugefügte Anwendung mit dem Namen "jtel ACD". Klicken Sie anschließend auf Hinzufügen.

  8. Klicken Sie unter Pinned apps auf Add apps und fügen Sie die neue Anwendung hinzu.

  9. Klicken Sie abschließend auf die Schaltfläche "Speichern" und Sie sollten das folgende Popup-Fenster sehen:


  10. Starten Sie die Teams neu, gehen Sie zu Apps und suchen Sie nach jtel ACD.


  11. Wählen Sie die neue Anwendung aus und klicken Sie auf die Schaltfläche Hinzufügen. Das Portal wird dann geöffnet.

Info
P.S

Tipp: Die Teams-Anwendung erhält die Änderungen nicht sofort. Wenn Sie die neue App nicht in der Teams-Anwendung sehen, überprüfen Sie sie mit der Teams-Webanwendung.

Vorhandene App aktualisieren

  1. Aktualisieren Sie den Anwendungsordner (manifest.json und ggf. Symbole).
  2. In manifest.json sollte die id gleich bleiben und die version erhöht werden (z. B. von 1.0.0 auf 1.0.1).
  3. Komprimieren Sie den Ordner.
  4. Melden Sie sich bei Dashboard - Microsoft Teams admin center.
  5. Gehen Sie zu Teams-Apps → Apps verwalten und suchen Sie nach der jtel-App.
  6. Öffnen Sie die App und klicken Sie oben auf dem Bildschirm auf New version Upload file .
  7. Laden Sie die neue Zip-Datei hoch.
Info

Wenn nach dem Hochladen der Zip-Datei eine Fehlermeldung am oberen Bildschirmrand erscheint, können Sie die Anwendung löschen und von Grund auf neu installieren.

Mit diesen Schritten kann Ihr Unternehmen den jtel ACD Client nahtlos in Microsoft Teams integrieren und verwalten.