Versions Compared

Key

  • This line was added.
  • This line was removed.
  • Formatting was changed.
Comment: Content imported from a Scroll Translations translation file.

...

Sv translation
languagede

Table of Contents
maxLevel2
printablefalse

Unterstützte Windows Versionen

VersionUnterstütztEmpfehlung
Windows Server 2008Nein
Windows Server 2008 R2Ja

Bei Neuinstallationen nicht mehr nutzen.
Update auf neue Version einplanen.

Windows Server 2012Nein
Windows Server 2012 R2Ja

Bei Neuinstallationen nicht mehr nutzen.
Update auf neue Version einplanen.

Windows Server 2016Nein
Windows Server 2016 R2Ja
Windows Server 2019Ja

Hinweis

Für die Installation der SIP Treiber unter Windows Server 2016 R2 sowie Windows Server 2019 muss das sogenannte Secure Boot deaktiviert werden. Hinweise wie dies geschehen kann finden Sie bei der Dokumentation Ihrer jeweiligen virtuellen Umgebung.

Aufheben vom BIOS Lock bei OEM Versionen von Windows Server

Manchmal bei der Installation in VMWare mit Nutzung eines Images von einer OEM Version von Windows Server, kann ein Fehler entstehen, ungefähr so:

Um dieses zu beheben, folgendes machen:

Translations Ignore


Code Block
With VSphere Client installed navigate to the VM and edit settings. 
From the "Options" tab navigate to Advanced and click General. 
Configure Parameters on the right and add a new row to the parameters called "smbios.ReflectHost" with a value of "true." 
Do this with the VM off, if it's on then restart the VM. 
Lock is lifted. 


Proxy Server

Manche Anwendungen (beispielsweise GIT) benötigen die explizite Angabe eines Proxies. 

Dies kann mit folgenden Befehl ermittelt werden, falls die Einstellungen automatisch sind:

Translations Ignore


Code Block
netsh winhttp show proxy


Grundinstallation des Betriebssystems

Die Installation von Windows Server erfolgt ohne besondere Vorkehrungen oder Anpassungen von einer Installations-DVD bzw. ISO-Datei.

Achtung: die Version MIT Grafische Oberfläche muss installiert werden.

Während der Installation wird das System mehrmals neu gestartet. Nach Fertigstellung der Installation verlangt das System in der Regel nach einem Passwort für den lokalen Administrator Benutzer. Ist dies festgelegt, befindet man sich im normalen Desktop. Da die Installationsroutine keine große Einstellungen erlaubt, wurden verschiedene gängige Merkmale bereits automatisch eingestellt:

  • Rechnername: Es wurde ein Hostname automatisch erzeugt.
  • Netzwerkkonfiguration: Der Windows-Installer konfiguriert die gefunden Netzwerkkarten automatisch mit DHCP. Steht ein DHCP Server zur Verfügung, so ist das installierte Windows unter einer dynamisch zugewiesenen Adresse erreichbar. Steht ein solcher nicht zur Verfügung, so muss der Netzwerkadapter so konfiguriert werden, dass er unter einer bekannten Adresse im Netzwerk funktionsfähig ist.

Windows Updates

  • Bitte solange Windows Updates durchführen, bis wirklich keine Updates mehr gefunden werden. 
  • Sollte dies vom Projekt-Techniker durchgeführt werden müssen, stellt dies ein Mehraufwand dar!
  • Anschließend, sollten automatische Windows Updates ausgeschaltet werden
    • Unter Windows Server 2012 R2 ist die Einstellung über "Windows Updates" verfügbar und kann einfach angeklickt werden.
    • Unter Windows Server 2016 ist diese Option weiter versteckt. 
      Windows + R drücken, und gpedit.msc eingeben. 
      Dann zu folgenden Zweig navigieren:
      Computerkonfiguration ... Administrative Vorlagen ... Windows-Komponenten ... Windows Update. Hier die Option entsprechend ausschalten.


Voraussetzungen für die Übergabe an den Projekt-Techniker

Folgende Einstellungen müssen nun auf der Windows-Maschine getätigt werden:

  1. Hostname des Systems einstellen.
  2. IP Adresse, Netzmaske, Standardgateway und DNS Server einstellen. Adresse muss statisch sein oder eine Reservierung im DHCP muss vorliegen.
  3. Falls vom Kunden gewollt, Rechner der Domäne hinzufügen (erfordert einen entsprechend berechtigten Domänen-Account und einen Neustart). Muss gegebenenfalls in Zusammenarbeit mit dem Kundenadministrator erfolgen.
  4. Remote Desktop aktivieren. Dies kann über den Server Manager erledigt werden: 
  5. Lokalen JTEL-Benutzer erzeugen und in die lokale Administrator-Gruppe aufnehmen. Dies kann über die Computer-Verwaltung erledigt werden:

    ACHTUNG: Sollte der Kunde darauf bestehen, dass die jtel-Programme unter einem Domänen Account ausgeführt werden weil z.B. die Unternehmens- bzw. Domänen-Richtlinien keine lokale Windows-Benutzer zulassen, so muss dieser Account Administrator-Rechte auf diesem spezifischen Server erhalten. Dieser muss also in der lokalen Administrator Gruppe aufgenommen werden. Innerhalb der Domäne braucht dieser Account keine weiteren Rechte.
  6. Bei virtuellen Maschinen: Installation der Guest Tools (z.B.: VMware Tools, Hyper-V Integration Services, etc.)
  7. Alle Windows Updates installieren

Tests

Nach einem Neustart sollte nun folgendes geprüft werden:

  1. Das System ist über RDP erreichbar.
  2. Es ist für den Projekt-Techniker möglich, sich über einen Remote Desktop Client als jtel-Benutzer an das System anzumelden.
  3. Der Projekt-Techniker kann in einer solchen Sitzung einen Prozess als Administrator starten.

Installiert der Kunde die Betriebssysteme, so ist dies üblicherweise der Übergabepunkt an den Projekt-Techniker.

Anpassung des Betriebssystems

Folgende weitere Anpassungen erfolgen nun auf der Windows Maschine durch den Projekt-Techniker:

  1. Java
    1. https://cdn.jtel.de/downloads/java/jdk-8u202-windows-x64.exe
  2. Compiler-Bibliotheken
    1. https://cdn.jtel.de/downloads/redist/vcredist_9.0_x86_9.0.30729.4148.exe
    2. https://cdn.jtel.de/downloads/redist/vcredist_2010_x86_10.0.30319.exe
    3. https://cdn.jtel.de/downloads/redist/vcredist_2012_x64_11.0.61030.exe
    4. https://cdn.jtel.de/downloads/redist/vcredist_2012_x86_11.0.61030.exe
    5. https://cdn.jtel.de/downloads/redist/vcredist_2015_x64_14.0.24123.exe
    6. https://cdn.jtel.de/downloads/redist/vcredist_2015_x86_14.0.24123.exe
    7. https://cdn.jtel.de/downloads/redist/vcredist_2017_x64_14.16.27027.exe
    8. https://cdn.jtel.de/downloads/redist/vcredist_2017_x86_14.16.27027.exe
    9. https://cdn.jtel.de/downloads/redist/ww_icl_redist_ia32_2017.1.143.msi
    10. https://cdn.jtel.de/downloads/redist/ww_icl_redist_intel64_2017.1.143.msi
  3. Cygwin Umgebung. Die Installation erfolgt in mehreren Schritten:
    1. https://www.cygwin.com/setup-x86_64.exe
      1. "Install from Internet" 
      2. Zielverzeichnis: C:\Cygwin
      3. Package directory: C:\Cygwin\packages
      4. Select Packages:
        openssh (Bereich "Net")
        ncftp (Bereich "Net")
        curl (Bereich "Net")
        wget (Bereich "Web")
  4. Git Pre-Requisites:
    1. https://cdn.jtel.de/downloads/tools/Git-2.16.2-64-bit.exe
      WICHTIG: Git Credential Manager NICHT installieren
  5. GIT Client: 
    1. https://cdn.jtel.de/downloads/tools/TortoiseGit-2.6.0.0-64bit.msi
      Name: jtel Support
      E-Mail: support@jtel.de
  6. Text-Editor Notepad++
    1. https://cdn.jtel.de/downloads/tools/npp.7.5.6.Installer.exe

  7. MySQL ODBC Connector:
    HINWEIS: Wegen Speicher-Probleme in den neueren MySQL Treibern wird empfohlen, mit der Version 5.2.7 zu arbeiten. Auch in den neuesten 8.x ODBC Treibern treten Speicherprobleme auf, wenn Verbindungen zu der Datenbank abbrechen.
    1. https://cdn.jtel.de/downloads/tools/mysql-connector-odbc-5.2.7-win32.msi
  8. Google Chrome: 
    1. (Englisch) https://www.google.com/chrome/browser/desktop/index.html?system=true&standalone=1&platform=win64&hl=en
    2. (Deutsch) https://www.google.com/chrome/browser/desktop/index.html?system=true&standalone=1&platform=win64&hl=de
  9. Windows Explorer Einstellungen:
    1. Explorer starten (Win+E)
      1. "Ansicht" bzw. "View" ... "Optionen" bzw. "Options"
      2. "Alle Ordner anzeigen" bzw. "Show all folders" aktivieren
      3. "Dateinamenerweiterungen" bzw. "File name extensions" aktivieren
  10. CMD Einstellungen:
    1. "Defaults" bzw. "Defaults" wählen
    2. "Quick-Edit Modus" deaktivieren. Dies muss sein, damit Dienste die als cmd laufen nicht durch ein Mausklick unterbrochen werden.
    3. "Layout" die beiden Werte "Breite" auf 125 einstellen.
    4. "Layout" den Wert "Höhe" im Bereich "Fenstergröße" auf 50 einstellen

Alle Downloads

Translations Ignore


Code Block
titleAlle Downloads
https://cdn.jtel.de/downloads/java/jdk-8u202-windows-x64.exe
https://cdn.jtel.de/downloads/redist/vcredist_9.0_x86_9.0.30729.4148.exe
https://cdn.jtel.de/downloads/redist/vcredist_2010_x86_10.0.30319.exe
https://cdn.jtel.de/downloads/redist/vcredist_2012_x64_11.0.61030.exe
https://cdn.jtel.de/downloads/redist/vcredist_2012_x86_11.0.61030.exe
https://cdn.jtel.de/downloads/redist/vcredist_2015_x64_14.0.24123.exe
https://cdn.jtel.de/downloads/redist/vcredist_2015_x86_14.0.24123.exe
https://cdn.jtel.de/downloads/redist/vcredist_2017_x64_14.16.27027.exe
https://cdn.jtel.de/downloads/redist/vcredist_2017_x86_14.16.27027.exe
https://cdn.jtel.de/downloads/redist/ww_icl_redist_ia32_2017.1.143.msi
https://cdn.jtel.de/downloads/redist/ww_icl_redist_intel64_2017.1.143.msi
https://www.cygwin.com/setup-x86_64.exe
https://cdn.jtel.de/downloads/tools/Git-2.16.2-64-bit.exe
https://cdn.jtel.de/downloads/tools/TortoiseGit-2.6.0.0-64bit.msi
https://cdn.jtel.de/downloads/tools/npp.7.5.6.Installer.exe
https://cdn.jtel.de/downloads/tools/mysql-connector-odbc-5.2.7-win32.msi

(Englisch)
https://www.google.com/chrome/browser/desktop/index.html?system=true&standalone=1&platform=win64&hl=en

(Deutsch)
https://www.google.com/chrome/browser/desktop/index.html?system=true&standalone=1&platform=win64&hl=de


 Wenn Chrome installiert und als Standardbrowser eingerichtet ist, können Sie folgende Befehle nutzen um alle Downloads (bis auf Chrome) automatisch zu starten:

Translations Ignore


Code Block
start https://cdn.jtel.de/downloads/java/jdk-8u202-windows-x64.exe
start https://cdn.jtel.de/downloads/redist/vcredist_9.0_x86_9.0.30729.4148.exe
start https://cdn.jtel.de/downloads/redist/vcredist_2010_x86_10.0.30319.exe
start https://cdn.jtel.de/downloads/redist/vcredist_2012_x64_11.0.61030.exe
start https://cdn.jtel.de/downloads/redist/vcredist_2012_x86_11.0.61030.exe
start https://cdn.jtel.de/downloads/redist/vcredist_2015_x64_14.0.24123.exe
start https://cdn.jtel.de/downloads/redist/vcredist_2015_x86_14.0.24123.exe
start https://cdn.jtel.de/downloads/redist/vcredist_2017_x64_14.16.27027.exe
start https://cdn.jtel.de/downloads/redist/vcredist_2017_x86_14.16.27027.exe
start https://cdn.jtel.de/downloads/redist/ww_icl_redist_ia32_2017.1.143.msi
start https://cdn.jtel.de/downloads/redist/ww_icl_redist_intel64_2017.1.143.msi
start https://www.cygwin.com/setup-x86_64.exe
start https://cdn.jtel.de/downloads/tools/Git-2.16.2-64-bit.exe
start https://cdn.jtel.de/downloads/tools/TortoiseGit-2.6.0.0-64bit.msi
start https://cdn.jtel.de/downloads/tools/npp.7.5.6.Installer.exe
start https://cdn.jtel.de/downloads/tools/mysql-connector-odbc-5.2.7-win32.msi


Sicherstellen der Namensauflösung

Da nicht unbedingt damit zu rechnen ist, dass alle Rechnernamen und IP Adressen zuverlässig durch die DNS Server des Kunden immer in beiden Richtungen aufgelöst werden können (oft hat der Kunde keine Ahnung, wie er das verwalten soll), sollte auf jede der Maschinen des jtel-Systems auch die Hostdatei entsprechend angepasst sein, dass alle Maschinen des Systems dadurch bekannt sind. Dafür muss die Datei C:\Windows\System32\drivers\etc\hosts als Administrator editiert werden. Das könnte dann so aussehen:

Translations Ignore


Code Block
titleC:\Windows\System32\drivers\etc\hosts
# Copyright (c) 1993-2009 Microsoft Corp.
#
# This is a sample HOSTS file used by Microsoft TCP/IP for Windows.
#
# This file contains the mappings of IP addresses to host names. Each
# entry should be kept on an individual line. The IP address should
# be placed in the first column followed by the corresponding host name.
# The IP address and the host name should be separated by at least one
# space.
#
# Additionally, comments (such as these) may be inserted on individual
# lines or following the machine name denoted by a '#' symbol.
#
# For example:
#
#      102.54.94.97     rhino.acme.com          # source server
#       38.25.63.10     x.acme.com              # x client host

# localhost name resolution is handled within DNS itself.
#	127.0.0.1       localhost
#	::1             localhost

192.168.1.10	acd-lb		acd-lb.example.com
192.168.1.10	acd-store	acd-store.example.com
192.168.1.21	acd-dbm		acd-dbm.example.com
192.168.1.22	acd-dbs		acd-dbs.example.com
192.168.1.22	acd-dbr		acd-dbr.example.com
192.168.1.31	acd-jb1		acd-jb1.example.com
192.168.1.32	acd-jb2		acd-jb2.example.com
192.168.1.40	acd-tel1	acd-tel1.example.com


Sv translation
languagefr

Table of Contents
maxLevel2
printablefalse

Versions Windows supportées

VersionSoutientRecommandation
Windows Server 2008Non
Windows Server 2008 R2Oui

Ne pas utiliser pour de nouvelles installations.
Programmer la mise à jour vers la nouvelle version.

Windows Server 2012Non
Windows Server 2012 R2Oui

Ne pas utiliser pour de nouvelles installations.
Programmer la mise à jour vers la nouvelle version.

Windows Server 2016Non
Windows Server 2016 R2Oui
Windows Server 2019Oui

Note

Pour installer les pilotes SIP sous Windows Server 2016 R2 et Windows Server 2019, il faut désactiver le Secure Boot. Consultez la documentation de votre environnement virtuel pour savoir comment procéder.

Suppression du verrouillage du BIOS sur les versions OEM de Windows Server

Parfois, lors de l'installation dans VMWare en utilisant une image provenant d'une version OEM de Windows Server, une erreur peut se produire, comme celle-ci :
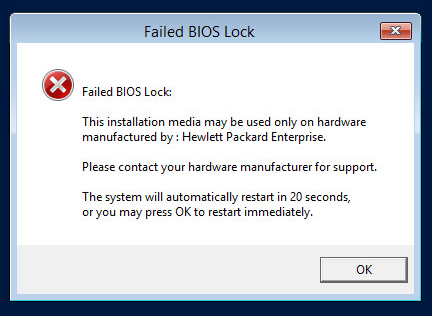
Image Added

Pour y remédier, procédez comme suit:

Translations Ignore


Code Block
Lorsque le client VSphere est installé, naviguez vers la VM et modifiez les paramètres. Dans l'onglet "Options", naviguez jusqu'à "Avancé" et cliquez sur "Général". Configurer les paramètres sur la droite et ajouter une nouvelle ligne aux paramètres appelée "smbios.ReflectHost" avec une valeur de "true". Faites-le avec la VM éteinte, si elle est allumée, redémarrez la VM. Le verrou est levé. 


Serveur proxy

Certaines applications (telles que GIT) nécessitent la spécification explicite d'un proxy. 

Ceci peut être déterminé avec la commande suivante si les réglages sont automatiques

Translations Ignore


Code Block
netsh winhttp show proxy


Installation de base du système d'exploitation

Windows Server est installé à partir d'un DVD d'installation ou d'un fichier ISO sans aucune précaution ou ajustement particulier.

Attention : la version AVEC interface utilisateur graphique doit être installée.

Au cours de l'installation, le système est redémarré plusieurs fois. Une fois l'installation terminée, le système demande généralement un mot de passe pour l'utilisateur de l'administrateur local. Si cette option est activée, vous êtes dans le bureau normal. Comme la routine d'installation ne permet pas de réglages importants, plusieurs caractéristiques communes ont déjà été définies automatiquement :

  • Nom d'hôte : Un nom d'hôte a été généré automatiquement.
  • Configuration du réseau : Le programme d'installation de Windows configure automatiquement les cartes réseau trouvées avec le DHCP. Si un serveur DHCP est disponible, le Windows installé peut être atteint sous une adresse attribuée dynamiquement. Si une telle adresse n'est pas disponible, l'adaptateur réseau doit être configuré de manière à pouvoir fonctionner sous une adresse connue sur le réseau.

Mises à jour Windows

  • Veuillez continuer à mettre à jour Windows jusqu'à ce que vous ne trouviez plus de mises à jour. 
  • Si cela doit être fait par le technicien du projet, cela représente un travail supplémentaire.
  • Ensuite, les mises à jour automatiques de Windows doivent être désactivées
    • Sur Windows Server 2012 R2, le paramètre est disponible via "Mises à jour Windows" et peut être facilement cliqué.
    • Sous Windows Server 2016, cette option est plus cachée. 
      Appuyez sur Windows + R et entrez gpedit.msc. 
      Ensuite, naviguez jusqu'à la branche suivante :
      Configuration de l'ordinateur ... Modèles administratifs ... Composants de Windows ... Windows Update. Ici, désactivez l'option en conséquence.
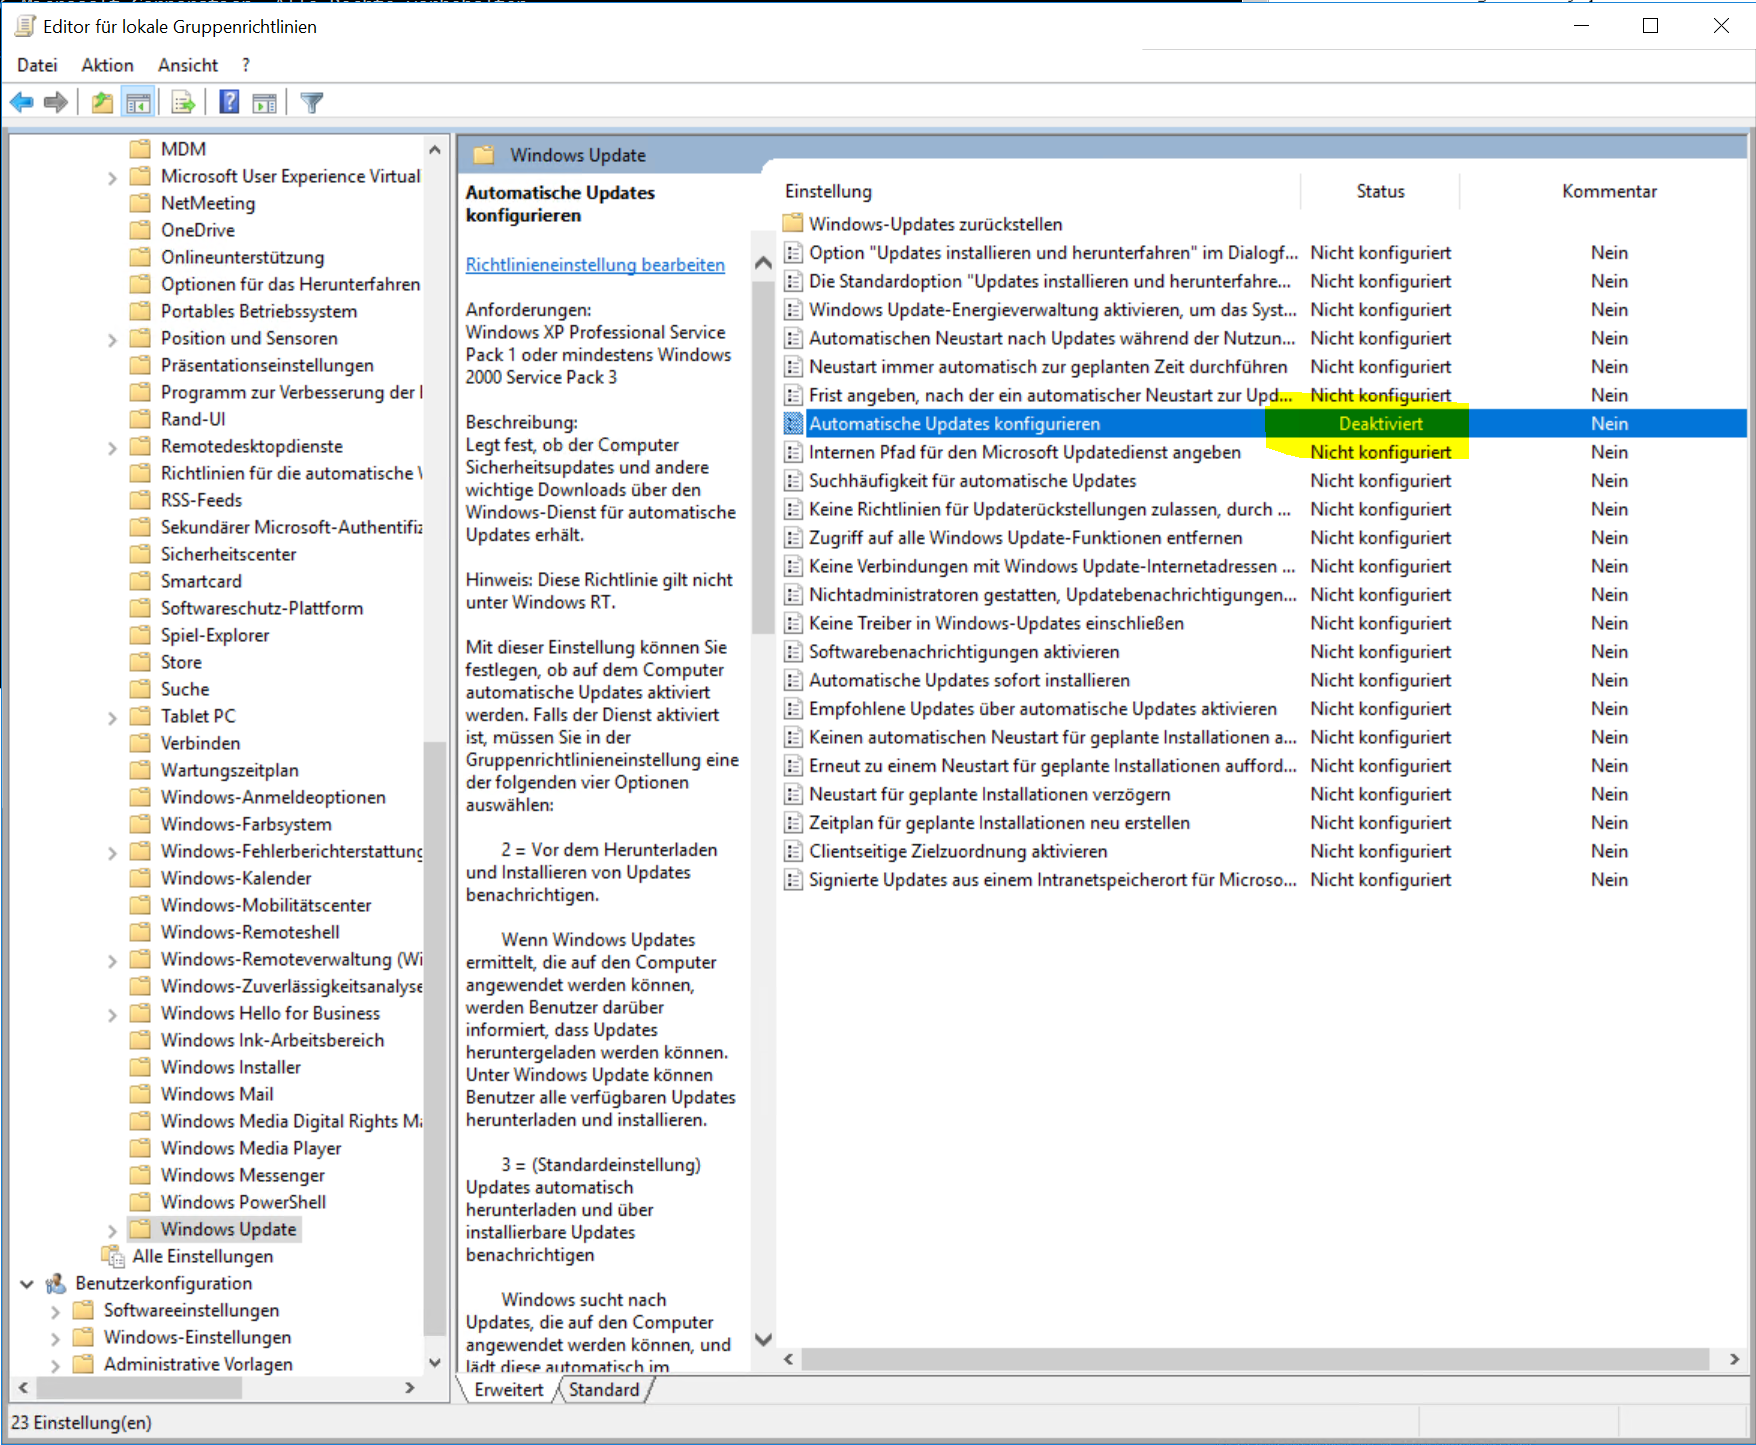
      Image Added

Conditions requises pour la remise au technicien du projet

Les réglages suivants doivent maintenant être effectués sur la machine Windows:

  1. Définissez le nom d'hôte du système.
  2. Définissez l'adresse IP, le masque de réseau, la passerelle par défaut et le serveur DNS. L'adresse doit être statique ou une réservation dans le DHCP doit être disponible.
  3. Si le client le souhaite, ajouter des ordinateurs au domaine (nécessite un compte de domaine dûment autorisé et un redémarrage) Doit être fait en coopération avec l'administrateur du client si nécessaire.
  4. Activer le bureau à distance. Cela peut être fait via le gestionnaire de serveur: 
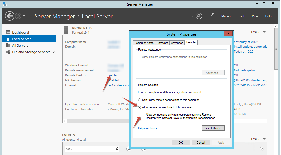
    Image Added
  5. Créez un utilisateur JTEL local et ajoutez-le au groupe d'administrateurs locaux. Cela peut se faire via l'administration informatique :
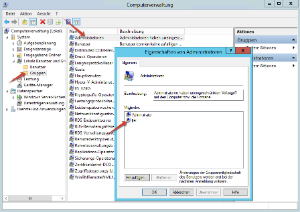
    Image Added
    ATTENTION: Si le client insiste pour que les programmes jtel soient exécutés sous un compte de domaine parce que, par exemple, les politiques de l'entreprise ou du domaine n'autorisent pas les utilisateurs locaux de Windows, ce compte doit se voir attribuer des droits d'administrateur sur ce serveur spécifique. Il doit donc être inclus dans le groupe administrateur local. Dans le domaine, ce compte n'a pas besoin de droits supplémentaires.
  6. Pour les machines virtuelles : L'installation des outils pour les invités (c'est-à-dire VMware Tools, Hyper-V Integration Services, etc.)
  7. Installer toutes les mises à jour de Windows

Tests

Après un redémarrage, il faut maintenant vérifier ce qui suit:

  1. Le système est accessible via RDP.
  2. Il est possible pour le technicien du projet de se connecter au système en tant qu'utilisateur jtel via un client de bureau à distance.
  3. Le technicien du projet peut lancer un processus en tant qu'administrateur dans une telle session.

Si le client installe les systèmes d'exploitation, c'est généralement le point de transfert au technicien du projet.

Adaptation du système d'exploitation

Les réglages supplémentaires suivants sont maintenant effectués sur la machine Windows par le technicien du projet:

  1. Java
    1. https://cdn.jtel.de/downloads/java/jdk-8u202-windows-x64.exe
  2. Bibliothèques des compilateurs
    1. https://cdn.jtel.de/downloads/redist/vcredist_9.0_x86_9.0.30729.4148.exe
    2. https://cdn.jtel.de/downloads/redist/vcredist_2010_x86_10.0.30319.exe
    3. https://cdn.jtel.de/downloads/redist/vcredist_2012_x64_11.0.61030.exe
    4. https://cdn.jtel.de/downloads/redist/vcredist_2012_x86_11.0.61030.exe
    5. https://cdn.jtel.de/downloads/redist/vcredist_2015_x64_14.0.24123.exe
    6. https://cdn.jtel.de/downloads/redist/vcredist_2015_x86_14.0.24123.exe
    7. https://cdn.jtel.de/downloads/redist/vcredist_2017_x64_14.16.27027.exe
    8. https://cdn.jtel.de/downloads/redist/vcredist_2017_x86_14.16.27027.exe
    9. https://cdn.jtel.de/downloads/redist/ww_icl_redist_ia32_2017.1.143.msi
    10. https://cdn.jtel.de/downloads/redist/ww_icl_redist_intel64_2017.1.143.msi
  3. Environnement Cygwin. L'installation se fait en plusieurs étapes:
    1. https://www.cygwin.com/setup-x86_64.exe
      1. "Installer à partir d'Internet" 
      2. Répertoire Cible : C:\Cygwin
      3. Répertoire des paquets: C:\Cygwin\packages
      4. Sélectionner les paquets:
        openssh (Zone "Net")
        ncftp (Zone "Net")
        curl (Zone "Net")
        wget (Zone "Web")
  4. Git Pre-Requisites:
    1. https://cdn.jtel.de/downloads/tools/Git-2.16.2-64-bit.exe
      IMPORTANT : N'installez pas le Git Credential Manager
  5. GIT Client: 
    1. https://cdn.jtel.de/downloads/tools/TortoiseGit-2.6.0.0-64bit.msi
      Nom: jtel Support
      email: support@jtel.de
  6. Editeur de texte Notepad++
    1. https://cdn.jtel.de/downloads/tools/npp.7.5.6.Installer.exe

  7. Connecteur ODBC MySQL:
    NOTE : En raison de problèmes de mémoire dans les pilotes MySQL les plus récents, il est recommandé de travailler avec la version 5.2.7 Même dans les derniers pilotes ODBC 8.x, des problèmes de mémoire se produisent lorsque les connexions à la base de données échouent.
    1. https://cdn.jtel.de/downloads/tools/mysql-connector-odbc-5.2.7-win32.msi
  8. Google Chrome: 
    1. (Anglais) https://www.google.com/chrome/browser/desktop/index.html?system=true&standalone=1&platform=win64&hl=en
    2. (Allemand) https://www.google.com/chrome/browser/desktop/index.html?system=true&standalone=1&platform=win64&hl=de
  9. Paramètres de l'explorateur Windows:
    1.  démarrer l'explorateur (Win+E)
      1.  "Voir" ...  "Options"
      2. activer "Afficher tous les dossiers" 
      3. activer les "extensions de noms de fichiers"
  10. Paramètres CMD:
    1. a choisi "Défauts" 
    2. désactiver le "Mode d'édition rapide »  Ceci doit être fait de manière à ce que les services fonctionnant en mode cmd ne soient pas interrompus par un clic de souris.
    3. "Mise en page" fixe les deux valeurs de "largeur" à 125
    4. "Mise en page" fixe la valeur de la "Hauteur" dans la zone "Taille de la fenêtre" à 50

Tous les téléchargements

Translations Ignore


Code Block
titleTous les téléchargements
https://cdn.jtel.de/downloads/java/jdk-8u202-windows-x64.exe https://cdn.jtel.de/downloads/redist/vcredist_9.0_x86_9.0.30729.4148.exe https://cdn.jtel.de/downloads/redist/vcredist_2010_x86_10.0.30319.exe https://cdn.jtel.de/downloads/redist/vcredist_2012_x64_11.0.61030.exe https://cdn.jtel.de/downloads/redist/vcredist_2012_x86_11.0.61030.exe https://cdn.jtel.de/downloads/redist/vcredist_2015_x64_14.0.24123.exe https://cdn.jtel.de/downloads/redist/vcredist_2015_x86_14.0.24123.exe https://cdn.jtel.de/downloads/redist/vcredist_2017_x64_14.16.27027.exe https://cdn.jtel.de/downloads/redist/vcredist_2017_x86_14.16.27027.exe https://cdn.jtel.de/downloads/redist/ww_icl_redist_ia32_2017.1.143.msi https://cdn.jtel.de/downloads/redist/ww_icl_redist_intel64_2017.1.143.msi https://www.cygwin.com/setup-x86_64.exe https://cdn.jtel.de/downloads/tools/Git-2.16.2-64-bit.exe https://cdn.jtel.de/downloads/tools/TortoiseGit-2.6.0.0-64bit.msi https://cdn.jtel.de/downloads/tools/npp.7.5.6.Installer.exe https://cdn.jtel.de/downloads/tools/mysql-connector-odbc-5.2.7-win32.msi (Englisch) https://www.google.com/chrome/browser/desktop/index.html?system=true&standalone=1&platform=win64&hl=en (Deutsch) https://www.google.com/chrome/browser/desktop/index.html?system=true&standalone=1&platform=win64&hl=de


 Si Chrome est installé et défini comme votre navigateur par défaut, vous pouvez utiliser les commandes suivantes pour lancer automatiquement tous les téléchargements (sauf Chrome)

Translations Ignore


Code Block
start https://cdn.jtel.de/downloads/java/jdk-8u202-windows-x64.exe start https://cdn.jtel.de/downloads/redist/vcredist_9.0_x86_9.0.30729.4148.exe start https://cdn.jtel.de/downloads/redist/vcredist_2010_x86_10.0.30319.exe start https://cdn.jtel.de/downloads/redist/vcredist_2012_x64_11.0.61030.exe start https://cdn.jtel.de/downloads/redist/vcredist_2012_x86_11.0.61030.exe start https://cdn.jtel.de/downloads/redist/vcredist_2015_x64_14.0.24123.exe start https://cdn.jtel.de/downloads/redist/vcredist_2015_x86_14.0.24123.exe start https://cdn.jtel.de/downloads/redist/vcredist_2017_x64_14.16.27027.exe start https://cdn.jtel.de/downloads/redist/vcredist_2017_x86_14.16.27027.exe start https://cdn.jtel.de/downloads/redist/ww_icl_redist_ia32_2017.1.143.msi start https://cdn.jtel.de/downloads/redist/ww_icl_redist_intel64_2017.1.143.msi start https://www.cygwin.com/setup-x86_64.exe start https://cdn.jtel.de/downloads/tools/Git-2.16.2-64-bit.exe start https://cdn.jtel.de/downloads/tools/TortoiseGit-2.6.0.0-64bit.msi start https://cdn.jtel.de/downloads/tools/npp.7.5.6.Installer.exe start https://cdn.jtel.de/downloads/tools/mysql-connector-odbc-5.2.7-win32.msi


Garantir la résolution des noms

Comme il ne faut pas nécessairement s'attendre à ce que tous les noms d'ordinateurs et adresses IP puissent toujours être résolus de manière fiable dans les deux sens par les serveurs DNS du client (souvent, le client ne sait pas comment gérer cela), le fichier hôte de chacune des machines du système jtel doit également être adapté en conséquence afin que toutes les machines du système soient connues. Pour ce faire, le fichier C:\Windows\System32\drivers\etc\hosts doivent être modifiés en tant qu'administrateur. Cela pourrait ressembler à cela :

Translations Ignore


Code Block
titleC:\Windows\System32\drivers\etc\hosts
# Copyright (c) 1993-2009 Microsoft Corp. # # Ceci est un exemple de fichier HOSTS utilisé par Microsoft TCP/IP pour Windows. # # Ce fichier contient les correspondances entre les adresses IP et les noms d'hôtes. Chaque entrée # doit être conservée sur une ligne individuelle. L'adresse IP doit être placée dans la première colonne, suivie du nom d'hôte correspondant. # L'adresse IP et le nom d'hôte doivent être séparés par au moins un # espace. # # En outre, des commentaires (tels que ceux-ci) peuvent être insérés sur des lignes # individuelles ou à la suite du nom de la machine indiqué par un symbole "#". # # Par exemple : # # 102.54.94.97 rhino.acme.com # source serveur # 38.25.63.10 x.acme.com # x client hôte # localhost la résolution du nom est gérée au sein du DNS lui-même. # 127.0.0.1 localhost # ::1 localhost 192.168.1.10 acd-lb acd-lb.example.com 192.168.1.10 acd-store acd-store.example.com 192.168.1.21 acd-dbm acd-dbm.example.com 192.168.1.22 acd-dbs acd-dbs. example.com 192.168.1.22 acd-dbr acd-dbr.example.com 192.168.1.31 acd-jb1 acd-jb1.example.com 192.168.1.32 acd-jb2 acd-jb2.example.com 192.168.1.40 acd-tel1 acd-tel1.example.com