| Sv translation | ||||||||||
|---|---|---|---|---|---|---|---|---|---|---|
| ||||||||||
IntroductionTo run the jtel starface connector and connect to starface via https, a certificate is required. Create Root CertificateTo create the certificate, use a CMD as Administrator. Change to Starface directory and into "Install" and run the command.
Create self-signed CertificateTo then create the self-signed version, run the following command in the same Administrator CMD window
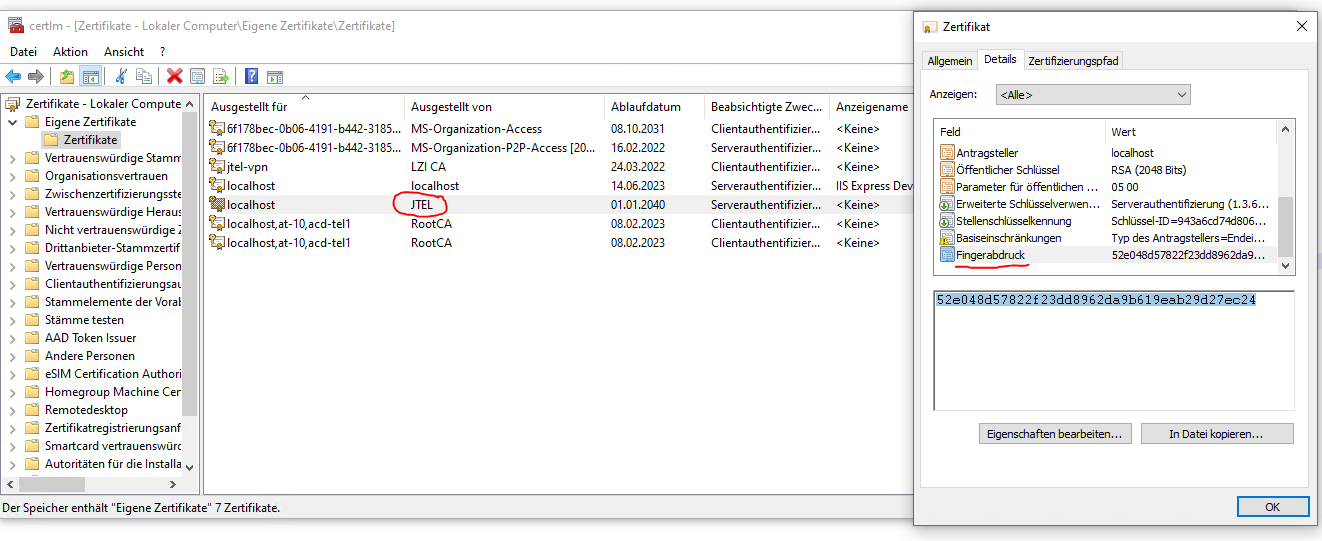
Extract the certificate-hashNavigate through windows to locate your new self-signed certificate and extract the hash value |
1. Run powershell script C:\ServiceV62\install\install.ps1
...
|
...
Open the folder to store the certificate, either the Local Computer or the Current User.
...
Open the Trusted Root Certification Authorities folder.
...
Right-click the Certificates folder and click All Tasks, then click Import.
...
Follow the on-screen wizard instructions to import the RootCA.pfx into the store.
Register the service Certificate for the URLReplace "<hash>" with the hash value in the window and execute the command in an Administrator CMD
Testuse the following URL in any browser to test
|


3. Testing
...
| Sv translation | |||||||||||||
|---|---|---|---|---|---|---|---|---|---|---|---|---|---|
| |||||||||||||
EinführungUm den jtel starface connector auszuführen und sich mit starface über https zu verbinden, wird ein Zertifikat benötigt. Root Zertifikat ErstellenUm das Zertifikat zu erstellen, verwenden Sie eine CMD als Administrator. Wechseln Sie in das Starface-Verzeichnis und führen Sie unter "Installieren" den Befehl aus.
Selbst Signiertes Zertifikat ErstellenUm dann die selbstsignierte Version zu erstellen, führen Sie den folgenden Befehl im gleichen Administrator-CMD-Fenster aus
Zertifikat-Hash ExtrahierenNavigieren Sie durch die Fenster, um Ihr neues selbstsigniertes Zertifikat zu finden, und extrahieren Sie den Hash-Wert
Registrieren Sie das Dienstzertifikat für die URLErsetzen Sie "<hash>" durch den Hash-Wert im Fenster und führen Sie den Befehl in einer Administrator-CMD aus
TestVerwenden Sie zum Testen die folgende URL in einem beliebigen Browser
|
|
| Sv translation | ||
|---|---|---|
| ||