Unterstützte Windows Versionen| Version | Unterstützt | Empfehlung |
|---|
| Windows Server 2008 | Nein |
| | Windows Server 2008 R2 | Ja | Bei Neuinstallationen nicht mehr nutzen.
Update auf neue Version einplanen. | | Windows Server 2012 | Nein |
| | Windows Server 2012 R2 | Ja | Bei Neuinstallationen nicht mehr nutzen.
Update auf neue Version einplanen. | | Windows Server 2016 | Nein |
| | Windows Server 2016 R2 | Ja |
| | Windows Server 2019 | Ja |
|
HinweisFür die Installation der SIP Treiber unter Windows Server 2016 R2 sowie Windows Server 2019 muss das sogenannte Secure Boot deaktiviert werden. Hinweise wie dies geschehen kann finden Sie bei der Dokumentation Ihrer jeweiligen virtuellen Umgebung. Aufheben vom BIOS Lock bei OEM Versionen von Windows ServerManchmal bei der Installation in VMWare mit Nutzung eines Images von einer OEM Version von Windows Server, kann ein Fehler entstehen, ungefähr so: 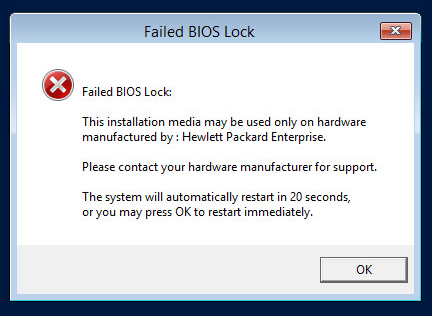 Image Added Image Added
Um dieses zu beheben, folgendes machen: | Translations Ignore |
|---|
| Code Block |
|---|
With VSphere Client installed navigate to the VM and edit settings.
From the "Options" tab navigate to Advanced and click General.
Configure Parameters on the right and add a new row to the parameters called "smbios.ReflectHost" with a value of "true."
Do this with the VM off, if it's on then restart the VM.
Lock is lifted. |
|
Proxy ServerManche Anwendungen (beispielsweise GIT) benötigen die explizite Angabe eines Proxies. Dies kann mit folgenden Befehl ermittelt werden, falls die Einstellungen automatisch sind: | Translations Ignore |
|---|
| Code Block |
|---|
netsh winhttp show proxy |
|
Grundinstallation des Betriebssystems Die Installation von Windows Server erfolgt ohne besondere Vorkehrungen oder Anpassungen von einer Installations-DVD bzw. ISO-Datei. Achtung: die Version MIT Grafische Oberfläche muss installiert werden. Während der Installation wird das System mehrmals neu gestartet. Nach Fertigstellung der Installation verlangt das System in der Regel nach einem Passwort für den lokalen Administrator Benutzer. Ist dies festgelegt, befindet man sich im normalen Desktop. Da die Installationsroutine keine große Einstellungen erlaubt, wurden verschiedene gängige Merkmale bereits automatisch eingestellt: - Rechnername: Es wurde ein Hostname automatisch erzeugt.
- Netzwerkkonfiguration: Der Windows-Installer konfiguriert die gefunden Netzwerkkarten automatisch mit DHCP. Steht ein DHCP Server zur Verfügung, so ist das installierte Windows unter einer dynamisch zugewiesenen Adresse erreichbar. Steht ein solcher nicht zur Verfügung, so muss der Netzwerkadapter so konfiguriert werden, dass er unter einer bekannten Adresse im Netzwerk funktionsfähig ist.
Windows Updates- Bitte solange Windows Updates durchführen, bis wirklich keine Updates mehr gefunden werden.
- Sollte dies vom Projekt-Techniker durchgeführt werden müssen, stellt dies ein Mehraufwand dar!
- Anschließend, sollten automatische Windows Updates ausgeschaltet werden.
- Unter Windows Server 2012 R2 ist die Einstellung über "Windows Updates" verfügbar und kann einfach angeklickt werden.
- Unter Windows Server 2016 ist diese Option weiter versteckt.
Windows + R drücken, und gpedit.msc eingeben.
Dann zu folgenden Zweig navigieren:
Computerkonfiguration ... Administrative Vorlagen ... Windows-Komponenten ... Windows Update. Hier die Option entsprechend ausschalten.
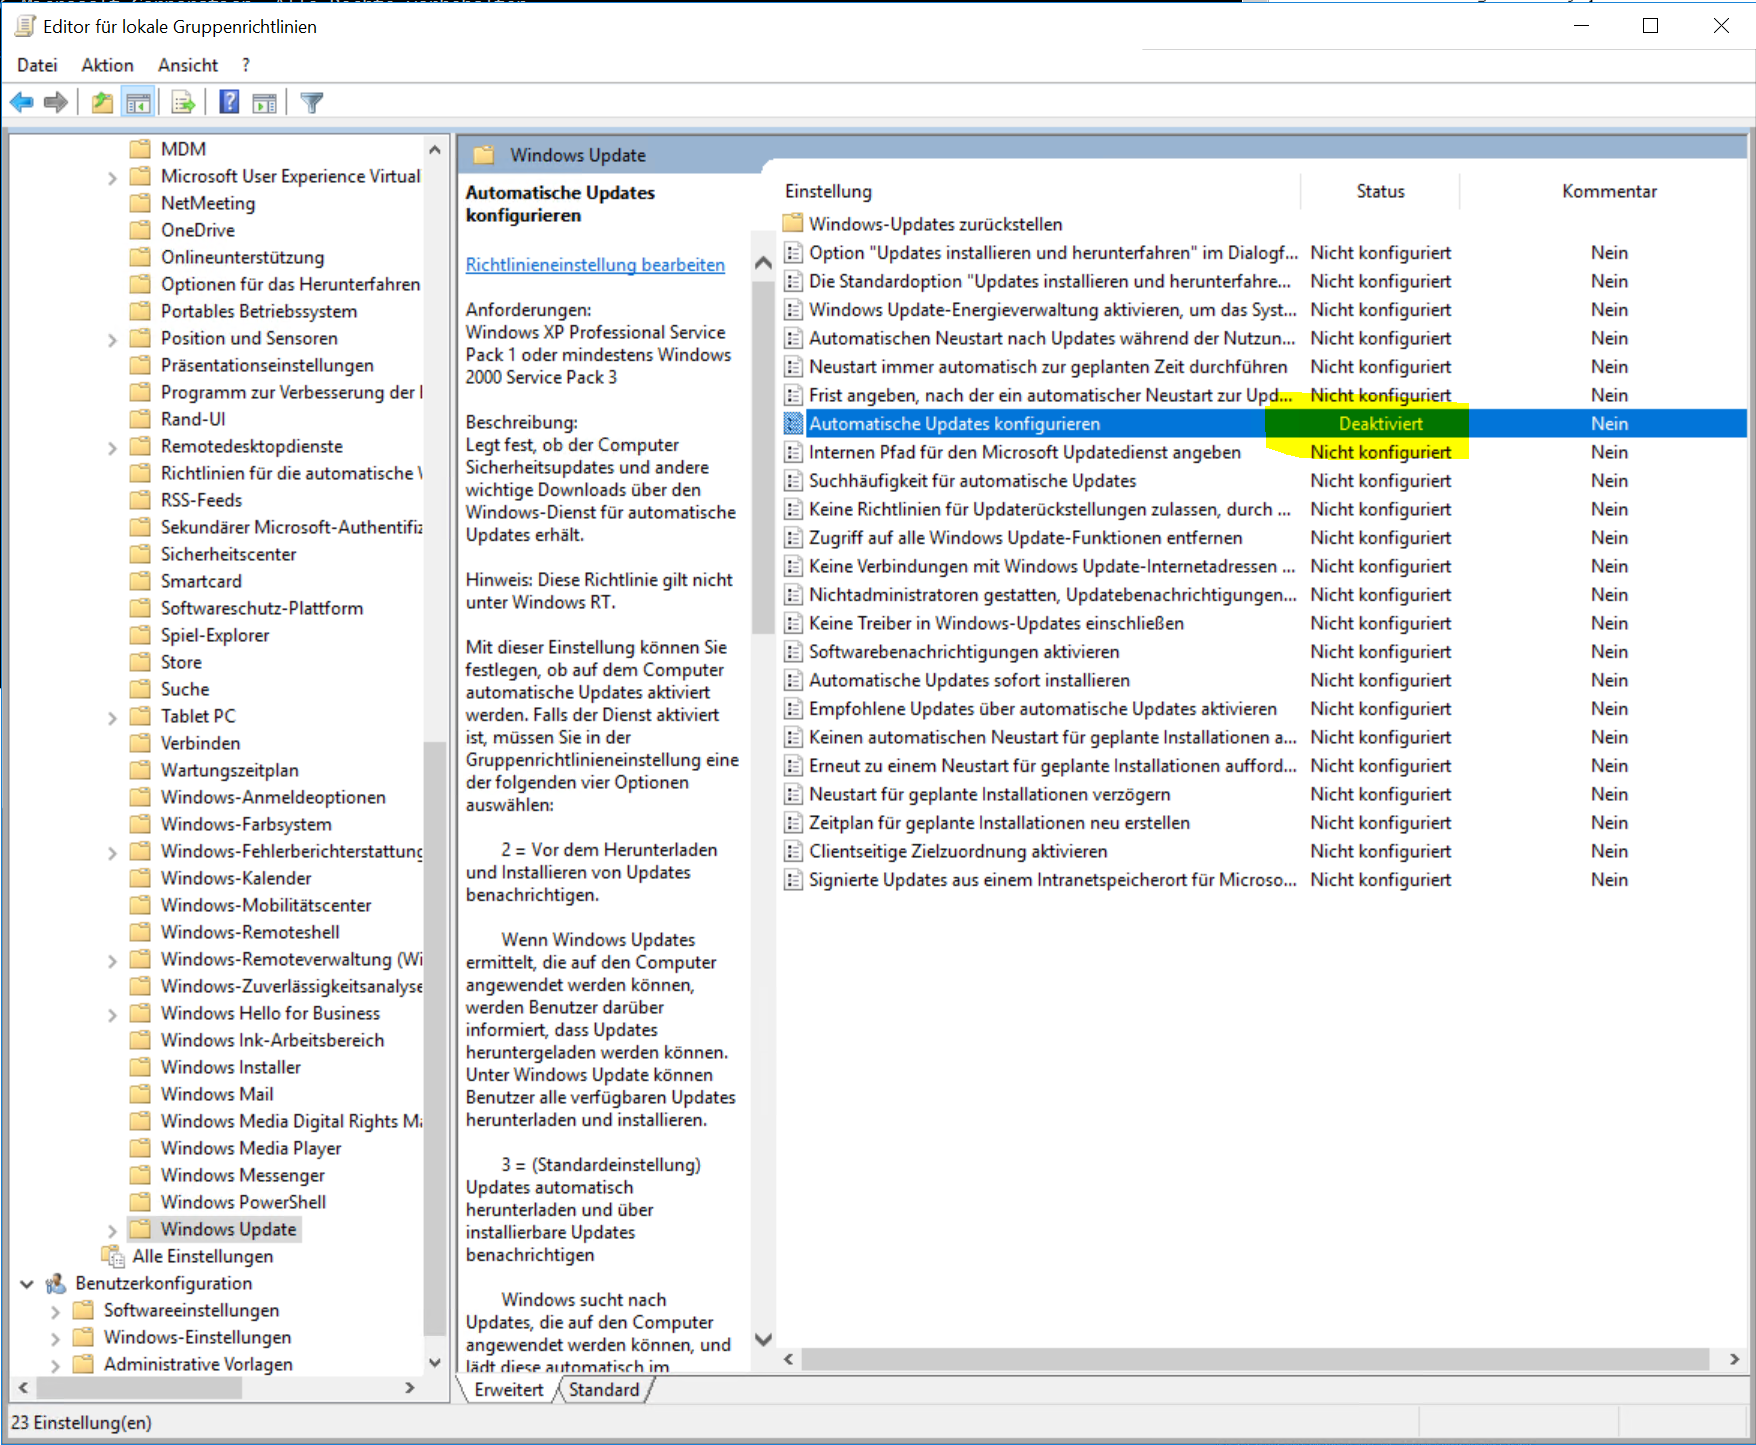 Image Added Image Added
Voraussetzungen für die Übergabe an den Projekt-TechnikerFolgende Einstellungen müssen nun auf der Windows-Maschine getätigt werden: - Hostname des Systems einstellen.
- IP Adresse, Netzmaske, Standardgateway und DNS Server einstellen. Adresse muss statisch sein oder eine Reservierung im DHCP muss vorliegen.
- Falls vom Kunden gewollt, Rechner der Domäne hinzufügen (erfordert einen entsprechend berechtigten Domänen-Account und einen Neustart). Muss gegebenenfalls in Zusammenarbeit mit dem Kundenadministrator erfolgen.
- Remote Desktop aktivieren. Dies kann über den Server Manager erledigt werden:
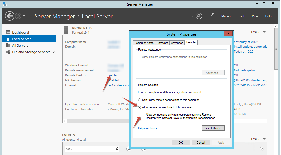 Image Added Image Added - Lokalen JTEL-Benutzer erzeugen und in die lokale Administrator-Gruppe aufnehmen. Dies kann über die Computer-Verwaltung erledigt werden:
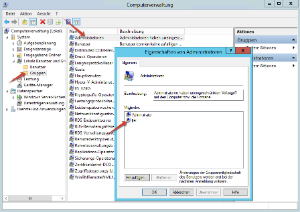 Image Added Image Added
ACHTUNG: Sollte der Kunde darauf bestehen, dass die jtel-Programme unter einem Domänen Account ausgeführt werden weil z.B. die Unternehmens- bzw. Domänen-Richtlinien keine lokale Windows-Benutzer zulassen, so muss dieser Account Administrator-Rechte auf diesem spezifischen Server erhalten. Dieser muss also in der lokalen Administrator Gruppe aufgenommen werden. Innerhalb der Domäne braucht dieser Account keine weiteren Rechte. - Bei virtuellen Maschinen: Installation der Guest Tools (z.B.: VMware Tools, Hyper-V Integration Services, etc.)
- Alle Windows Updates installieren
TestsNach einem Neustart sollte nun folgendes geprüft werden: - Das System ist über RDP erreichbar.
- Es ist für den Projekt-Techniker möglich, sich über einen Remote Desktop Client als jtel-Benutzer an das System anzumelden.
- Der Projekt-Techniker kann in einer solchen Sitzung einen Prozess als Administrator starten.
Installiert der Kunde die Betriebssysteme, so ist dies üblicherweise der Übergabepunkt an den Projekt-Techniker. Anpassung des BetriebssystemsFolgende weitere Anpassungen erfolgen nun auf der Windows Maschine durch den Projekt-Techniker: - Java
- https://cdn.jtel.de/downloads/java/jdk-8u202-windows-x64.exe
- Compiler-Bibliotheken
- https://cdn.jtel.de/downloads/redist/vcredist_9.0_x86_9.0.30729.4148.exe
- https://cdn.jtel.de/downloads/redist/vcredist_2010_x86_10.0.30319.exe
- https://cdn.jtel.de/downloads/redist/vcredist_2012_x64_11.0.61030.exe
- https://cdn.jtel.de/downloads/redist/vcredist_2012_x86_11.0.61030.exe
- https://cdn.jtel.de/downloads/redist/vcredist_2015_x64_14.0.24123.exe
- https://cdn.jtel.de/downloads/redist/vcredist_2015_x86_14.0.24123.exe
- https://cdn.jtel.de/downloads/redist/vcredist_2017_x64_14.16.27027.exe
- https://cdn.jtel.de/downloads/redist/vcredist_2017_x86_14.16.27027.exe
- https://cdn.jtel.de/downloads/redist/ww_icl_redist_ia32_2017.1.143.msi
- https://cdn.jtel.de/downloads/redist/ww_icl_redist_intel64_2017.1.143.msi
- Cygwin Umgebung. Die Installation erfolgt in mehreren Schritten:
- https://www.cygwin.com/setup-x86_64.exe
- "Install from Internet"
- Zielverzeichnis: C:\Cygwin
- Package directory:
C:\Cygwin\packages - Select Packages:
openssh (Bereich "Net")
ncftp (Bereich "Net")
curl (Bereich "Net")
wget (Bereich "Web")
- Git Pre-Requisites:
- https://cdn.jtel.de/downloads/tools/Git-2.16.2-64-bit.exe
WICHTIG: Git Credential Manager NICHT installieren
- GIT Client:
- https://cdn.jtel.de/downloads/tools/TortoiseGit-2.6.0.0-64bit.msi
Name: jtel Support
E-Mail: support@jtel.de
- Text-Editor Notepad++
https://cdn.jtel.de/downloads/tools/npp.7.5.6.Installer.exe
- MySQL ODBC Connector:
HINWEIS: Wegen Speicher-Probleme in den neueren MySQL Treibern wird empfohlen, mit der Version 5.2.7 zu arbeiten. Auch in den neuesten 8.x ODBC Treibern treten Speicherprobleme auf, wenn Verbindungen zu der Datenbank abbrechen.
- https://cdn.jtel.de/downloads/tools/mysql-connector-odbc-5.2.7-win32.msi
- Google Chrome:
- (Englisch) https://www.google.com/chrome/browser/desktop/index.html?system=true&standalone=1&platform=win64&hl=en
- (Deutsch) https://www.google.com/chrome/browser/desktop/index.html?system=true&standalone=1&platform=win64&hl=de
- Windows Explorer Einstellungen:
- Explorer starten (Win+E)
- "Ansicht" bzw. "View" ... "Optionen" bzw. "Options"
- "Alle Ordner anzeigen" bzw. "Show all folders" aktivieren
- "Dateinamenerweiterungen" bzw. "File name extensions" aktivieren
- CMD Einstellungen:
- "Defaults" bzw. "Defaults" wählen
- "Quick-Edit Modus" deaktivieren. Dies muss sein, damit Dienste die als cmd laufen nicht durch ein Mausklick unterbrochen werden.
- "Layout" die beiden Werte "Breite" auf 125 einstellen.
- "Layout" den Wert "Höhe" im Bereich "Fenstergröße" auf 50 einstellen
Alle Downloads| Translations Ignore |
|---|
| Code Block |
|---|
| https://cdn.jtel.de/downloads/java/jdk-8u202-windows-x64.exe
https://cdn.jtel.de/downloads/redist/vcredist_9.0_x86_9.0.30729.4148.exe
https://cdn.jtel.de/downloads/redist/vcredist_2010_x86_10.0.30319.exe
https://cdn.jtel.de/downloads/redist/vcredist_2012_x64_11.0.61030.exe
https://cdn.jtel.de/downloads/redist/vcredist_2012_x86_11.0.61030.exe
https://cdn.jtel.de/downloads/redist/vcredist_2015_x64_14.0.24123.exe
https://cdn.jtel.de/downloads/redist/vcredist_2015_x86_14.0.24123.exe
https://cdn.jtel.de/downloads/redist/vcredist_2017_x64_14.16.27027.exe
https://cdn.jtel.de/downloads/redist/vcredist_2017_x86_14.16.27027.exe
https://cdn.jtel.de/downloads/redist/ww_icl_redist_ia32_2017.1.143.msi
https://cdn.jtel.de/downloads/redist/ww_icl_redist_intel64_2017.1.143.msi
https://www.cygwin.com/setup-x86_64.exe
https://cdn.jtel.de/downloads/tools/Git-2.16.2-64-bit.exe
https://cdn.jtel.de/downloads/tools/TortoiseGit-2.6.0.0-64bit.msi
https://cdn.jtel.de/downloads/tools/npp.7.5.6.Installer.exe
https://cdn.jtel.de/downloads/tools/mysql-connector-odbc-5.2.7-win32.msi
(Englisch)
https://www.google.com/chrome/browser/desktop/index.html?system=true&standalone=1&platform=win64&hl=en
(Deutsch)
https://www.google.com/chrome/browser/desktop/index.html?system=true&standalone=1&platform=win64&hl=de |
|
Wenn Chrome installiert und als Standardbrowser eingerichtet ist, können Sie folgende Befehle nutzen um alle Downloads (bis auf Chrome) automatisch zu starten: | Translations Ignore |
|---|
| Code Block |
|---|
start https://cdn.jtel.de/downloads/java/jdk-8u202-windows-x64.exe
start https://cdn.jtel.de/downloads/redist/vcredist_9.0_x86_9.0.30729.4148.exe
start https://cdn.jtel.de/downloads/redist/vcredist_2010_x86_10.0.30319.exe
start https://cdn.jtel.de/downloads/redist/vcredist_2012_x64_11.0.61030.exe
start https://cdn.jtel.de/downloads/redist/vcredist_2012_x86_11.0.61030.exe
start https://cdn.jtel.de/downloads/redist/vcredist_2015_x64_14.0.24123.exe
start https://cdn.jtel.de/downloads/redist/vcredist_2015_x86_14.0.24123.exe
start https://cdn.jtel.de/downloads/redist/vcredist_2017_x64_14.16.27027.exe
start https://cdn.jtel.de/downloads/redist/vcredist_2017_x86_14.16.27027.exe
start https://cdn.jtel.de/downloads/redist/ww_icl_redist_ia32_2017.1.143.msi
start https://cdn.jtel.de/downloads/redist/ww_icl_redist_intel64_2017.1.143.msi
start https://www.cygwin.com/setup-x86_64.exe
start https://cdn.jtel.de/downloads/tools/Git-2.16.2-64-bit.exe
start https://cdn.jtel.de/downloads/tools/TortoiseGit-2.6.0.0-64bit.msi
start https://cdn.jtel.de/downloads/tools/npp.7.5.6.Installer.exe
start https://cdn.jtel.de/downloads/tools/mysql-connector-odbc-5.2.7-win32.msi |
|
Sicherstellen der NamensauflösungDa nicht unbedingt damit zu rechnen ist, dass alle Rechnernamen und IP Adressen zuverlässig durch die DNS Server des Kunden immer in beiden Richtungen aufgelöst werden können (oft hat der Kunde keine Ahnung, wie er das verwalten soll), sollte auf jede der Maschinen des jtel-Systems auch die Hostdatei entsprechend angepasst sein, dass alle Maschinen des Systems dadurch bekannt sind. Dafür muss die Datei C:\Windows\System32\drivers\etc\hosts als Administrator editiert werden. Das könnte dann so aussehen: | Translations Ignore |
|---|
| Code Block |
|---|
| title | C:\Windows\System32\drivers\etc\hosts |
|---|
| # Copyright (c) 1993-2009 Microsoft Corp.
#
# This is a sample HOSTS file used by Microsoft TCP/IP for Windows.
#
# This file contains the mappings of IP addresses to host names. Each
# entry should be kept on an individual line. The IP address should
# be placed in the first column followed by the corresponding host name.
# The IP address and the host name should be separated by at least one
# space.
#
# Additionally, comments (such as these) may be inserted on individual
# lines or following the machine name denoted by a '#' symbol.
#
# For example:
#
# 102.54.94.97 rhino.acme.com # source server
# 38.25.63.10 x.acme.com # x client host
# localhost name resolution is handled within DNS itself.
# 127.0.0.1 localhost
# ::1 localhost
192.168.1.10 acd-lb acd-lb.example.com
192.168.1.10 acd-store acd-store.example.com
192.168.1.21 acd-dbm acd-dbm.example.com
192.168.1.22 acd-dbs acd-dbs.example.com
192.168.1.22 acd-dbr acd-dbr.example.com
192.168.1.31 acd-jb1 acd-jb1.example.com
192.168.1.32 acd-jb2 acd-jb2.example.com
192.168.1.40 acd-tel1 acd-tel1.example.com |
|
|