| Sv translation | |||||
|---|---|---|---|---|---|
| |||||
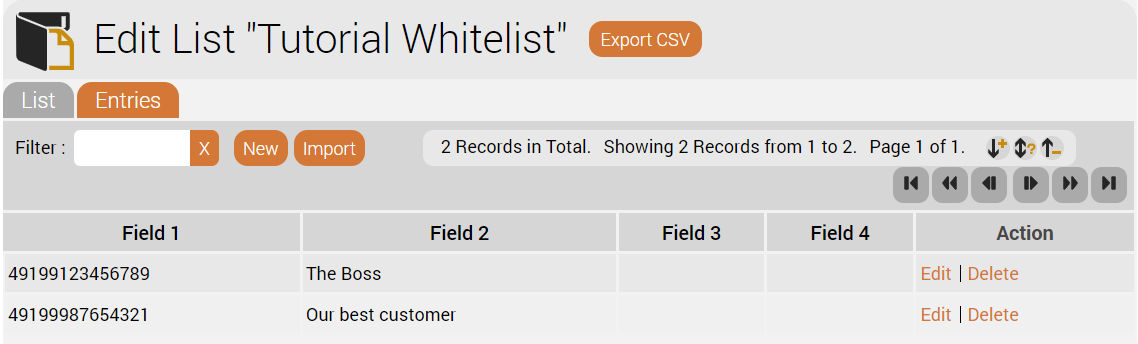
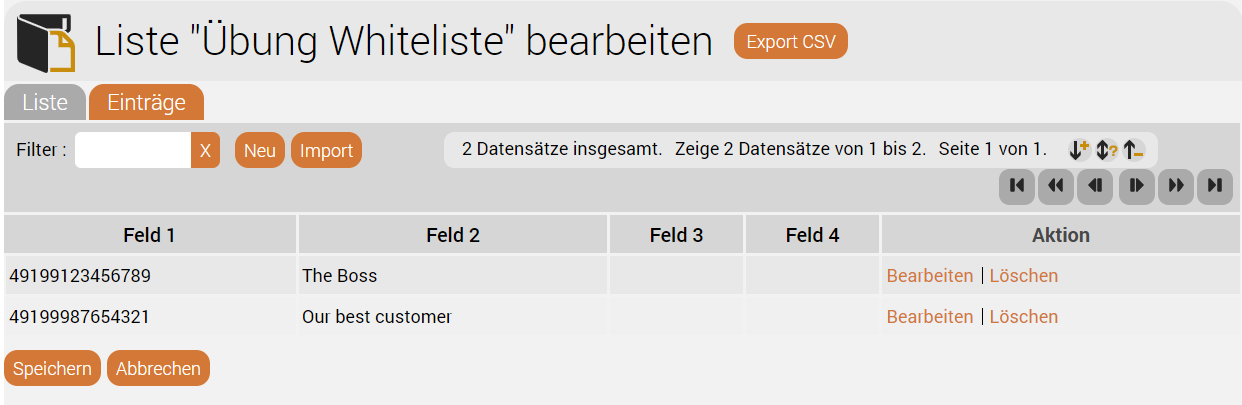
IntroductionThis example shows you how to create a whitelist which allows some callers to be routed to an ACD group always, but other callers can be handled differently depending on other criteria such as opening times. It makes use of the Start 2 entry point to the ACD group to bypass rules attached to the Start entry point for normal callers. Never used that trick before? Then read on ... WhitelistFirst of all create a list using System Settings ... Lists. The first column in the list will be the caller ID, the second column is the name of the entry - for informational purposes only. RoutingThe goal is to:
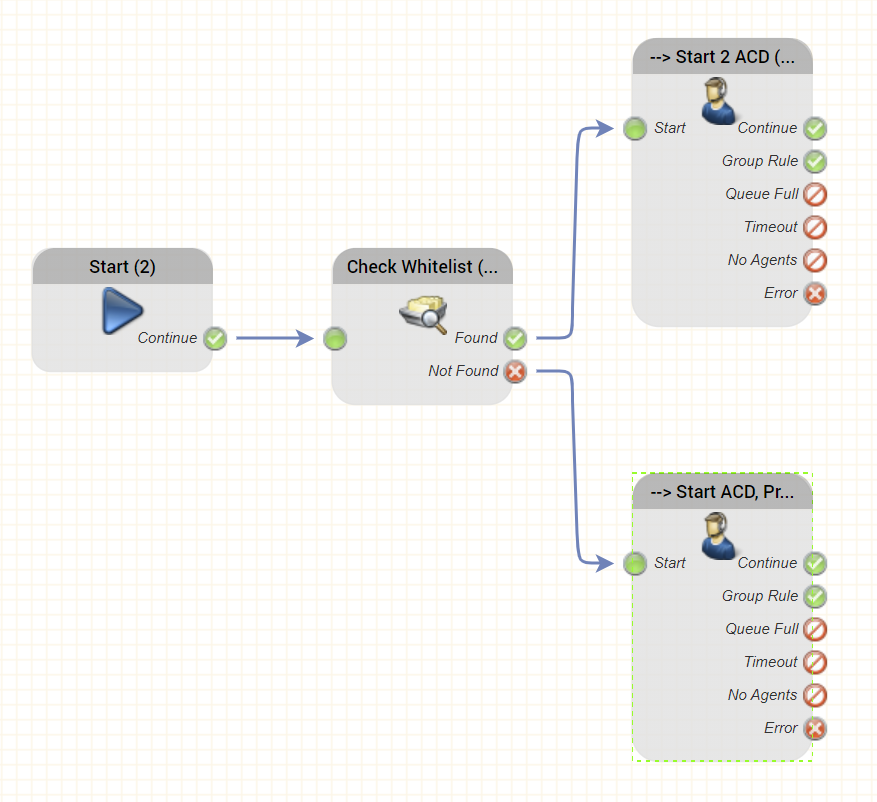
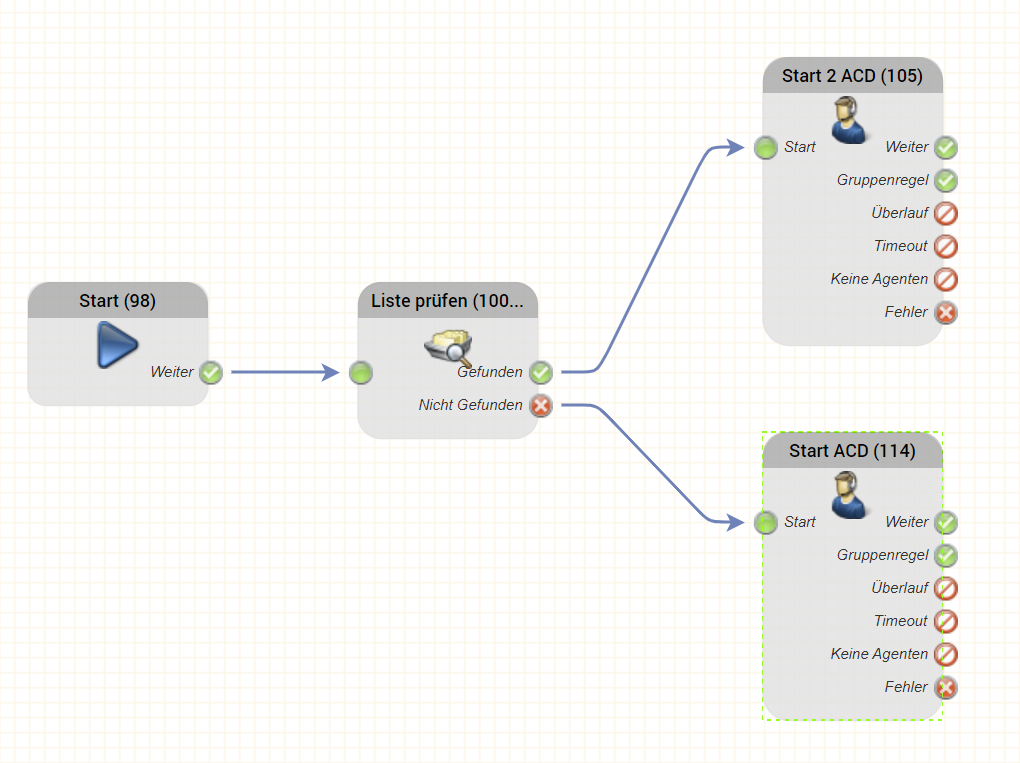
The routing is configured as follows:
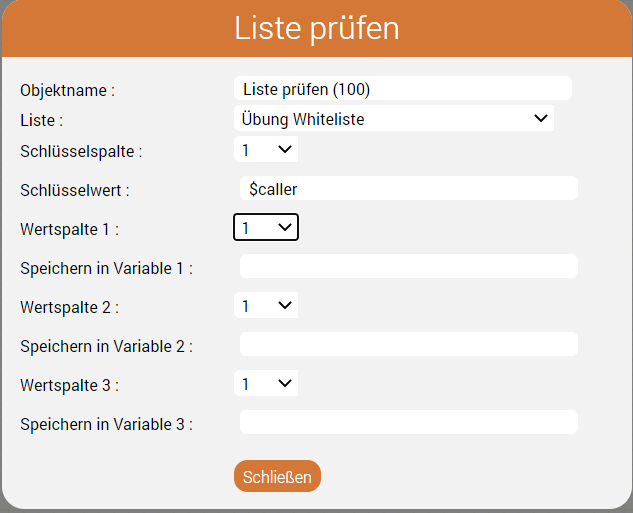
Each of the objects is parameterised as follows: Check Whitelist
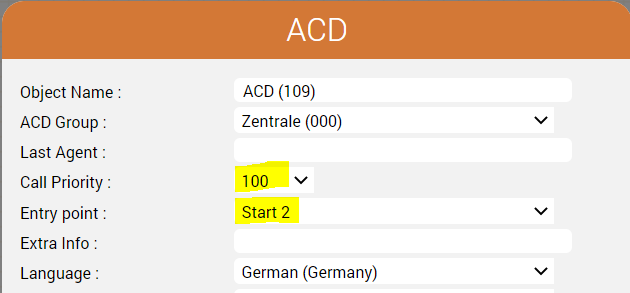
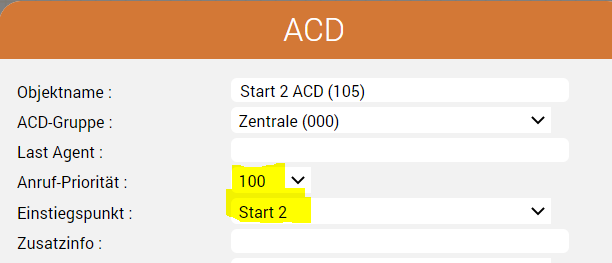
This will check the whitelist by searching for the caller ($caller) in the first column of the list. We don't need to save any variables here - it's enough to know whether the entry was found in the whitelist or not. Start 2 ACDThis is the VIP entry to the ACD. This we parameterise with a higher priority, and enter at Start 2. This is important as we will see further below.
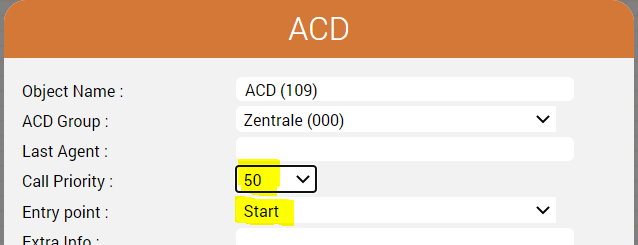
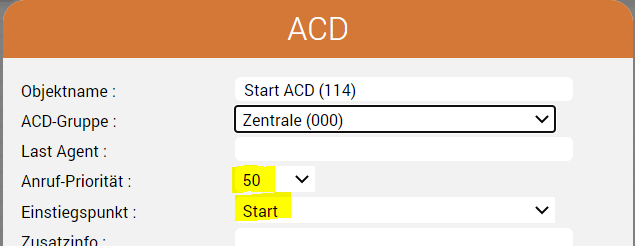
Start ACDThis entry to the ACD is given a call priority 50 (lower), and entry point Start:
ACD Configuration
Conclusion and Uses
|

| Sv translation | |||||
|---|---|---|---|---|---|
| |||||
EinführungDieses Beispiel zeigt Ihnen, wie Sie eine Whitelist erstellen können, die es ermöglicht, dass ausgewählte Anrufer immer an eine ACD-Gruppe weitergeleitet werden, während alle anderen Anrufer je nach Kriterien wie z.B. Öffnungszeiten anders behandelt werden. Es wird der Einstiegspunkt Start 2 zur ACD-Gruppe genutzt, um Regeln zu umgehen, die an dem Einstiegspunkt Start für normale Anrufer angehängt sind. Haben Sie diesen Trick noch nie benutzt? Dann lesen Sie hier die Anleitung ... WhitelistErstellen Sie zunächst eine Liste mit Systemeinstellungen ... Listen. Die erste Spalte in der Liste wird die Anrufer-ID sein, die zweite Spalte ist der Name des Eintrags - nur zu Informationszwecken.
RoutingDas Ziel ist:
Das Routing wird wie folgt konfiguriert:
Jedes der Objekte ist wie folgt parametrisiert: Liste prüfen
Die Whitelist wird überprüft, indem in der ersten Spalte der Liste nach dem Anrufer ($caller) gesucht wird. Wir brauchen hier keine Variablen zu speichern - es genügt zu wissen, ob der Eintrag in der Whiteliste gefunden wurde oder nicht. Start 2 ACDDies ist der VIP-Eingang zur ACD. Diesen parametrisieren wir mit einer höheren Priorität und betreten die ACD bei Start 2. Dies ist wichtig, wie wir weiter unten sehen werden.
Start ACDDieser Eingang zur ACD erhält die Aufrufpriorität 50 (niedriger) und den Einstiegspunkt Start:
ACD Konfiguration
Schlussfolgerung und Anwendungsfälle
|
| Sv translation | |||||
|---|---|---|---|---|---|
| |||||
IntroductionCet exemple vous montre comment créer une liste blanche qui permet à certains appelants d'être toujours routés vers un groupe ACD, mais d'autres appelants peuvent être traités différemment en fonction d'autres critères tels que les heures d'ouverture. Il utilise le point d'entrée Début 2 du groupe ACD pour contourner les règles attachées au point d'entrée Début pour les appelants normaux. Vous n'avez jamais utilisé cette astuce auparavant ? Alors, lisez la suite ... Liste blancheTout d'abord, créer une liste en utilisant System settings - Lists. La première colonne de la liste sera l'identification de l'appelant, la deuxième colonne est le nom de l'entrée - à titre d'information uniquement. RoutageL'objectif est de :
Le routage est configuré comme suit :
Chacun des objets est paramétré comme suit : Consulter la liste blanche
La liste blanche sera vérifiée en recherchant l'appelant ($caller) dans la première colonne de la liste. Nous n'avons pas besoin de sauvegarder de variables ici - il suffit de savoir si l'entrée a été trouvée dans la liste blanche ou non. Début 2 ACDC'est l'entrée VIP de l'ACD. Nous paramétrons cela avec une priorité plus élevée, et entrons à Début 2. C'est important, comme nous le verrons plus loin.
Début ACDCette entrée de l'ACD se voit attribuer une priorité d'appel 50 (inférieure), et le point d'entrée Début :
Configuration ACD
Conclusion et utilisations
|